Category: Crafts

Furls CAL – Sun Hat

WooHoo! The sun hat crochet along finally reached the pattern stage! I used the same cream coloured yarn for the main hat, but have a slightly iridescent light green yarn for the accent. I’m thinking about making Anya’s hat in reverse – using the green for the main yarn with cream as an accent. Partially because I don’t like having the exact same thing and partially because inverting the colours uses the yarn more efficiently (otherwise I am going to have a heap of the accent colour left over!)

Round four completed:

I have trouble keeping track of the start and end of rounds — not a problem unique to this pattern, Anya’s star blanket was just as tricky for me. Easy enough to re-count the stitches on early rounds — and frogging a few stitches isn’t such a big deal. As the project progresses to the point where a round comprises 40 or 50 stitches, adding or missing a stitch is a pain to correct. I’ve tried using those little round stitch markers, and honestly I just don’t get it. If they had splits in the rings and could easily slip back off of the project … that would make sense to me.

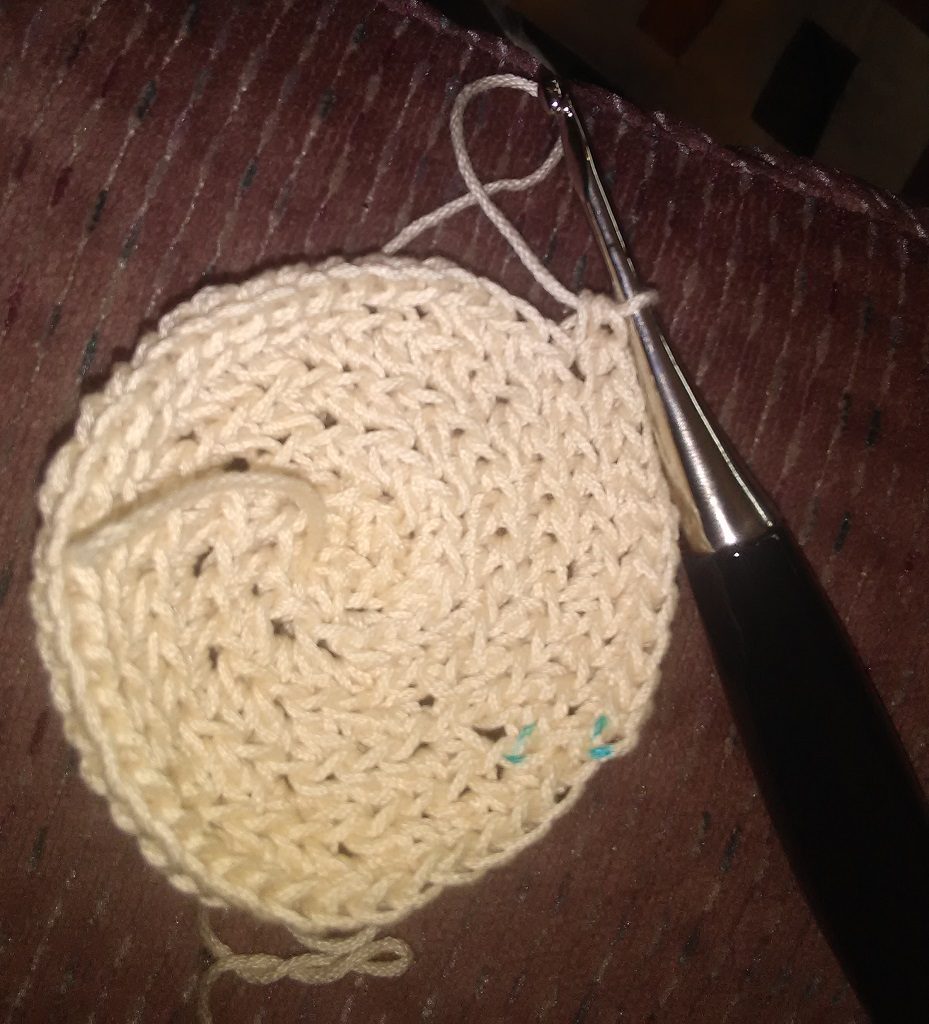
I’ve come up with an easy method to keep track of rounds — a water soluble marker I use for marking dress patterns. Test it on your yarn to make sure it comes off completely (and mark in an inconspicuous spot just in case). Which stitch it makes sense to highlight will vary by pattern. Here, the chain stitch which starts each round does not count as the first stitch. I chose to mark this ‘skipped’ stitch. The round should end immediately before the marked stitch, and the first hdc from the round into which the last hdc is slip stitched is immediately after it. Chain one and mark again. See the little blue marks on the “inside” of the hat? Those are my ch stitches. Voila, two rounds without frogging anything 🙂

Bar Codes

I realized, recently, that my experience in manufacturing inventory management systems is actually useful for smaller craft businesses. Someone inquired about using bar codes in their soap making business. The first question is why are you using bar codes. For personal use (like inventory management) or codes used by outside parties? Or both — you can have both internal maintained inventory management bar codes and a UPC maintained code for finished products.

If you are trying to sell products in a store that uses laser scanners for checkout, then you need to use a system with managed number assignment. Otherwise two companies could randomly assign the same code to a product — you ring up a bar of soap and get charged for a hundred dollar handbag. What that system *is* depends on where the product would be sold (and, to some extent, what the product *is* — books use an ISBN system). UPC in the US (https://www.gs1us.org), EAN in the EU (https://www.gs1uk.org). The price to use these codes depends on how many unique products you have (https://www.gs1us.org/upcs-barcodes-prefixes/get-started-guide/1-get-a-gs1-us-issued-company-prefix). Up to 10 codes for a 250$ initial fee plus 50$ annual renewal. Up to 100 codes is a 750$ initial fee plus 150$ annual renewal. Up to 1,000 codes is 2,500$ initial fee plus 500$ annual renewal. The price tiers are economical for companies that do not have variants of a single product (different sizes, different colours) because multiple codes are not used for essentially the same product.

I’ve only worked with companies that manufacture single variations of a product. In small craft manufacturing, the number of codes you need can get out of control. Using registered bar codes creates a financial incentive for streamlining product offerings — you could package your bath bombs individually, in two packs, three packs, four packs … ten packs *but* that uses nine different UPC codes! Add a pot of lip balm, a tube of lip balm, a guest bar of soap, and a full size bar of soap and the the renewal fee triples. Some small vendors will accept a single code for same-price items (“4 oz soap bar” or “bath bombs, four pack”), but larger vendors require a unique code for each unique iteration of the product because they manage their inventory through UPC codes. You need to understand who will be using the codes and what their requirements are before you can determine how many codes you need to purchase.

Does purchasing a single UPC through a reseller make sense? Again, the individual retailer requirements need to be checked — some companies require the company prefix be registered to the manufacturer (i.e. you cannot use a reseller to purchase a single UPC code). Assuming your intended customer allows resold codes, the cost effectiveness depends on how many products and for how long you want to maintain your codes. The reseller structure is good for someone test-marketing in a retail store – if the market test does not pan out, you are out ten bucks (current price from a quick Google search). Even long term, a single UPC reseller is cost effective for up to five products. If you have nine products, you save money registering with GS1 in the third year. Seven products breaks even after five years. Six products breaks even after ten years. But verify the services offered by the reseller — how do you update your product registration?

Printing the bar codes is fairly trivial — there are UPC and EAN fonts available. Some are free, some cost money. You type the proper characters (I prefer fonts where ‘9’ on my keyboard is the 9 bar code. A lot of free fonts are mapped oddly – like you need to type ‘c’ to get a 9) and change the font. I also prefer fonts with human-readable characters under the bar code. Firstly this confirms I’ve typed the proper thing, but it also allows for manual code entry in case the bar code gets obscured. You can print the code on your product wrapping, or include the code in your packaging design and outsource package production.

Could you use the UPC/EAN codes for inventory management? Sure — raw materials you purchase may already have a unique code assigned. Scan the bar code, enter the quantity … voila. But if you are purchasing raw materials that are not already coded … there’s no reason to spend money on a prefix that allows you to code all of your inventory! UPC prefix assignments are a little bit like network blocks — there are different “size” blocks that allow different numbers of products to be registered. A prefix block that allows up to 10 products costs a lot less than a prefix block that allows ten thousand products. If you grow a bunch of different botanicals in your garden, allocating a registered code to each item could get quite costly.

As an inventory management system (the majority of my barcode experience), you can use whatever format bar code and whatever numbering system you like. The number doesn’t need to mean anything to anyone else – and it does not need to be globaly unique – so the entire process is a lot easier. If the manufacturing company next door uses your code for resistance wire for their quart bottles … who cares. As long as you have a database that indicates that item 72 is magnesium oxide powder, people scanning inventory against your database will see magnesium oxide powder.

For printing bar codes, there are fonts available for free online. I’ve used code 39 in the inventory systems I’ve built out – to print the code, just type the numbers and change the font. We used sheets of sticky labels & printed the barcodes onto them – then stuck the label on the raw material bins. Work orders printed out on a form and had a sticky label for the product(s) being built. Scanning the product bar code brought up a list of materials that needed to be used and pull up the engineering draft for the product. Employees scanned raw materials out of inventory as they pulled parts, built the item, then affixed the label from the work order to finished product to scan the completed item into inventory. All of the number assignments were internal – generally using whatever manufacturing software the company already maintained, but I’ve done it in custom code with a PHP front end and MySQL backend too. You need a form for adding to inventory and a form for removing from inventory. Scan the bar code to input the item number, enter the amount being used, submit. You could even maintain your purchase orders and recipes as a batch of inputs — receive an order and check everything contained there-in into inventory. Select a specific recipe and check set amounts of ingredients out of inventory.

I generally also create a reconciliation form — similar to how stores will go through and do manual inventory counts to true-up their database inventory with reality, a reconciliation form allows you to update the inventory database with the actual amount on hand. Personally, I store deltas from true-up operations too — if we should have fifty ounces of shea butter but only have forty seven because of over-measuring or small bits left on scoops, we want to know that there was a loss of three ounces. Once you know your inventory deltas, then you can include that loss into the cost of goods produced.

Why would you want to put so much effort into tracking your inventory? I see a lot of people asking how someone calculates costs for finished products. Calculating cost is fairly easy if you track your inventory in and out (costs not associated with inventory [your time, electricity, space, taxes] still need to be accommodated). In the inventory database, you have an item number, a quantity, and a price per unit value. As inventory is checked in, the price per unit is adjusted to include the incoming items. A recipe — specific amounts of different items — can be represented as a cost. You can also track material cost over time (trend the price of an ingredient, see if there’s a better time to buy it) or compare costs for product reformulation – takes additional database space and a little extra coding, but it is good information to manage costs.

How to reflect shipping costs on incoming inventory is a personal decision. The easiest way is to divide the cost equally over the items – this works well for flat-rate shipped orders. You could also divide the shipping cost over the weight of the shipment — 10 dollars in shipping over forty pounds of materials is twenty-five cents per pound. Then a three pound item cost seventy-five cents in shipping. A ten pound item is 2.50$ to ship.

The question was specifically asked regarding soap making, but the methodology is valid for basically any industry or home business. Most of my experience was garnered in an electric heater element manufacturer. The approach is viable for recipe-based manufacturing (knitting, crocheting, sewing, soap making) and even non-recipe based manufacturing … you’d just need to pull materials from inventory as you use them.
Furls Crochet Along

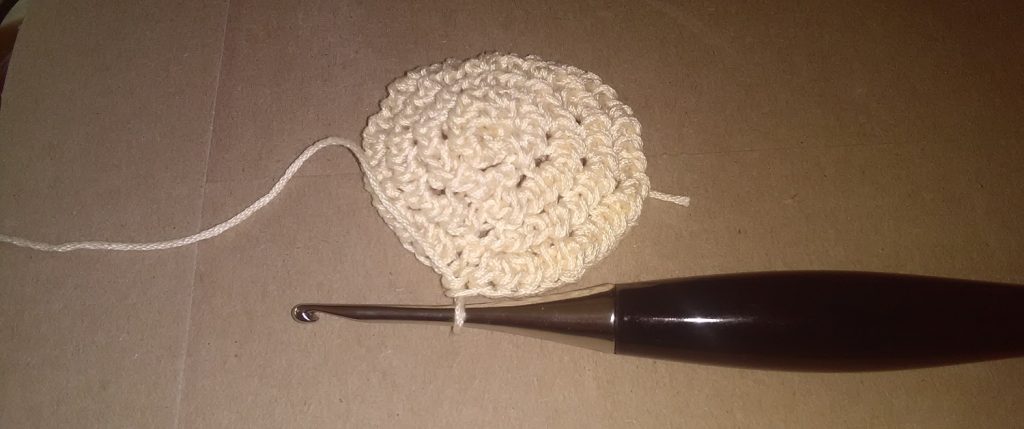
Furls makes some beautiful crochet hooks — I picked some up a few years ago in a holiday promo coding failure (free shipping != 50$ off the order) and have been on their newsletter ever since. They’ve got a lot of cool project ideas – a lot of amigurumi critters and crochet along projects. I keep most of them, but nothing has been so awesome that I just had to do it. Until today.

This month’s crochet along project is a sun hat! I am really looking forward to making my own hat. I ordered the materials already – hopefully they’ll get here within a week so I can actually crochet along with the project.

Peppermint Swirl Dress

I came across a new pattern this weekend – the Peppermint Swirl Dress from Candy Castle Patterns – that I absolutely love. I can think of a lot of combinations that are holiday specific — red, white, and blue Independence Day dress, or a red and green Christmas dress. But didn’t want a wear-once dress.

It would also be great for a single color with gradients — take eight shades and arrange them 1 – 2 – 3 – 4 – 5 – 6 – 7 – 8 – 7 – 6 – 5 – 4 – 3 – 2 (loop back to #1 at the beginning). *But* this dress takes a lot of fabric. Like five yards for a 5 year old kid. At ten dollars a yard, it’s a fairly expensive dress using two or three fabrics. Even if I could get half yards for the skirt segments and use Kona cotton solids at 6$ a yard … that’s around 50$ for the skirt. Which, unfortunately, makes it a special occasion type of outfit.

Maybe as I get more fabric scraps, it would be a neat use-the-scraps project. But, for now, I wanted to get two colours that could be worn pretty much whenever. And I’d rather not spend 10$ a yard 🙂 So I began searching for closeout fabrics. There are a TON of cool closeouts in the 4$-5$ a yard range, but finding two that coordinated well … not so much. I thought about getting a print and then picking up a coordinating Kona locally. But then I came across a sale on marbled fabrics. I should have a blue and cream marbles in a week or so. I plan to use the blue as the dress top, make some piping with the cream fabric to go along the neckline, and use the cream fabric for the sash.

Book “Guitars”

I’ve been trying to play some more teaching games with Anya. Today’s activity was building our own guitar-like instrument. A small box with a hole cut in it would work well, but we used a couple of her board books. Stretch a few rubber bands around the book (I’m a little uptight, so I put them in a specific tonal order … hers are a haphazard arrangement), then insert something under the bands along the book to raise the bands up a little bit from the book. A wooden block, a marker, and a glowstick all worked well. If you put the object toward the center of the rubber bands, then you get two different notes per band.

Blindly Following Instructions

I purchased a table runner kit after the holidays. I’ve never done paper piecing, but I like the Mariner’s Compass patterns. It’s a technique I wanted to learn; and I wanted a clean, modern table runner for our dining room. I didn’t see a whole lot of modern-looking quilted table runners.

I’ve watched a couple of online videos showing the paper piecing process, and thought I was ready to give it a try. Traced the A variant of the block four times, cut all of the fabric pieces, and got ready to sew. I was halfway done the first block when I realized that the instructions have a point made of a blue piece and a yellow piece. Not a darker and lighter blue or a darker and lighter yellow. Checked the B variant of the block – same thing.

Well, that’s not right! I can see the intended result and it’s clearly got points that have a shadow effect created by using a darker and lighter shade of the same color. And if you combine two of the block units, you’ll have nothing but yellow/blue points.

I ended up re-writing the fabric to be used – and realized that there isn’t actually a B variant of the block anywhere in the thing. It is 8 identical blocks. A dark blue, light yellow/dark yellow, then a light blue. That light blue connects to the dark blue on the next block.

One of the challenges of working on something new … I don’t know enough about what I’m doing to question the instructions. Until it becomes obvious (and I have to cut new pieces to re-do an entire block!)

Overlaying Fabrics

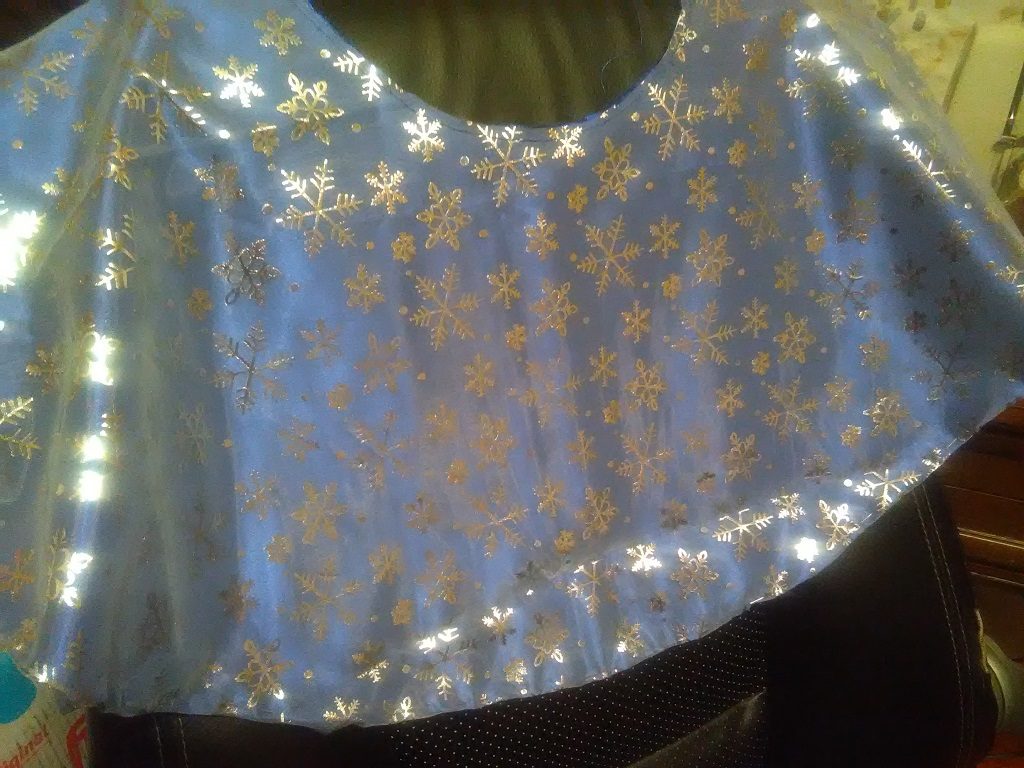
I played around with overlaying fabrics – I used an organza with a silver snowflake design over a deep blue satin. The resulting color is a much lighter icy blue (pretty much what I was going for).

I had a lot of trouble handling the fabric – I cut the circles and basted the two pieces together at the waist and hem. I then used the lower baste-line to fold and hem the skirt. That worked well. For some reason, though, I could NOT get the waistband to attach. I ended up catching the skirt in the serger and slicing the fabric. There’s a fairly large (3/4″ wide by 3″ long) gash that I had to patch up right along the band. Not something you notice when Anya is wearing it, I didn’t have enough fabric to cut new circles, and it would look worse if I spliced in an entire wedge of the skirt.

The organza material is a little plastic-y, and difficult to work with. My original idea was to do a rolled hem on the bottom of both materials. Couldn’t get a nice rolled hem on a straight piece of sample fabric … so that was out. Once the organza was combined with the satin, it was pretty easy to work with. It doesn’t drape like cotton, though (hence my problem with the serger).

The end result, however, looks really awesome. And Anya loves having a glittery silver snowflake skirt.

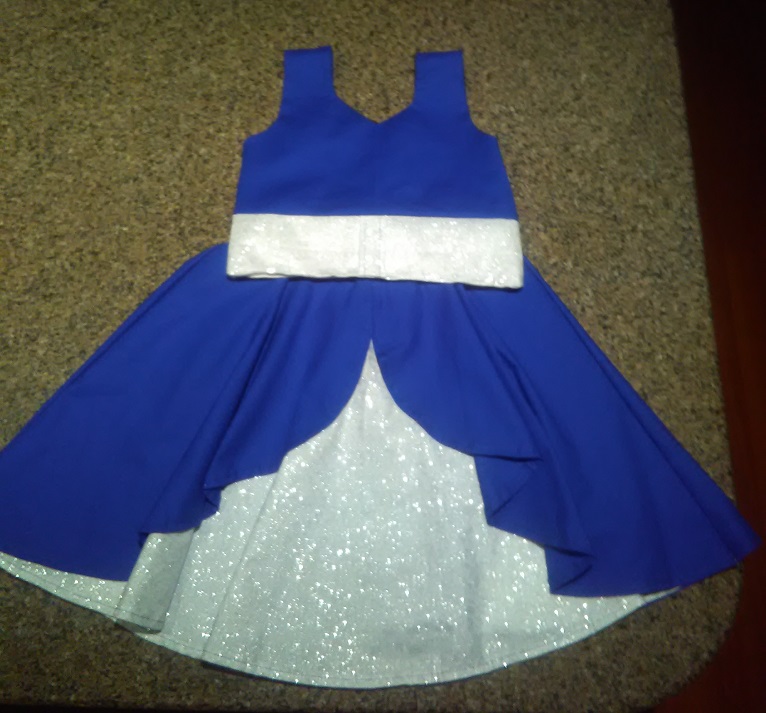
Anya’s Easter Dress (2017) – Almost Finished

In fitting this dress, I decided to split the dress into a top and skirt to produce an outfit Anya can put on herself. As a dress, it was a little tricky to get into. I considered putting a zipper in the back, but she wouldn’t be able to dress herself.

Since the skirt is basically a circle skirt, I added a wide waistband with 2″ elastic. Done.

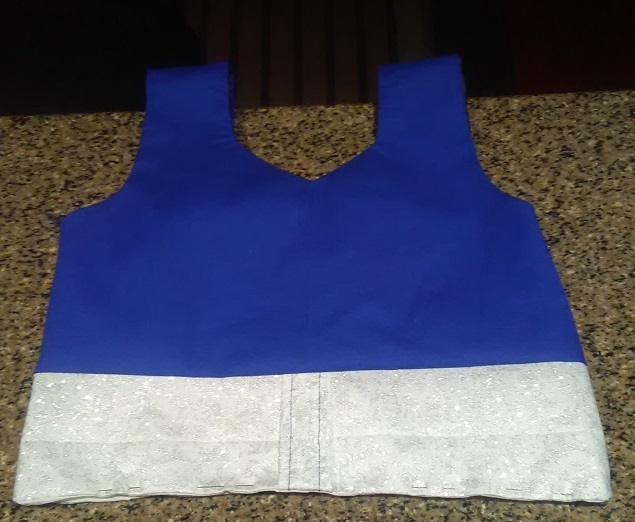
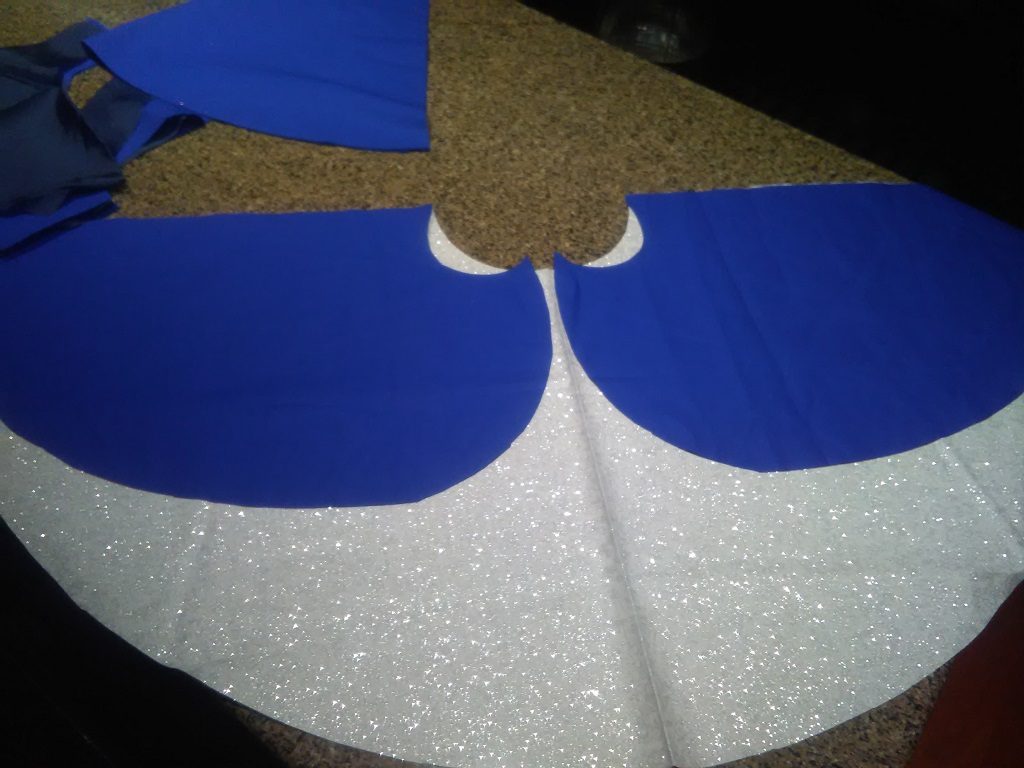
I’ve extended the lining (attached a strip of cream Bemberg lining material to the navy fabric which stops at the top of the white fabric).

Anya’s Easter Dress (2017) – Getting Started

I started making Anya’s Easter dress using the Kinley Cascading Flounce Dress pattern from Simple Life Sewing Company. I’m using a bright-ish blue main fabric with white Fairy Frost (glittery silver on white) as the underskirt. I have a navy blue Bemberg lining on the bodice – it’s a little dark, but it was something I already owned 🙂

I’ve got the pieces cut and am ready to start assembling the dress tomorrow.

Serger (American Home AH100) Review

It’s been a little over a year since I bought my serger. I vacillated between a really expensive Juki with all sorts of features and not buying a serger … 800$, the cheapest price I found for the Juki — and that was from someone on eBay so may not have included a valid warranty, is a LOT of money. Especially for something you don’t know that you are going to use. And, honestly, I don’t know enough about sergers to say if the whole list of features is useful ‘stuff’ or just for such niche uses that I’d never encounter a use for them.

As I researched sergers, I came across an old list of serger recommendations for different user types. The Juki that I’d been considering was on there, but I was drawn to #5 on their list: American Home’s AH100. I didn’t find a lot of reviews for the product. I still wasn’t sure I’d use a serger at all. But I found one on Overstock for under 200$. That was a good enough deal to try it out.

I don’t sew enough to say I use the serger weekly, but I’ve gotten a good bit of use from the serger. Starting with Easter dresses last year – probably not the best project to learn on. When you get the machine, there’s a little bit of thread pulled through it. There is a sample and the tension settings used for the sample.

The machine isn’t too difficult to thread – I wouldn’t have paid 500$ to get an automatically threading machine! I’d read a technique where you clip the already-threaded threads off at the cone. You put the new cones on & tie each one to the old threads that are run through the machine. You set the tensions to the loosest setting and manually advance the machine to pull the new threads through. When the knots get to the needles, you need to clip the knot & thread the needle. I’d also read,, though, that threads can snap in the machine … so you should know how to thread your machine. I’ve fully re-threaded the AH100 three times — it takes a few minutes, but it gets done. I usually do the cut/tie/pull/cut through method of re-threading the machine, and that only takes a few seconds. The thread path is color coded, though, so it isn’t a problem if you have to re-thread the machine from nothing.

The base of the machine, on the left hand side, has a door that swings out so you can fit sleeves/trouser legs onto the machine. I’ve used that to assemble Anya’s circle skirts.

I’ve used the normal 4-thread stitch – quite a few different materials, and it certainly improves the look of the finished seam if you test the tension on some spare scraps. I’ve also changed over to the other plate and done a 3-thread rolled hem. I need to figure out how to use the flat-lock stitch to repair one of Anya’s pajamas. I haven’t encountered any situation where a more expensive serger would have been able to do something, and I am quite happy with my purchase.

The manual is sufficient – haven’t come across anything I had to Google yet. That’s the one down side to this machine – I see forums all over the place with Babylock, Janome, and Juki users talking about how to do XYZ on their machine. Supposedly the AH100 is the same thing as a Babylock Lauren (BL450A). The manuals seem to line up, so I believe this to be true. Anyway, it is possible I’d be able to find some Lauren users to help out … but I don’t see a lot of AH100 users discussing the intricacies of their machines online.