Category: Technology

Fortify on Demand Remediation – Header Injection: Cookies

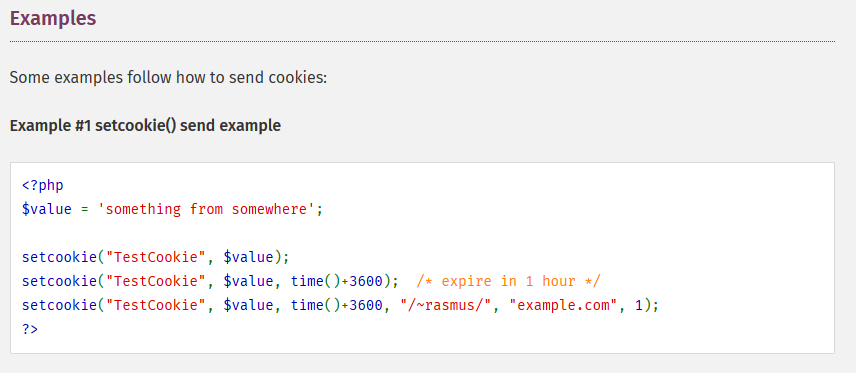
Cookie injection vulnerabilities occur when user input is stored into a cookie. It’s possible for malicious input to include newline characters that would be parsed out as new elements in the cookie. As an example, if I send my user ID as “lisa\r\nadmin: true” … I’ve got a cookie that says the userID is lisa and admin is true.

With Fortify on Demand, you cannot just filter out \r and \n characters – Fortify still says the code is vulnerable. You can, however, filter out anything apart from alpha-numeric characters (and, I assume, any oddball character that has a legit reason to be included in the user input):

$strLogonUserID = filter_var(preg_replace(‘/[^a-z\d_]/iu’, ”, $_POST[‘strUID’]), FILTER_SANITIZE_STRING, FILTER_FLAG_STRIP_LOW);

PHP oci_bind_by_name Caveat (a.k.a. a reminder to read the documentation)

This is readily apparent when you actually read the documentation for oci_bind_by_name … but, if you quickly skim through the doc and get mostly what it’s telling you, you can lose data when implementing oci_bind_by_name in your code. That’s because the variable that gets bound into the name is a reference. It’s right there in the description

And again in the more verbose part of the description

Well? They really mean It!

I usually iterate through arrays with for $x=0; $x<count($arrayOfData);$x++ — which is fine because $arrayOfData[$x] is a valid location in memory that contains the data I want. I had a program, though, that accepted user input. Input that frequently contains a bunch of extraneous newline characters in the middle of the data. To avoid making the users clean up their input, I just threw an array_filter on the input. But I don’t need the reorganized data, so I didn’t “waste” the cycles to re-index the filtered array. Instead, I used

$iIterator=0;
for( $itemInput in array_filter( $arrayOfData ) ) {
     oci_bind_by_name($stmt, ‘:placeholder’.$iIterator++, $itemInput);
}

Which is fine in most circumstances. But, with oci_bind_by_name … the memory address where $inputItem happened to be stashed is bound to the names :placeholder0, :placeholder1, …, :placeholdern – that memory address happened to still contain the last element of arrayOfData I happened to stash there because the server isn’t so busy that memory is being reallocated a fraction of a second later. But this loop does not bind each element of arrayOfData to its corresponding placeholder — instead of saying “select * from MyTable where ID IN (1,2,3,4,5)” … I had “select * from MyTable where ID IN (5,5,5,5,5)”.

In this case you need to use the array index

for( $x = 0; $x < count( $arrayOfData ); $x++ ) {
     $strPlaceholderName = ":inputclli".$x;
     oci_bind_by_name($stmt, $strPlaceholderName, $arrayOfData[$x]);
}

So each unique memory address is bound to a placeholder.

Fortify on Demand Remediation – JSON Injection

This vulnerability occurs when you write unvalidated input to JSON. A common scenario would be using an Ajax call to pass a string of data to a file and then decoding that string to JSON within the file.

To get around the Foritfy scanning requirements you have to use base64 encoding on the string before sending it through the Ajax call:

var update = $.ajax({
    type: "POST",
    url: "SFPNotesUpdate/../php/validate_notes.php",
    data: { tableData: btoa(JSON.stringify(HotRegisterer.getInstance('myhot').getData())) },
    dataType: 'json'
});

When reading the input to decode the JSON string to an array you have to perform these actions in order:

  • base64_decode the input string
  • sanitize the input string
  • decode the JSON string to an array
$tbl_data = json_decode(filter_var(base64_decode($_POST['tableData']), FILTER_SANITIZE_STRING, FILTER_FLAG_NO_ENCODE_QUOTES), true);

PHP Curl and Mangled Headers

I have PHP code that calls out to a SOAP endpoint, gets the response XML, and then does stuff. Well … that was the plan anyway. What actually happened was nothing. No error set, but the response string was null. Even adding curl debugging produced nothing. Fortunately, the endpoint is a sandbox one and thus available on http without encryption. I was going to do a network trace, so I needed to run the script from my computer. Aaaand STDOUT is where the curl debugging was going, not (as I assumed) STDERR. And look, there actually was an error. 400 bad request (how did that not come through to curl_error?!?) — and it became immediately obvious what my problem was — the content length is a quoted string instead of an integer.

Sigh! Copy/paste error where I built out my header. Cleared the escaped quotes from around the strlen call and, voila, my code works perfectly.

But a note to my future self — when PHP’s curl calls aren’t producing any output … try running it from the CLI. Or remember to add the instruction to have verbose output in STDERR!

curl_setopt($ch, CURLOPT_STDERR, $verbose);


Fortify on Demand Remediation – XSS Reflected

This vulnerability occurs when you accept user input and then use that input in output. The solution is to sanitize the input. The filter_var or filter_input functions can be used with a variety of sanitize filters.

As an example, code to accept what should be an integer value from user input:

     $iVariable = $_POST['someUserInput'];

Becomes code that removes all characters except for digits (and + or – signs) from the input:

     $iVariable = filter_input(INPUT_POST, 'someUserInput', FILTER_SANITIZE_NUMBER_INT);

Fortify on Demand Remediation – Introduction

The company for which I work signed a contract with some vendor for cloud-based static code analysis. We ran our biggest project through it and saw just shy of ten thousand vulnerabilities. Now … when an application sits out on the Internet, I get that a million people are going to try to exploit whatever they can in order to compromise your site. When the app is only available internally? I fully support firing anyone who plays hacker against their employer’s tools. When a tool is an automation that no one can access outside of the local host? Lazy, insecure code isn’t anywhere near the same problem it is for user-accessible sites. But the policy is the policy, so any code that gets deployed needs to pass the scan — which means no vulnerabilities identified.

Some vulnerabilities have obvious solutions — SQL injection is one. It’s a commonly known problem — a techy joke is that you’ll name your kid “SomeName’;DROP TABLE STUDENTS; … and most database platforms support parameterized statements to mitigate the vulnerability.

Some vulnerabilities are really a “don’t do that!” problem — as an example, we were updating the server and had a page with info(); on it. Don’t do that! I had some error_log lines that output user info that would be called when the process failed (“Failed to add ecckt $iCircuitID to work order $iWorkOrderID for user $strUserID with $curlError from the web server and $curlRepsonse from the web service”). I liked having the log in place so, when a user rang up with a problem, I had the info available to see what went wrong. The expedient thing to do here, though, was just comment those error_log lines out. I can uncomment the line and have the user try it again. Then checkout back to the commented out iteration of the file when we’re done troubleshooting.

Some, though … static code analysis tools don’t always understand that a problem is sorted when the solution doesn’t match one of their list of ‘approved’ methods. I liken this to early MS MCSE tests — there was a pseudo-GUI that asked you to share out a printer from a server. You had to click the exact right series of places in the pseudo-GUI to answer the question correctly. Shortcut keys were not implemented. Command line solutions were wrong.

So I’ve started documenting the solutions we find that pass the Fortify on Demand scan for everything identified in our scans — hopefully letting the next teams that use the static scanner avoid the trial-and-error we’ve gone through to find an acceptable solution.

Docker and Windows — Unable to Allocate Port

On the most recent iteration of Windows (20H2 build 19042.1052) and Docker Desktop (20.10.7 built Wed Jun 2 11:54:58 2021), I found myself unable to launch my Oracle container. The error indicated that the binding was forbidden.


C:\WINDOWS\system32>docker start oracleDB
Error response from daemon: Ports are not available: listen tcp 0.0.0.0:1521: bind: An attempt was made to access a socket in a way forbidden by its access permissions.
Error: failed to start containers: oracleDB

Forbidden by whom?! Windows, it seems. Checking excluded ports using netsh:

netsh int ipv4 show excludedportrange protocol=tcp

Shows that there are all sorts of ports being forbidden — Hyper-V is grabbing a lot of ports when it starts. To avoid that, you’ve got to add a manual excluded port for the one you want to use.

To reserve the port for your own use, disable Hyper-V (reboot), add a port exclusion, and enable Hyper-V (reboot)

REM Disable Hyper-V
dism.exe /Online /Disable-Feature:Microsoft-Hyper-V 
REM REBOOT ... then add an exclusion for the Oracle DB Port
netsh int ipv4 add excludedportrange protocol=tcp startport=1521 numberofports=1 
dism.exe /Online /Enable-Feature:Microsoft-Hyper-V /All
REM REBOOT again

Now 1521 is reserved for Oracle

ADO – Migrating a Repository to Azure Repos (and keeping your commit history)

The most direct way to migrate a repo into Azure Repos is to create a new, blank repository. This may mean making a new project. From the organization’s main page, click “New project”

Or it may mean making a new repo in an existing project. From an existing repo, click the drown-down next to the repo name and select “New repository”

Name the repository but don’t add a README. We want a blank repo

Note the URL to the repository – in this case, it’s https://ado0255@dev.azure.com/ado0255/History%20Test/_git/Another%20History%20Test

Find the URL for your existing Git repo – if you cd into the project’s folder and run “git remote -v”, you will get a list of the repos. Make a new folder somewhere – this is a temporary staging area to move the data from your existing repo over to the new Azure Repo. Change directories into your new folder. Run git clone –mirror URLToOldRepo

You will see data being downloaded from your git server.

Change directories into the folder that just got downloaded. You won’t see your code like you normally do when you clone a git repo. You’re looking at the underlying git stuff that makes up the repo. You’re code is all in there, as are all of the branches and commit history.

Now add the new Azure Repo as a remote – in this case, I’m naming the remote “ado”. Then run “git push ado –all” to push everything up to the new Azure Repo.

Stuff will transfer – you may be prompted to log into your ADO repository first. Eventually, you’ll see new branches being created on the remote and the process will complete.

Refreshing the Azure Repo, you’ll now see the files.

Selecting “Commits” will display the commit history.

Anyone else using the repo will need to add the new remote. Use “git remote rm origin” to remove the existing origin, then use “git remote add origin url” to add the new Azure Repo as origin.

ADO – Cleaning up test repos and projects

I find the process to delete repositories and projects to be nonintuitive. Since I create a lot of projects and repos for testing and documentation, it’s nice to be able to clean them up when I’m done!

To delete an Azure Repo, navigate to a repo and select the drop-down next to the repo name. Select “Manage repositories”

With your mouse over a repository, there’s a hamburger menu at the right-hand side of the listing. Click it and select “Delete”

You’ll need to type the repository’s full name to activate the delete button.

To delete a project, go to the organization’s home page and select “Organization Settings” from the lower left-hand corner of the screen.

Select “Projects” from the left-hand navigation bar

With your mouse over the project listing, you’ll have a hamburger menu. Click it and select “Delete Project”

You’ll need to type the project name to activate the delete button.


Git – Removing Confidential Info From History

The first cut of code may contain … not best practice code. Sometimes this is just hard coding something you’ll want to compute / look up in the future. Hard coding user input isn’t a problem if my first cut is always searching for ABC123. Hard coding the system creds? Not good. You sort that before you actually deploy the code. But some old iteration of the file has MyP2s5w0rD sitting right there in plain text. That’s bad in a system that maintains file history! The quick/easy way to clean up passwords stashed within the history is to download the BFG JAR file.

For this test, I created a new repository in .\source then created three clones of the repo (.\clone1, .\clone2, and .\clone3). In each cloneX copy, I created a tX folder that has a file named ldapAuthTest.py — a file that contains a statically assigned password as

strSystemAccountPass = "MyP2s5w0rD"

The first thing I did was to redact the password in the files — this means anyone looking at HEAD won’t see the password. Source, clone1, and clone2 are all current. The clone3 copy has pulled all changes but has a local change committed but not merged.

To clean the password from the git history, first create a backup of your repo (just in case!). Then mirror the repo to work on it

mkdir mirror
cd mirror
git clone --mirror d:\git\testFilterBranch\source


Create file .\replacements.txt with the string to be redacted — in this case:

strSystemAccountPass = "MyP2s5w0rD"

Formatting notes for replacements.txt

MyP2s5w0rD # Replaces string with default ***REMOVED***
MyP2s4w0rD==>REDACTED # Replaces string using custom string REDACTED
MyP2s3w0rD==> # Replaces string with null -- i.e. removes the string
regex:strSystemAccountPass\s?=\s?"MyP2s2w0rD""==>REDACTED # Uses a regex match -- in this case we may or may not have a space around the equal sign

So, in my mirror folder, I have the replacement.txt file which defines which strings are replaced. I have a folder that contains the mirror of my repo.

lisa@FLEX3 /cygdrive/d/git/testFilterBranch/mirror
$ ls
replacements.txt source.git

To replace my “stuff”, run bfg using the –replace-text option. Because I only want to replace the text in files named ldapAuthTest.py, I also added the -fi option

java -jar ../bfg-1.14.0.jar --replace-text ..\replacements.txt -fi ldapAuthTest.py source.git


lisa@FLEX3 /cygdrive/d/git/testFilterBranch/mirror
$ java -jar ../bfg-1.14.0.jar --replace-text replacements.txt -fi ldapAuthTest.py source.git

Using repo : D:\git\testFilterBranch\mirror\source.git

Found 3 objects to protect
Found 2 commit-pointing refs : HEAD, refs/heads/master

Protected commits
-----------------
These are your protected commits, and so their contents will NOT be altered:
* commit 87f1b398 (protected by 'HEAD')

Cleaning
--------
Found 5 commits
Cleaning commits: 100% (5/5)
Cleaning commits completed in 613 ms.

Updating 1 Ref
--------------

Ref Before After
---------------------------------------
refs/heads/master | 87f1b398 | 919c8f0f

Updating references: 100% (1/1)
...Ref update completed in 151 ms.

Commit Tree-Dirt History
------------------------

Earliest Latest
| |
. D D D m

D = dirty commits (file tree fixed)
m = modified commits (commit message or parents changed)
. = clean commits (no changes to file tree)

Before After
-------------------------------------------
First modified commit | dc2cd935 | 8764f6f1
Last dirty commit | 9665c4e0 | ccdf0359

Changed files
-------------

Filename Before & After
-------------------------------------
ldapAuthTest.py | 25e79fa6 ? 4d12fdad

In total, 8 object ids were changed. Full details are logged here:
D:\git\testFilterBranch\mirror\source.git.bfg-report\2021-06-23\12-50-00

BFG run is complete! When ready, run: git reflog expire --expire=now --all && git gc --prune=now --aggressive

Check to make sure nothing looks abjectly wrong. Assuming the repo is sound, we’re ready to clean up and push these changes.

cd source.git

git reflog expire --expire=now --all && git gc --prune=now --aggressive
git push


Pulling the update from my source repo, I have merge conflicts

These are readily resolved and the source repo can be merged into my local copy.

And the change I had committed but not pushed is still there.

Pushing that change produces no errors

Now … pushing the bfg changes may not work. In my case, the real repo has a bunch of branchs and I am getting “non fast-forward merges”. To get the history changed, I need to do a force push. Not so good for the other developers! In that case, everyone should get their changes committed and pushed. The servers should be checked to ensure they are up to date. Then the force push can be done and everyone can pull the new “good” data (which, really, shouldn’t differ from the old data … it’s just the history that is being tweaked).