Category: Technology

Did you know … you can add Teams channel meetings to your calendar?

Holding a meeting in a Teams channel allows channel members to attend if they have time and are interested in the meeting – it also lets Team members access meeting artifacts easily.

But when you schedule a meeting in a channel, only direct invitees see the meeting in their calendar. This is great for people who aren’t going to attend, but I end up joining the call ten minutes late because I didn’t see the meeting when I check my calendar to see what’s coming up.

But you can add a channel meeting to your calendar – if you decide to attend the meeting, click the ellipses on the meeting item and select “View meeting details”

Click “Add to calendar”

Voilà! Now the meeting appears in your calendar.


Did you know … you can open files in VSCode over SSH!?

The plug-in is a preview and you need to use VS Code Insiders to install it … but you can open files and folders directly from a *n?x server via SSH. This is a great way to circumvent Samba quirks (changing the case of a file name, filemode differences between the Samba share and the local files causing all files to be marked as changed, etc) – and can even eliminate the need to load file sharing servers like Samba in the first place.

Once the plug-in is installed, a “Remote – SSH” icon appears in the left-hand menu bar. There is a single configuration option for a file containing host definitions. You’ll want to set up key-based authentication and include the path to the authorized private key in your host config.

Right-clicking a host will allow you to open a file or folder within the current VSCode window or launch a new window.

One caveat – you are running git commands from the context of the remote machine … this means you’ll need a user name set up there or your commits show up with the local logged on username and username@hostname address.


Did you know … you can open Teams files directly from Office 365 Applications?

While you can go into a channel, select the files tab, and open a file from within Teams … that’s a lot of clicking just to open a file in another program. But you can open files stored in Teams (or any other SharePoint document repository) directly from Office 365 programs. How?

Open an Office 365 program – Word, Excel, PowerPoint, Visio. Click on the “File” ribbon bar and select “Open”. SharePoint Online document repositories, including those used by Teams, are listed under “Sites – Windstream Communic…”.

You may already have SharePoint sites listed. To add a new site, you just have to follow it.

Select the SharePoint site that matches your Team name. Click “Documents”

You’ll see a folder for each channel in your Team. Click the channel where the file is saved.

Navigate to the folder where your file is stored, then select the file. It will open directly in the application. When you save the document, the SharePoint document is updated.

Tip: Frequently used documents can be pinned for quick access. After you have opened the file, it will appear in the most recently used list. Click the little push-pin next to the file and it will be pinned to the top of the recently used file list. The Excel files and Word documents that I use frequently can now be opened without navigating through the file structure to find them.


Information Barriers: Microsoft Teams

Information barriers preclude someone from communicating someone else (additional O365 services are going to implement it eventually, Teams just happens to be on the leading edge). Now there are lines of business where this is an awesome feature — law firm representing both sides of a case, for instance, don’t want people on side A chatting with people from side B. A company with a large front-line workforce may want to preclude the unwashed masses from communicating with Corporate.
If it were free and low effort to set up and maintain, I could come up with use cases for it here. Say, isolating the C11 people so someone unauthorized to talk to C11 people aren’t accidentally disclosing information. En mass blocking people from using federated communication is an interesting option — basically disallow it for everyone & have a specific request to be thrown into the “talks to people outside the company” group.
There’s some initial setup effort in building out the policies and applying them, and there would be effort in getting some mechanism for people to be moved into and out of policies. So it probably passes the ‘low effort’ test. Cost, not so much. It looks like, while anyone with an E3 SKU can use it during this preview, barrier’d accounts need an E5 or an add-on compliance/regulatory license once this goes GA.
Based on cost, I’m thinking we don’t want go dig into it. It’s an additional 8$/month for the compliance add-on license. Something like 15$/month to go from an E3 to an E5. And I don’t particularly care 8$ a user if people in our call center are inviting their friends from the MS call center to lunch over the chat federation.
Anyone else see a use case where it’d be worth the additional money for the technologically enforced barrier?

Shadowing Remote Desktop Sessions – Windows 2016

You need the session ID of the console you want to remote control. How do you get this? Log into the server under your ID and run “query session” in a command prompt – the session ID is in the “ID” column. Yes there are a lot of ways to do this. Ask the person you want to remote control to run quser, add the ‘session ID’ column to task manager, etc.

I am e0082643, which makes my session ID 40.

The person who wants to control the session needs to run mstsc with the /shadow option. You need to run mstsc as a user that is an administrator on the target host.

Run: mstsc /v:hostname /shadow:# /control

e.g. mstsc /v:cwwapp1726.windstream.com /shadow:40 /control

The session being controlled will see a control request – click ‘yes’ and the session will be shadowed. Click ‘no’ and it won’t.


Did you know … you can copy files from OneDrive to SharePoint Online (thus Microsoft Teams too)?

Sometimes I work on a document privately before putting it out for my group to review, but it takes time to upload a copy of the document to our Teams space! You can move and copy documents from OneDrive directly to SharePoint Online. Since “Files” in Teams spaces are just SharePoint Online document repositories, this means you can move/copy documents to a Teams space too.

Open “OneDrive” from https://portal.office.com or the side-bar of any web-based Office 365 product.

Select the document(s) that you want to move/copy and select either “Move to” or “Copy to” from the menu bar.

A new pane will fly out from the right-hand side of the browser window. You’ll see some of the SharePoint Online sites and Teams spaces to which you have access listed. If the one you want isn’t listed, click “Browse sites” to see a full list.

Click “Show more” to browse through the list of sites.

If you are unable to locate the site you want to use, open it in SharePoint online and follow it. Click on the site into which you want to move/copy your documents.

For SharePoint online sites, you’ll see the site contents and can navigate through the hierarchy to the location you want the file stored. For Teams spaces, click “Documents”.

You’ll then see folders for each Channel. Click the channel into which you want to store the documents.

Navigate through the Channel’s file structure to the location you want the document stored. Click the blue button to copy/move the document to that location.

Voila, my documents are moved within Microsoft’s cloud from OneDrive to SharePoint Online.


Microsoft Flow Usage Tracking Process Proposal

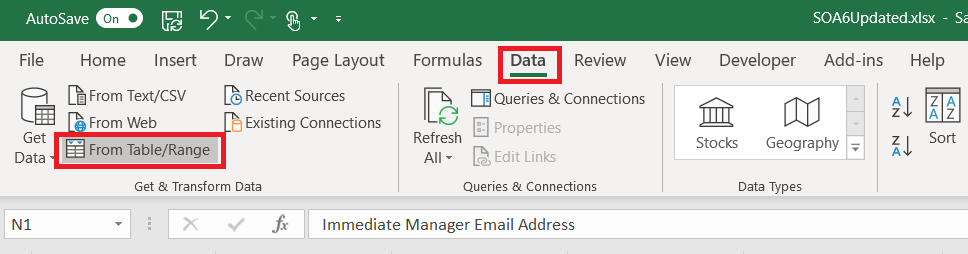
Assumptions: This proposal is predicated on having some reasonable way to download the Flow usage report that currently needs to be generated from the Flow admin page. Otherwise usage tracking is a manual process kicked off by logging into Flow admin site and downloading the CSV usage detail report.

This proposal is also predicated on the idea that our group is not-for-profit — we are not seeking to recoup O365 licensing cost through Flow usage billback.

Issue: Flow execution is “throttled” when usage exceeds the tenant limits. Per a response from a “Flow Staff” individual to ‘what actually happens when you exceed your allocated cycle limit’, “To clarify what is meant by throttling, flow run usage exceeding your tenant limits may be suspended at Flow’s discretion until the following billing cycle.”. While “at Flow’s discretion” is still vague, a tenant risks having Flow runs suspended when they exceed their allocated cycle limit.

Additional cycles can be purchased to continue Flow execution. As of 26 April 2019, an additional 50,000 runs costs 40$. We should ask Microsoft to clarify “Flow’s discretion”. Are enterprise customers able to have Flow execution continued and be billed for their overage? Do enterprise customers receive a short grace period during which time they can purchase additional execution cycles for upcoming months?

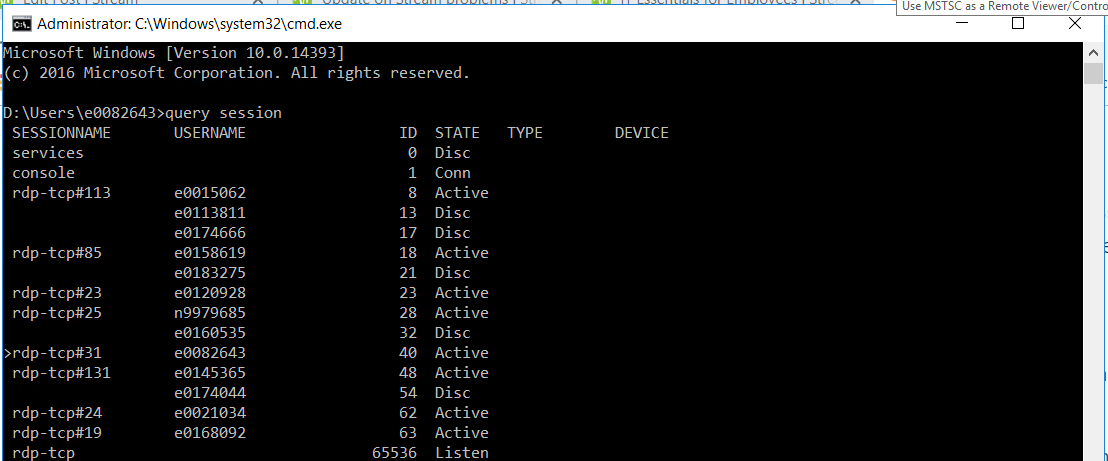
Farther complicating the issue, it is difficult for a manager to assess how many flow cycles are being executed by their subordinates. While Microsoft has added per-workflow usage statistics, even when workflows are maintained under shared spaces, individually checking each Team flow to determine how many times it has executed is cumbersome.

Solution: If we cannot purchase execution cycles after our limit has been reached, we will need to routinely track the number of cycles executed in our tenant to avoid both execution disruption and purchasing additional runs in months where we do not exceed our “free” cycle quota. To determine an appropriate alerting interval, we need to determine the time between identifying that our tenant is approaching its threshold and the activation of newly purchased cycles.

To create a financial incentive to maintain efficient Flow jobs, cycles should be billed back to the business units that are using Flow. Since each Office 365 license includes 2,000 Flow execution cycles, a BU is not charged when they are under their “free” allocation (i.e. # of O365 licensed users in the BU times 2,000). BUs may be charged at a rate of 0.0008$ per cycle over their “free” allocation (question: does this need to be rounded up to avoid fractional pennies? i.e. one cent per 1,250 cycles). In months were the Flow execution cycle limit in the tenant is exceeded, the BUs are charged. Many individuals do not use Flow so there are unused execution cycles. If we are under our tenant limit but a BU has exceeded their allocation, no additional money has been spent so no billback occurs. The BU owner would still be notified with a message that includes “due to low company-wide Flow usage, your overage does not incur any charge this month. This overage could result in a charge of up to {calculatedOverageCost} charged to your BU.”. The message will include the web link to help them understand who is using Flow in their organization.

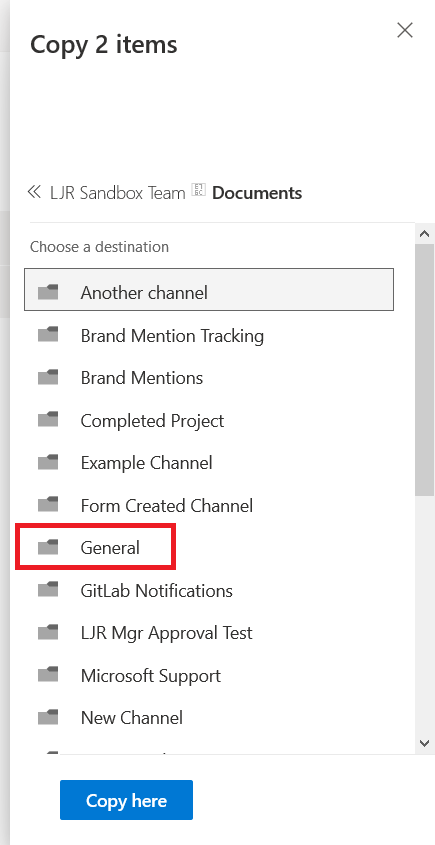
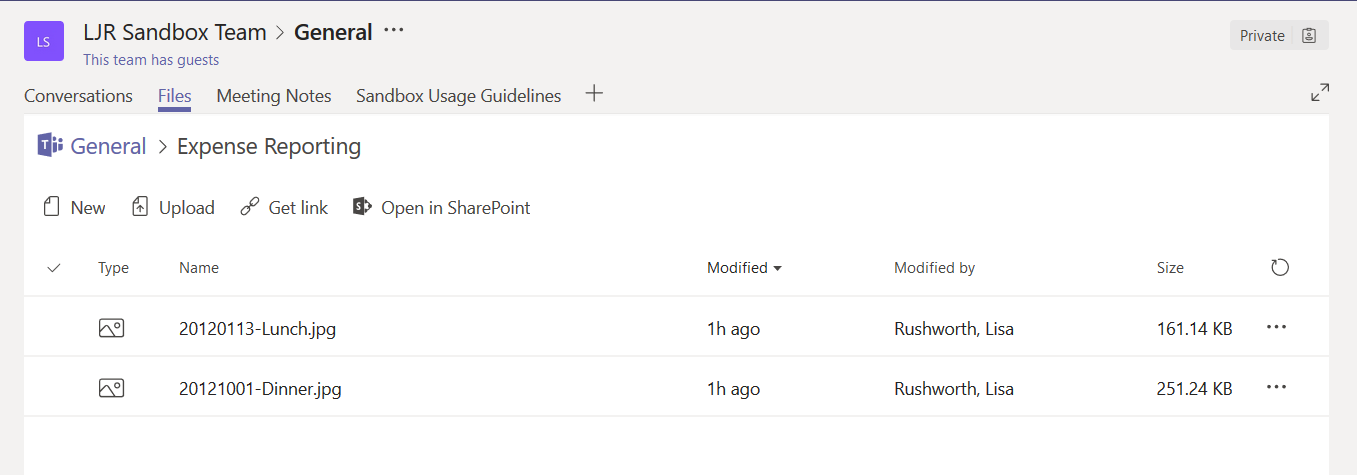
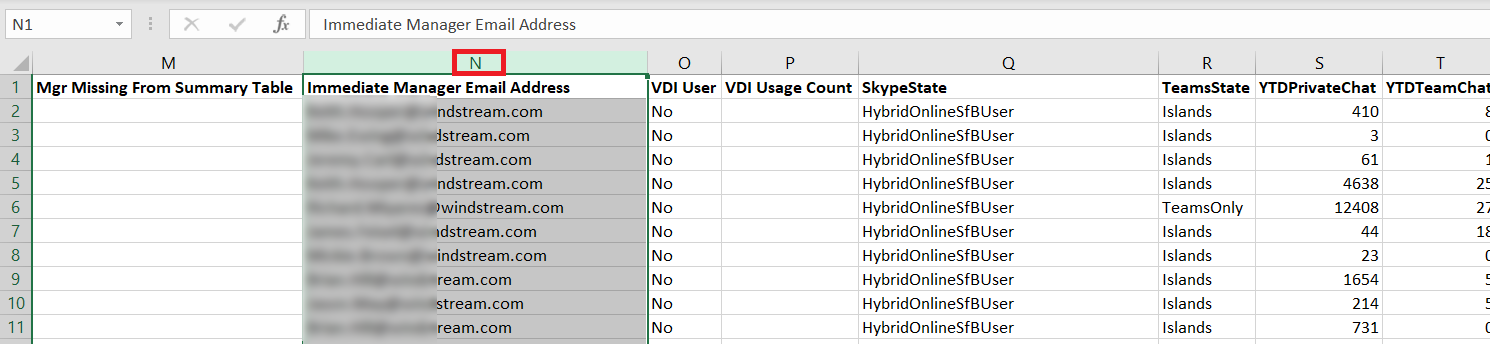
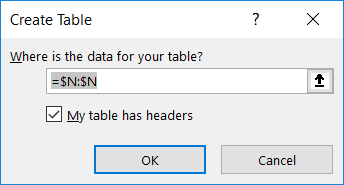
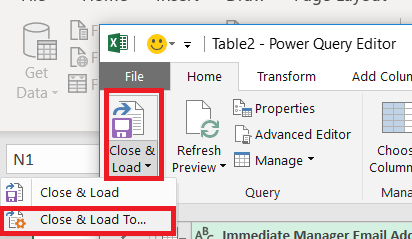
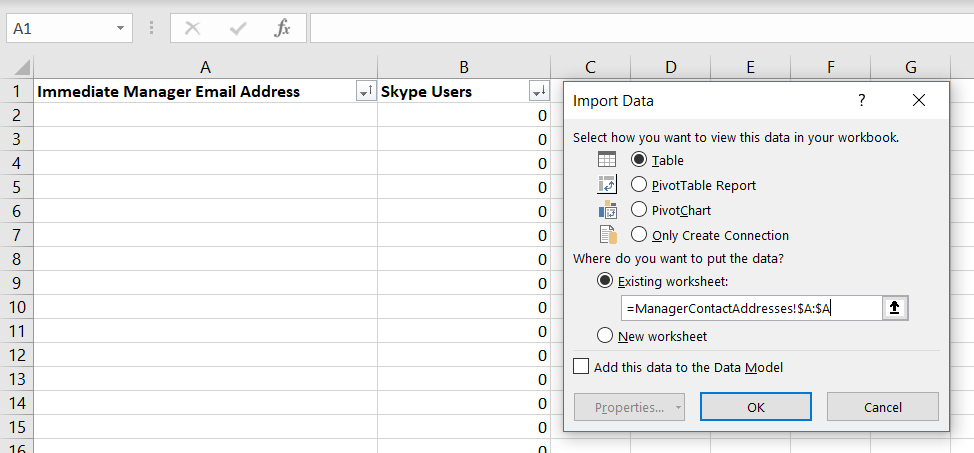
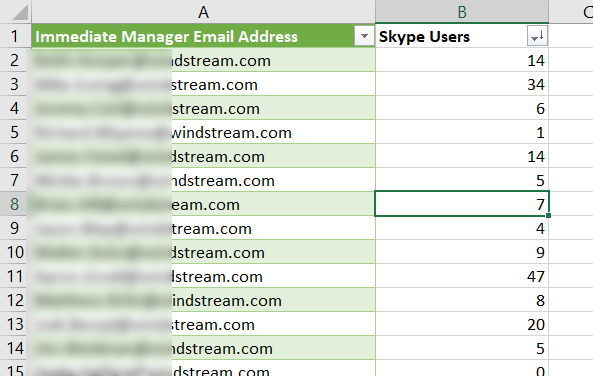
We would develop a script to update a data table. This table will record each Flow user, the number of cycles used month to date, the number of cycles used during the previous month, the number of cycles used year to date, and the number of cycles used during the previous year. A web interface like https://msteams.windstream.com/usageReporting/index.php (which allows managers to view Teams usage of their sub-organization) would be created to provide visibility into the Flow usage data. We would also develop a script, run at the beginning of each month, that determines the BU for each Flow user, aggregates “previous month” Flow usage data per BU, calculates the total number of O365 licensed accounts per BU, calculates the BU’s cycle overage, notifies BU owners per the previous paragraph, and either initiates the billback process or produces the data which is needed to initiate the billback process.

I additionally suggest we create a “best practices” guide for using Flow. As an example, creating a workflow ‘perform some process every time our shared mailbox receives a message from BOB’ incurs a cycle execution every time the shared mailbox receives a message, regardless of the message source. When creating workflows triggered by e-mail messages, using a dedicated mailbox (research: can an O365 group mailbox be used as a trigger??) avoids non-trigger messages executing a Flow.

Did you know … Power Query can extract a unique list of records?

Remove duplicates is a quick way to obtain a unique list of records; every time the source data is updated, though, you’ve got to copy and ‘remove duplicates’ again. There’s a better way! Use Power Query to create a unique list that can be updated with a single click.

To use Power Query, first highlight the column containing the information for which you want a list of unique values.

On the “Data” ribbon bar, select “From Table/Range”

You’ll be asked to confirm where the source data is located – the highlighted selection should appear. Click “OK” to continue.

A new window will open – the Power Query Editor. On the “Home” ribbon bar, click on “Remove Rows” and select “Remove Duplicates”

A unique list of values has been extracted in the Power Query editor – but you want to insert that data into your spreadsheet. Click the drop-down by “Close & Load” then select “Close & Load To …”

Now you can select where you want your list of unique values to appear – I am creating a table in an existing worksheet. Click “OK” to insert the unique list.

Voila, I now have a unique list.

What happens when new records are added to my source data? The Power Query table does not automatically update as values are added to the source data. On the “Data” ribbon bar, click “Refresh All” to update the unique value list.


Did you know … you can redirect custom URLs to Microsoft Forms?

Microsoft Forms provides a simple framework for creating surveys and polls which can be distributed either to internal users or made publicly available. Including your Form URL in an a href tag is one way to avoid trying to communicate the super-long Form URL … but if you’re looking for a ‘pretty’ URL, something that can be included in print media or provided to someone verbally, you can redirect custom URLs to your Form URL.

Generally, hosting a forwarding URL requires a web server; but URL-shortening services should work. To use a web server, you’ll need to configure a site (or path from a site) to serve an HTTP redirect. I am using 302 (temporary) redirection instead of 301 (permanent redirection) in case I want to forward my custom URL to a different Form.

Apache config

Use the “Redirect” directive in your virtual host config:

<VirtualHost 10.1.2.3:80>
     ServerName customsite.example.com
     ServerAlias customsite.example.com customsite
     Redirect / https://forms.office.com/Pages/DesignPage.aspx#FormID=wbRnJe2w9UCu41....
</VirtualHost>

IIS Config

In the IIS management utility, navigate to your website and select “HTTP Redirect”.

Check the box to redirect requests and paste in your Forms URL. Check the box to redirect all requests to the exact destination.

When your site is accessed, the browser receives the HTTP redirect and displays your Form.