Found a neat pair of methods that were added in Python 2.5 — it’s like split/index except it handles breaking the string into two elements for you. A tuple is returned with the part before the separator, the separator, and the part after the separator. If the separator is not found, element 0 and 1 are empty strings.
C:\Users\lisa> python
Python 3.13.3
Type “help”, “copyright”, “credits” or “license” for more information.
>>> test = “This is a string | with pipe characters as | delimiters in the string”
>>> print(test.rpartition(“|”)[0])
This is a string | with pipe characters as
>>> print(test.partition(“|”)[0])
This is a string
>>>
Anya made me birthday cookies! I wanted to save the recipe because they turned out really well.
Ingredients:
1 3/4 cups all-purpose flour
1/2 cup almond flour
1 teaspoon baking soda
1/2 teaspoon salt
1 cup unsalted butter, softened
1 cup maple syrup
1/2 cup plain Greek yogurt
2 large eggs
2 cups semi-sweet chocolate chips
1 cup frozen dark cherries, roughly chopped
Instructions:
Preheat your oven to 375°F. Line baking sheets with parchment paper.
In a medium bowl, whisk together the all-purpose flour, almond flour, baking soda, and salt. Set aside.
In a large mixing bowl, beat the softened butter with the maple syrup until well mixed. The mixture will be looser than a typical creamed butter-sugar mixture due to the syrup.
Mix in the Greek yogurt until smooth. Beat in the eggs one at a time, mixing well after each addition.
Gradually add the dry ingredients to the wet ingredients, mixing until just combined. The dough will be a bit softer due to the syrup and yogurt.
Gently fold in the chocolate chips and frozen dark cherries until evenly distributed throughout the dough.
Drop rounded tablespoons of dough onto the prepared baking sheets, leaving about 2 inches between each cookie to allow for spreading.
Bake the cookies in the preheated oven for 10-12 minutes, or until the edges are golden brown and the centers are set but still soft. If you made really big cookies, this may be more like 20 minutes!
Allow the cookies to cool on the baking sheet for about 5 minutes before transferring them to a wire rack to cool completely.
I made garlic kale pork burgers for dinner tonight — cut up pork loin & ground it with garlic scapes, salt, ground black pepper, and kale. Then cooked patties and topped with kale sauteed in butter with more pureed garlic scapes. Served on an everything bagel, and they were very good.
I put together a quick program that creates a “fancy” QR code to a specified URL with the specified color and drops the desired “logo” file into the center of the code.
import qrcode
from PIL import Image

def generate_qr_code_with_custom_color_and_logo():
    url = input("Please enter the URL for which you want to generate a QR code: ")

    rgb_input = input("Please enter the RGB values for the QR code color (e.g. 0,0,0 for black): ")

    try:
        rgb_color = tuple(map(int, rgb_input.split(',')))
        if len(rgb_color) != 3 or not all(0 <= n <= 255 for n in rgb_color):
            raise ValueError("Invalid RGB color value.")
    except Exception:
        print("Error parsing RGB values. Please make sure to enter three integers separated by commas.")
        return

    qr = qrcode.QRCode(
        version=1,  # controls the size of the QR Code
        error_correction=qrcode.constants.ERROR_CORRECT_H,  # high error correction for image insertion
        box_size=10,
        border=4,
    )
    qr.add_data(url)
    qr.make(fit=True)

    # Generate the QR code with the specified RGB color
    img = qr.make_image(fill_color=rgb_color, back_color="white")

    # Load the logo image
    logo_image_path = input("Please enter the logo for the center of this QR code: ")

    try:
        logo = Image.open(logo_image_path)
    except FileNotFoundError:
        print(f"Logo image file '{logo_image_path}' not found. Proceeding without a logo.")
        img.save("qr_code_with_custom_color.png")
        print("QR code has been generated and saved as 'qr_code_with_custom_color.png'.")
        return

    # Resize the logo image to fit in the QR code
    img_width, img_height = img.size
    logo_size = int(img_width * 0.2)  # The logo will take up 20% of the QR code width
    logo = logo.resize((logo_size, logo_size), Image.ANTIALIAS)

    position = ((img_width - logo_size) // 2, (img_height - logo_size) // 2)

    img.paste(logo, position, mask=logo.convert("RGBA"))

    img.save("qr_code_with_custom_color_and_logo.png")

    print("QR code with a custom color and a logo image has been generated and saved as 'qr_code_with_custom_color_and_logo.png'.")

if __name__ == "__main__":
    generate_qr_code_with_custom_color_and_logo()
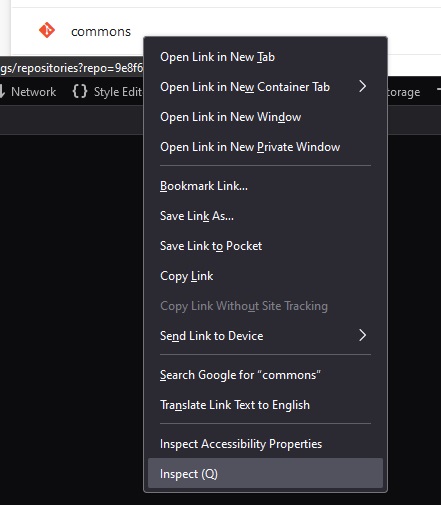
There are many times I need to copy “stuff” from a website that is structured in such a way that simply copy/pasting the table data is impossible. Screen prints work, but I usually want the table of data in Excel so I can add notations and such. In these cases, running JavaScript from the browser’s developers console lets you access the underlying text elements.
Right click on one of the text elements and select “Inspect”
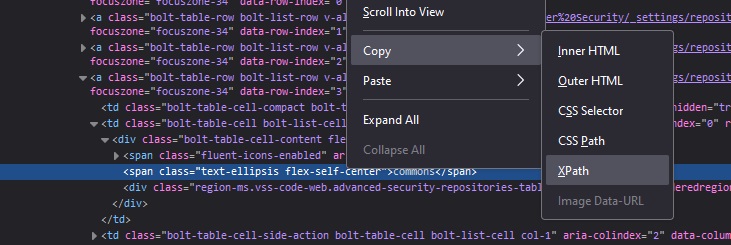
Now copy the element’s XPath
Read the value — we don’t generally want just this one element … but the path down to the “tbody” tag looks like a reasonable place to find the values within the table.
Use JavaScript to grab all of the TD elements under the tbody:
// Define the XPath expression to select all <td> elements within the specific <tbody>
const xpathExpression = "/html/body/div[1]/div/div/div[2]/div[2]/div[2]/div/div[3]/div/div/div[3]/div/div/div/table/tbody//td";

// Use document.evaluate to get all matching <td> nodes
const nodesSnapshot = document.evaluate(xpathExpression, document, null, XPathResult.ORDERED_NODE_SNAPSHOT_TYPE, null);

// Log the number of nodes found (for debugging purposes)
console.log("Total <td> elements found:", nodesSnapshot.snapshotLength);

// Iterate over the nodes and log their text content
for (let i = 0; i < nodesSnapshot.snapshotLength; i++) {
    let node = nodesSnapshot.snapshotItem(i);
    if (node) {
        const textContent = node.textContent.trim();
        if (textContent) { // Only log non-empty content
            console.log(textContent);
        }
    }
}
Voila! I redacted some data below, but it’s just a list of values, one per line.
Like my script that pulls the AD site information – this lets me see what subnets are defined and which sites are assigned to those subnets. I was able to quickly confirm that the devices that had problems communicating with Active Directory don’t have a site defined. Way back in 2000, we created a “catch all” 10.0.0.0/8 subnet and assigned it to the user authentication site. New networks on a whole different addressing scheme don’t have a site assignment. It should still work, but the application in question has historically had issues with going the “Ok, list ’em all” route.
from ldap3 import Server, Connection, ALL, SUBTREE, Tls
import ssl
import getpass

# Attempt to import USERNAME and PASSWORD from config.py
try:
    from config import USERNAME, PASSWORD
except ImportError:
    USERNAME, PASSWORD = None, None

# Define constants
LDAP_SERVER = 'ad.example.com'
LDAP_PORT = 636

def get_subnets_and_sites(username, password):
    # Set up TLS configuration
    tls_configuration = Tls(validate=ssl.CERT_REQUIRED, version=ssl.PROTOCOL_TLSv1_2)

    # Connect to the LDAP server
    server = Server(LDAP_SERVER, port=LDAP_PORT, use_ssl=True, tls=tls_configuration, get_info=ALL)
    connection = Connection(server, user=username, password=password, authentication='SIMPLE', auto_bind=True)

    # Define the search base for subnets
    search_base = 'CN=Subnets,CN=Sites,CN=Configuration,DC=example,DC=com'  # Change this to match your domain's DN
    search_filter = '(objectClass=subnet)'  # Filter to find all subnet objects
    search_attributes = ['cn', 'siteObject']  # Retrieve the common name and site object references

    # Perform the search
    connection.search(search_base, search_filter, SUBTREE, attributes=search_attributes)

    # Extract and return subnets and their site assignments
    subnets_sites = []
    for entry in connection.entries:
        subnet_name = entry.cn.value
        site_dn = entry.siteObject.value if entry.siteObject else "No site assigned"
        subnets_sites.append((subnet_name, site_dn))

    return subnets_sites

def print_subnets_and_sites(subnets_sites):
    if subnets_sites:
        print("\nSubnets and their Site Assignments:")
        for subnet, site in subnets_sites:
            print(f"Subnet: {subnet}, Site: {site}")
    else:
        print("No subnets found in the domain.")

def main():
    # Prompt for username and password if not available in config.py
    username = USERNAME if USERNAME else input("Enter your LDAP username: ")
    password = PASSWORD if PASSWORD else getpass.getpass("Enter your LDAP password: ")

    subnets_sites = get_subnets_and_sites(username, password)
    print_subnets_and_sites(subnets_sites)

if __name__ == "__main__":
    main()
One down side of not administering the Active Directory domain anymore is that I don’t have the quick GUI tools that show you how “stuff” is set up. Luckily, the sites are all reflected in AD objects that can be read by authenticated users:
from ldap3 import Server, Connection, ALL, SIMPLE, SUBTREE, Tls
import ssl
import getpass

# Attempt to import USERNAME and PASSWORD from config.py
try:
    from config import USERNAME, PASSWORD
except ImportError:
    USERNAME, PASSWORD = None, None

# Define constants
LDAP_SERVER = 'ad.example.com'
LDAP_PORT = 636

def get_all_sites(username, password):
    # Set up TLS configuration
    tls_configuration = Tls(validate=ssl.CERT_REQUIRED, version=ssl.PROTOCOL_TLSv1_2)

    # Connect to the LDAP server
    server = Server(LDAP_SERVER, port=LDAP_PORT, use_ssl=True, tls=tls_configuration, get_info=ALL)
    connection = Connection(server, user=username, password=password, authentication='SIMPLE', auto_bind=True)

    # Define the search base for sites
    search_base = 'CN=Sites,CN=Configuration,DC=example,DC=com'  # Update to match your domain's DN structure
    search_filter = '(objectClass=site)'  # Filter to find all site objects
    search_attributes = ['cn']  # We only need the common name (cn) of the sites

    # Perform the search
    connection.search(search_base, search_filter, SUBTREE, attributes=search_attributes)

    # Extract and return site names
    site_names = [entry['cn'].value for entry in connection.entries]
    return site_names

def print_site_names(site_names):
    if site_names:
        print("\nAD Sites:")
        for site in site_names:
            print(f"- {site}")
    else:
        print("No sites found in the domain.")

def main():
    # Prompt for username and password if not available in config.py
    username = USERNAME if USERNAME else input("Enter your LDAP username: ")
    password = PASSWORD if PASSWORD else getpass.getpass("Enter your LDAP password: ")

    site_names = get_all_sites(username, password)
    print_site_names(site_names)

if __name__ == "__main__":
    main()
package com.example;
import org.apache.kafka.clients.producer.KafkaProducer;
import org.apache.kafka.clients.producer.ProducerRecord;
import org.apache.kafka.clients.producer.ProducerConfig;
import org.apache.kafka.common.serialization.StringSerializer;
import java.io.InputStream;
import java.time.LocalDateTime;
import java.time.format.DateTimeFormatter;
import java.util.Properties;
public class SimpleKafkaProducer {
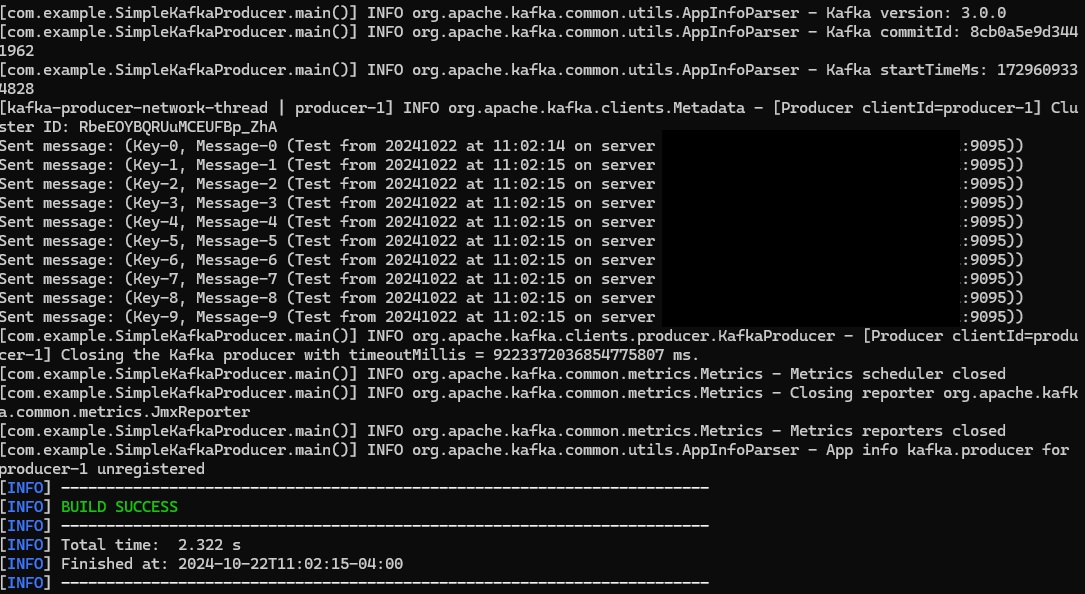
public static void main(String[] args) {
if (args.length < 2) {
System.err.println("Please provide Kafka server and port. Usage: SimpleKafkaProducer <kafka-server> <port>");
System.exit(1);
}
String kafkaHost = args[0];
String kafkaPort = args[1];
String kafkaServer = kafkaHost + ":" + kafkaPort;
String topicName = "LJRJavaTest";
String truststorePassword = "truststore-password";
Properties props = new Properties();
props.put(ProducerConfig.BOOTSTRAP_SERVERS_CONFIG, kafkaServer);
props.put(ProducerConfig.KEY_SERIALIZER_CLASS_CONFIG, StringSerializer.class.getName());
props.put(ProducerConfig.VALUE_SERIALIZER_CLASS_CONFIG, StringSerializer.class.getName());
// Load truststore from resources
try (InputStream truststoreStream = SimpleKafkaProducer.class.getResourceAsStream("/kafka.client.truststore.jks")) {
if (truststoreStream == null) {
throw new RuntimeException("Truststore not found in resources");
}
// Create a temporary file to hold the truststore
java.nio.file.Path tempTruststore = java.nio.file.Files.createTempFile("kafka.client.truststore", ".jks");
java.nio.file.Files.copy(truststoreStream, tempTruststore, java.nio.file.StandardCopyOption.REPLACE_EXISTING);
props.put("security.protocol", "SSL");
props.put("ssl.truststore.location", tempTruststore.toString());
props.put("ssl.truststore.password", truststorePassword);
KafkaProducer<String, String> producer = new KafkaProducer<>(props);
// Define the date-time formatter
DateTimeFormatter formatter = DateTimeFormatter.ofPattern("yyyyMMdd 'at' HH:mm:ss");
try {
for (int i = 0; i < 10; i++) {
String key = "Key-" + i;
// Get the current timestamp
String timestamp = LocalDateTime.now().format(formatter);
// Include the timestamp, Kafka host, and port in the message value
String value = String.format("Message-%d (Test from %s on server %s:%s)", i, timestamp, kafkaHost, kafkaPort);
ProducerRecord<String, String> record = new ProducerRecord<>(topicName, key, value);
producer.send(record);
System.out.println("Sent message: (" + key + ", " + value + ")");
}
} catch (Exception e) {
e.printStackTrace();
} finally {
producer.close();
}
} catch (Exception e) {
e.printStackTrace();
}
}
}
Consumer
package com.example;
import org.apache.kafka.clients.consumer.ConsumerConfig;
import org.apache.kafka.clients.consumer.ConsumerRecords;
import org.apache.kafka.clients.consumer.KafkaConsumer;
import org.apache.kafka.clients.consumer.ConsumerRecord;
import org.apache.kafka.common.serialization.StringDeserializer;
import java.io.InputStream;
import java.time.Duration;
import java.util.Collections;
import java.util.Properties;
public class SimpleKafkaConsumer {
public static void main(String[] args) {
if (args.length < 2) {
System.err.println("Please provide Kafka server and port. Usage: SimpleKafkaConsumer <kafka-server> <port>");
System.exit(1);
}
String kafkaServer = args[0] + ":" + args[1];
String topicName = "LJRJavaTest";
String groupId = "test-consumer-group";
String truststorePassword = "truststore-password";
Properties props = new Properties();
props.put(ConsumerConfig.BOOTSTRAP_SERVERS_CONFIG, kafkaServer);
props.put(ConsumerConfig.GROUP_ID_CONFIG, groupId);
props.put(ConsumerConfig.KEY_DESERIALIZER_CLASS_CONFIG, StringDeserializer.class.getName());
props.put(ConsumerConfig.VALUE_DESERIALIZER_CLASS_CONFIG, StringDeserializer.class.getName());
props.put(ConsumerConfig.AUTO_OFFSET_RESET_CONFIG, "earliest");
// Load truststore from resources
try (InputStream truststoreStream = SimpleKafkaConsumer.class.getResourceAsStream("/kafka.client.truststore.jks")) {
if (truststoreStream == null) {
throw new RuntimeException("Truststore not found in resources");
}
// Create a temporary file to hold the truststore
java.nio.file.Path tempTruststore = java.nio.file.Files.createTempFile("kafka.client.truststore", ".jks");
java.nio.file.Files.copy(truststoreStream, tempTruststore, java.nio.file.StandardCopyOption.REPLACE_EXISTING);
props.put("security.protocol", "SSL");
props.put("ssl.truststore.location", tempTruststore.toString());
props.put("ssl.truststore.password", truststorePassword);
KafkaConsumer<String, String> consumer = new KafkaConsumer<>(props);
consumer.subscribe(Collections.singletonList(topicName));
try {
while (true) {
ConsumerRecords<String, String> records = consumer.poll(Duration.ofMillis(100));
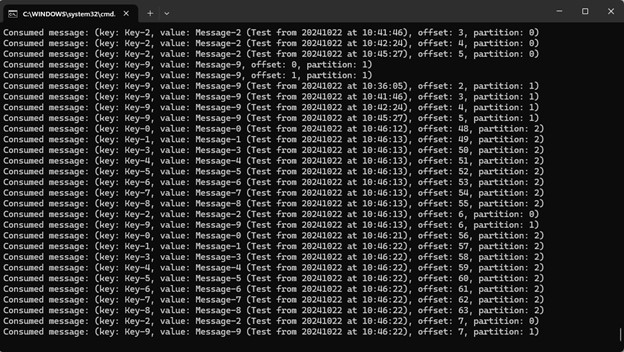
for (ConsumerRecord<String, String> record : records) {
System.out.printf("Consumed message: (key: %s, value: %s, offset: %d, partition: %d)%n",
record.key(), record.value(), record.offset(), record.partition());
}
}
} catch (Exception e) {
e.printStackTrace();
} finally {
consumer.close();
}
} catch (Exception e) {
e.printStackTrace();
}
}
}
Keystore for Trusts
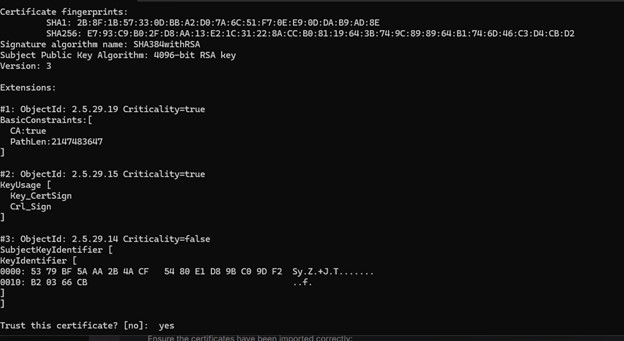
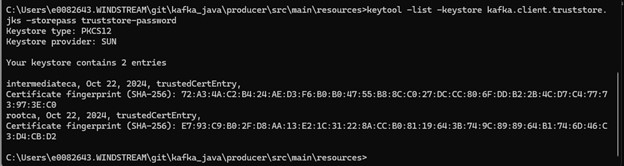
The cert on my Kafka server is signed by a CA that has both a root and intermediary signing certificate. To trust the chain, I need to populate rootCA.crt and intermediateCA.crt files with the correct base64 encoded public key and import both files into a new trust store:
I write a lot of things down to save myself time the next time I need to do the same sort of thing — and publish this to the Internet in case I can save someone else time too. But this one is so specific, I’m not sure it’s an “ever going to encounter this again” sort of thing. Just in case, though — I have device data being stored in redis — because the device doesn’t know its throughput values, you need the last time and last value paired with the current device metrics to calculate throughput. OK. But, sporadically, the cached data is updated insomuch as a new record is posted with a new timestamp. But the actual values, other than timestamp, remain unchanged. With millions of interfaces, it’s challenging to identify these situations by spot-checking the visualizations. Instead, I need to monitor redis and identify when the tstamp is updated but no other values change.
import redis
import time
import re
import json
import os

# Configuration
redis_host = 'redishost.example.net'
redis_port = 6379
redis_password = 'P@5sw0rDG03sH3r3'  # Replace with your Redis password
pattern = re.compile(r'INTERFACE_RAW_STATS_hostname\d\d\d\d_\d+_\d+')
output_file = 'changed_records.json'

# Connect to Redis
client = redis.StrictRedis(host=redis_host, port=redis_port, password=redis_password, decode_responses=True)

# Dictionary to track records
records = {}
matching_keys = []

def get_matching_keys():
    """
    Retrieve keys from Redis matching the specified pattern.

    Returns:
        list: A list of keys that match the pattern.
    """
    all_keys = client.keys()
    matching_keys = [key for key in all_keys if pattern.match(key)]
    return matching_keys

def process_keys():
    """
    Process Redis keys to track changes in data.

    Retrieves keys matching the pattern, gets their data using HGETALL,
    and tracks changes. If only the 'tstamp' field has changed and all
    other fields remain the same, the record is written to a file.
    """
    global records
    i = 0

    for key in matching_keys:
        i += 1
        data = client.hgetall(key)
        if i == 1 or i % 1000 == 0:
            print(f"Processed {i} records")

        if not data:
            continue

        collector_name = data.get('collectorName')
        node_id = data.get('nodeId')
        if_index = data.get('ifIndex')
        tstamp = data.get('tstamp')

        if not collector_name or not node_id or not if_index or not tstamp:
            continue

        unique_key = f"{collector_name}_{node_id}_{if_index}"

        if unique_key in records:
            previous_data = records[unique_key]
            if previous_data['tstamp'] != tstamp:
                # Check if all other values are the same
                if all(data[k] == previous_data[k] for k in data if k != 'tstamp'):
                    print(f"***** Record changed: {json.dumps(data, indent=2)} *****")
                    write_to_file(data)
            records[unique_key] = data  # Update the record
        else:
            records[unique_key] = data

def write_to_file(data):
    """
    Write the given data to a file.

    Args:
        data (dict): The data to write to the file.
    """
    with open(output_file, 'a') as file:
        file.write(json.dumps(data) + '\n')

if __name__ == "__main__":
    # Ensure the output file is empty at the start
    if os.path.exists(output_file):
        os.remove(output_file)

    # Retrieve the list of matching keys once
    matching_keys = get_matching_keys()

    while True:
        process_keys()
        print("Sleeping ... ")
        time.sleep(300)  # Sleep for 5 minutes
The Java application I recently inherited had a lot of … quirks. One of the strangest was that it calculated throughput statistics based on ‘start’ values in a cache that was only refreshed every four hours. So at a minute past the data refresh, the throughput is averaged out over that minute. At three hours and fifty nine minutes past the data refresh, the throughput is averaged out over three hours and fifty nine minutes. In the process of correcting this (reading directly from the cached data rather than using an in-memory copy of the cached data), I noticed that the running application paused a lot as the Kafka group was re-balanced.
Which is especially odd because I’ve got a stable number of clients in each consumer group. But pods restart occasionally, and there was nothing done to attempt to stabilize partition assignment.
Which was odd because Kafka has had mechanisms to reduce re-balancing — StickyAssignor added in 0.11
        // Set the partition assignment strategy to StickyAssignor
        config.put(ConsumerConfig.PARTITION_ASSIGNMENT_STRATEGY_CONFIG, "org.apache.kafka.clients.consumer.StickyAssignor");
And groupInstanceId in 2.3.0
        // Set the group instance ID
        String groupInstanceId = UUID.randomUUID().toString();
        config.put(ConsumerConfig.GROUP_INSTANCE_ID_CONFIG, groupInstanceId);
Now, I’m certain that a UUID isn’t the best way to go about crafting your group instance ID name … but it produces a “name” that isn’t likely to be duplicated. Since deploying this change, I went from seeing three or four re-balance operations an hour to zero.