Category: Office 365

Did you know … Teams can automatically record meetings you schedule?

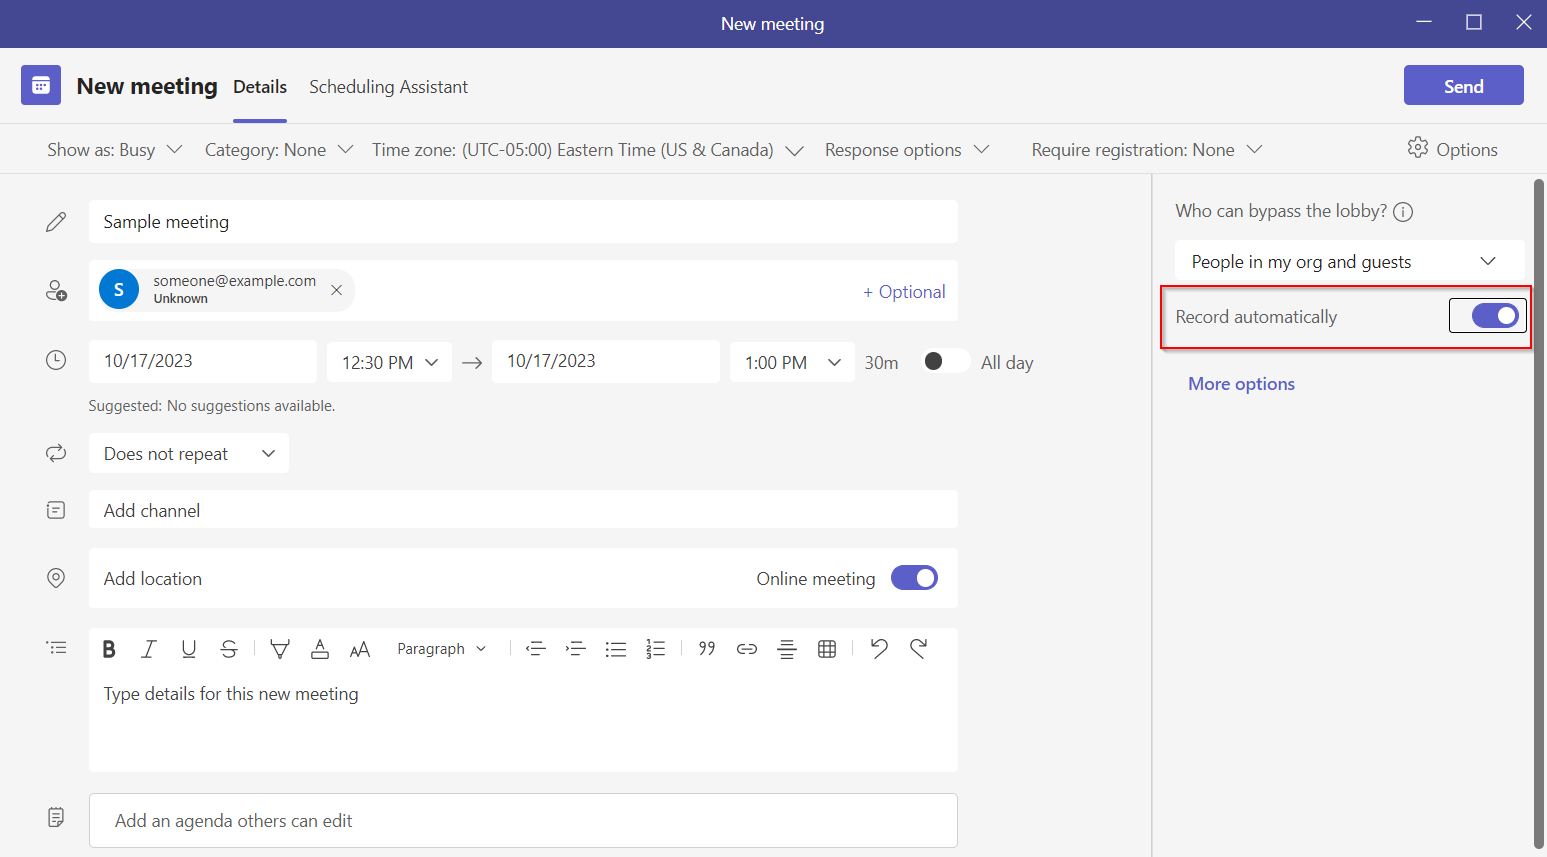
I don’t record all of my meetings — I probably don’t even record most of my meetings. But I schedule the occasional training session. And it really sucks when no one remembers to start recording … and we realize we missed the first fifteen minutes or so. Luckily, Teams has added an option to automatically record a meeting when it starts. No needing to remember to click record. No worrying that no one else thinks to kick off the recording if you are a bit late. When scheduling a meeting through Teams, there are a few settings on the right-hand side of the new meeting form. Simply toggle ‘Record automatically’ to on.


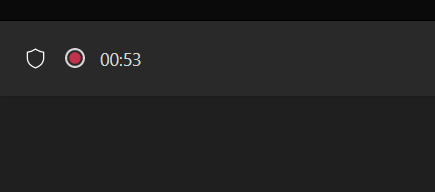
Voila — when I start the meeting, it immediately starts recording.

Creating an Azure DevOps Work Item From a Teams Message

You can use Power Automate to create an ADO work item (bug, user story, etc) when a user posts into specific Teams channel.

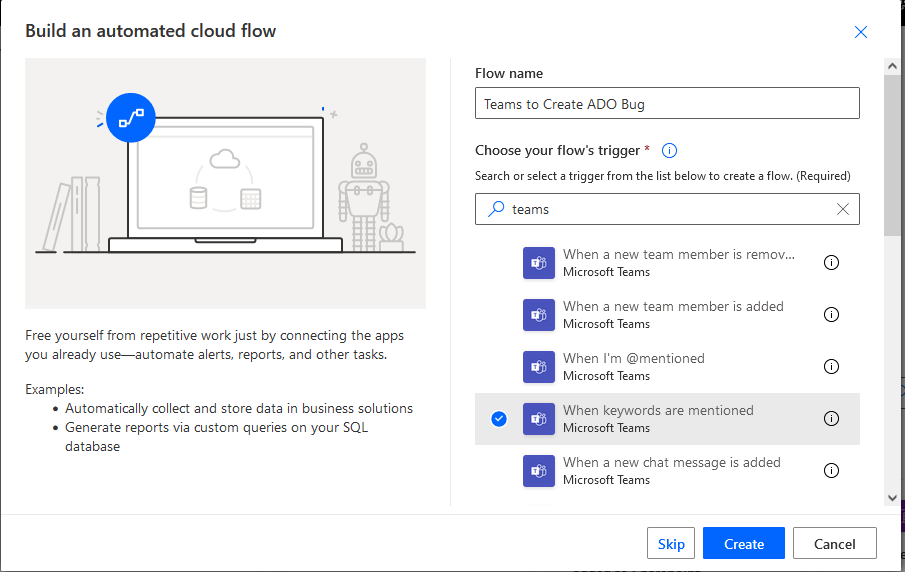
Log into Power Automate and create a new workflow. Find a Teams trigger that suits your need – in my case, I wanted to use a key word (you could even use different key words to create work items in different projects or with different content). Note that automation cycles accrue based on execution — so if you elect to link up to a busy Teams channel and filter for keywords to indicate you want an ADO item created, you may be “wasting” workflow cycles. In our case, I have a “user group” Teams space and set up a special channel where users can submit bug and feature requests. This means workflow cycles are accrued when someone specifically wishes to create an ADO item not when messages are posted into the user group’s general chat channels.

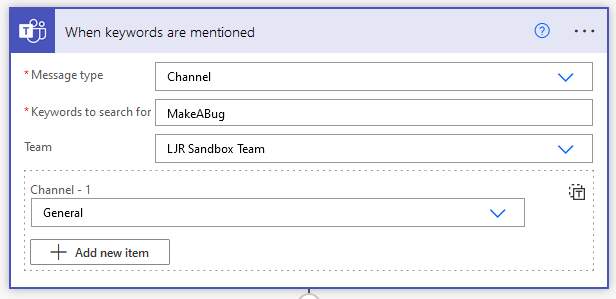
You can source messages from channels or group chats in the “Message type” selection. You cannot use hash-tags as key words! The workflow execution reports a gateway error. Select the Team and channel(s) that you want the workflow to monitor.

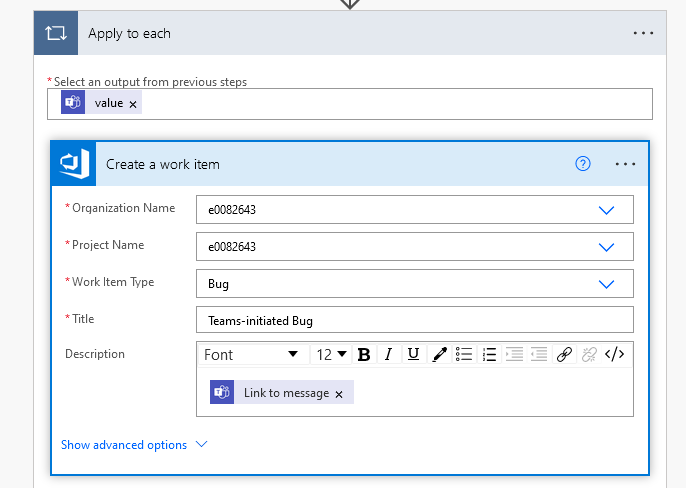
Add a new step to “create a work item” from Azure DevOps

Configure the project into which you want to create the work item – the organization and project name, the type of work item, and content of the work item.

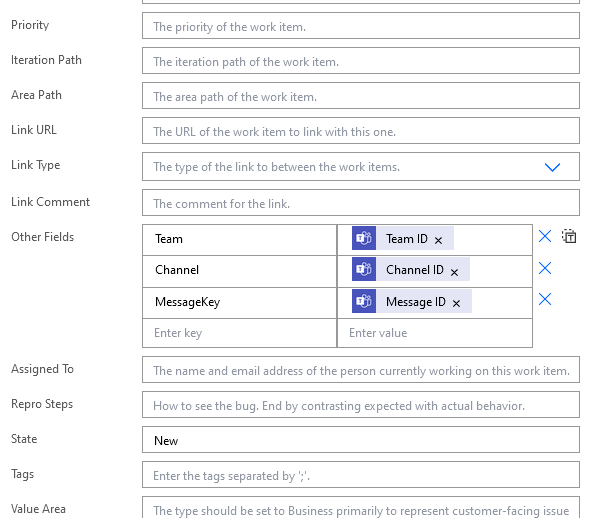
If you want to set priority, add an assignment, etc – click on “Show advanced options”. I added a few fields to provide a clue as to where the bug report came from.

Save the workflow and post a message in your channel with the key word. Go into the ADO project work items; your Teams-initiated bug should be there.


Using Excel to turn week of month and day of week into actual dates

Our patching schedules are algorithmic – the 1st Tuesday of the month, the 3rd Wednesday of the month, etc. But that’s not particularly useful for notifying end users or for us to verify functionality after patching.
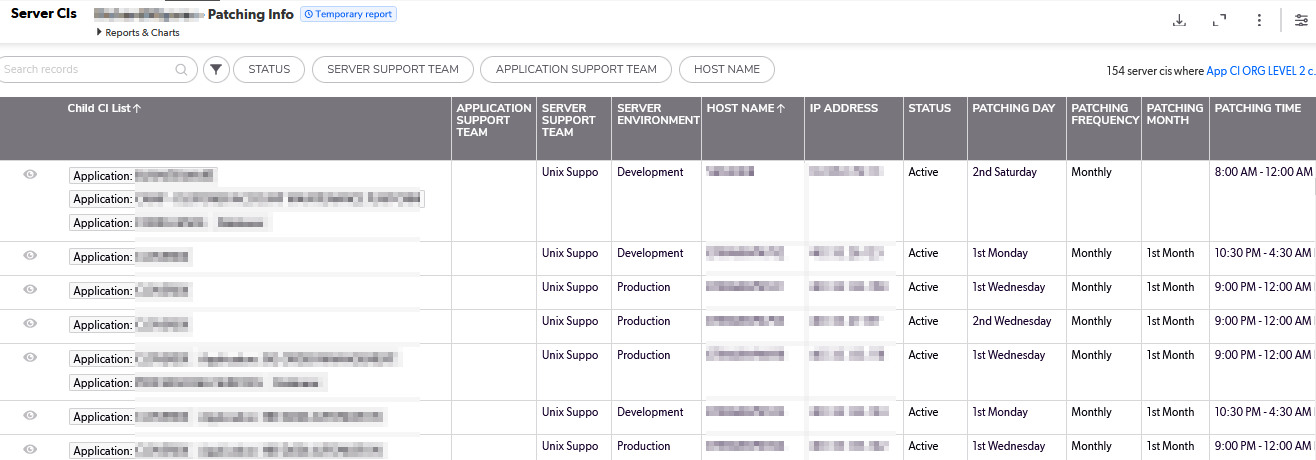
Graphical user interface, table Description automatically generated

Long term, I think we can pull the source data from a database and create appointment items each month for whatever list of servers will be patched that month based on a relative date (so no one has to add new servers or remove decommissioned servers). But, short term? I really wanted a way to see what date a server would be patched. So I created a but of a convoluted spreadsheet to produce this information based on a list of servers and patching schedule patterns.

There are two “extra” tabs used – “Dates” used to say what month and year I want the patching dates for
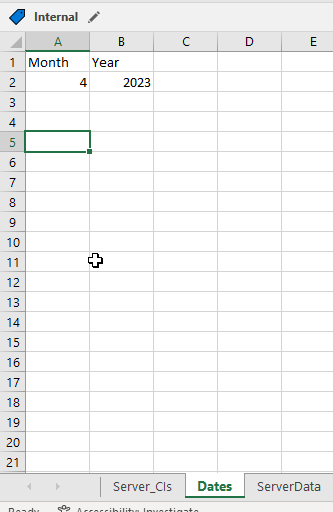
Graphical user interface, application, table, Excel Description automatically generated

And “ServerData” which provides a cross-reference between the server names and a useful description.
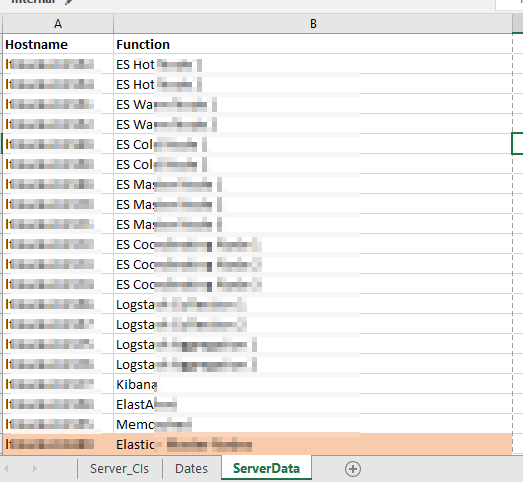
Graphical user interface, application, table, Excel Description automatically generated

There are then a series of formulae used to add columns to our source data. First, the “Function” is populated in column G with a VLOOKUP =VLOOKUP(B2,ServerData!A:B,2,FALSE)

Columns I and J break the “1st Saturday” into the two components – week of month and day of week –

I =LEFT(C2,3)
J =RIGHT(C2,LEN(C2)-4)

Columns K and L then map these components into numeric values I can use in a formula:

K =IF(I2=”1st”,1,IF(I2=”2nd”,2,IF(I2=”3rd”,3,IF(I2=”4th”,4,”Unscheduled”))))
L =IF(J2=”Sunday”,1,IF(J2=”Monday”,2,IF(J2=”Tuesday”,3,IF(J2=”Wednesday”,4,IF(J2=”Thursday”,5,IF(J2=”Friday”,6,IF(J2=”Saturday”,7,”Unscheduled”)))))))

And finally a formula in column H that turns the week of month and day of week values into an actual date within the month and year on the “Dates” tab:

H =DATE(Dates!$B$2,Dates!$A$2,1+7*K2)-WEEKDAY(DATE(Dates!$B$2,Dates!$A$2,8-L2))

Voila – I have a spreadsheet that says we should expect to see this specific list of servers being patched tonight.
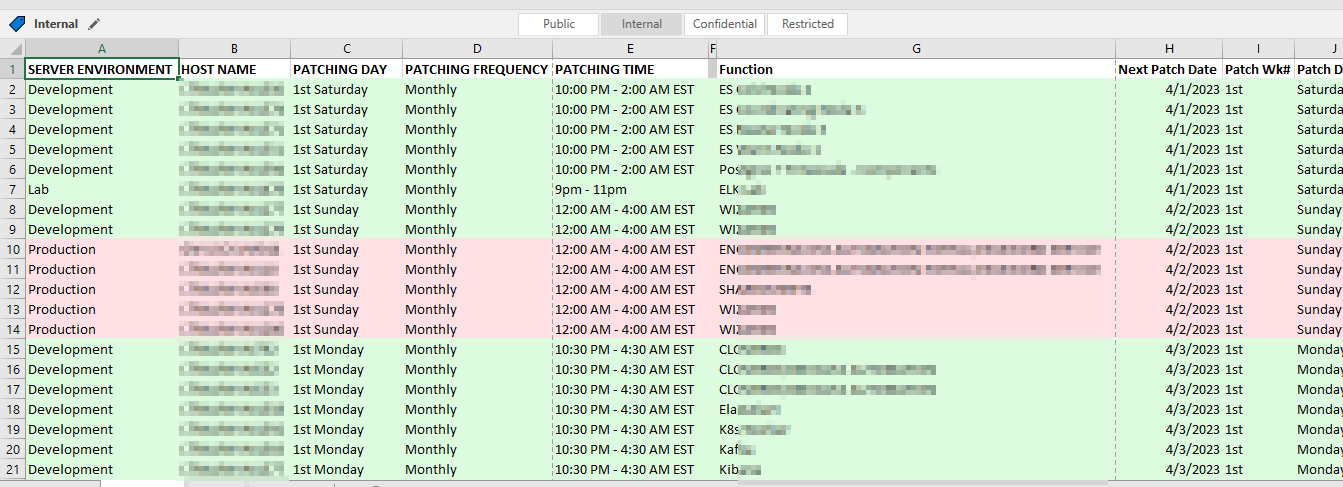
Graphical user interface, application, table, Excel Description automatically generated


Outlook Preferred Meeting Time

While this doesn’t address work days or conveniently highlight working and non-working hours when someone is checking free/busy … Microsoft does offer a way for individuals to publish their preferred working hours – so someone who lives in Mountain time but works 6AM-3PM to match their colleagues on the east coast can let us all know that they are keeping non-standard hours for their time zone.

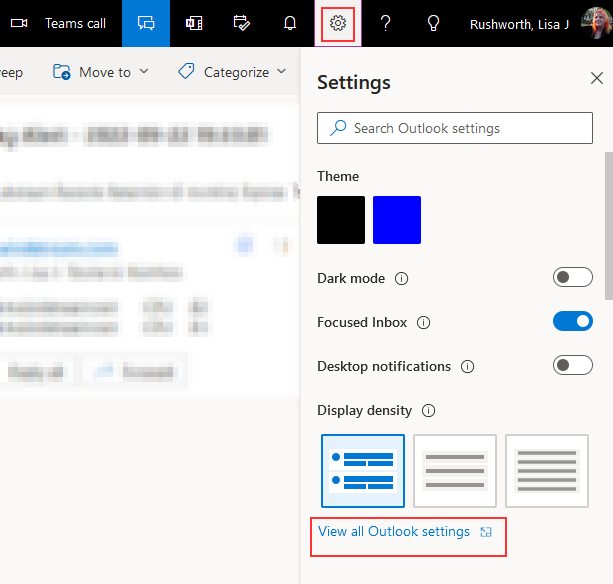
Logged in to OWA, select the “Settings” gear:

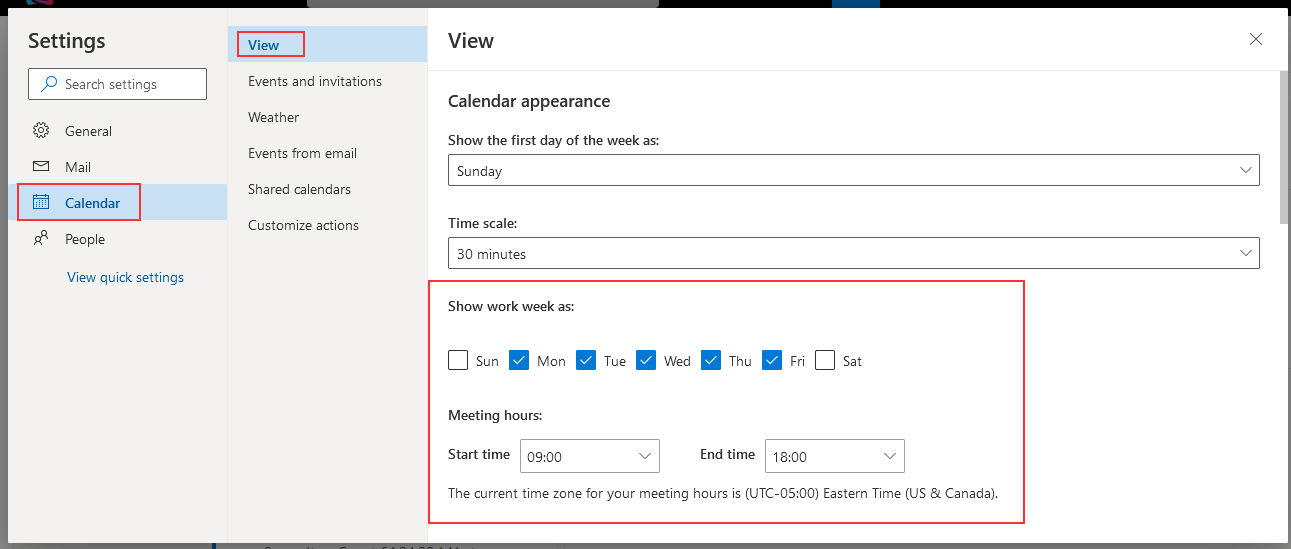
Select “Calendar” and then select “View” – there is a place to specify your “meeting hours”.

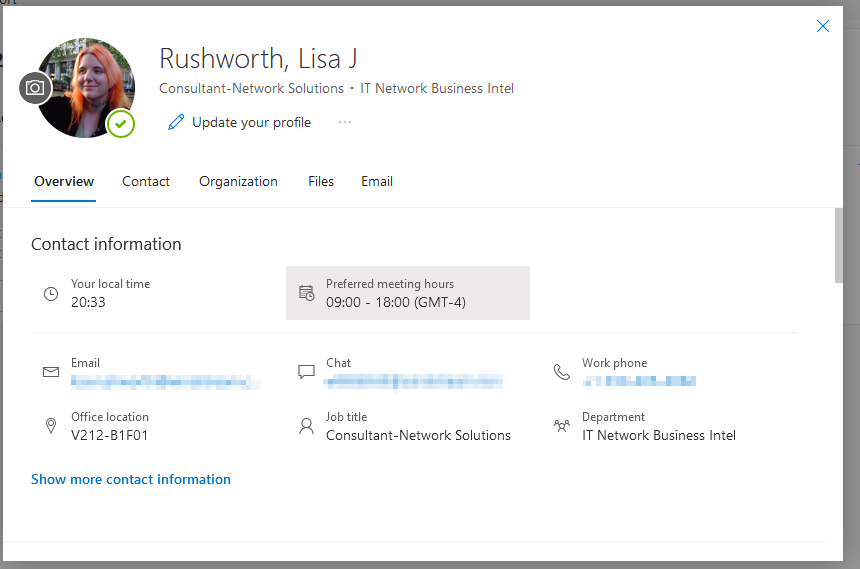
That data is used to populate “Preferred meeting hours” in your profile card:


Why doesn’t everyone do this — non-working hours clarification

I like that Microsoft has added “they are x hours behind you” to individual profiles, but that assumes people all work 8-5 in their local time. Which isn’t the case, so I’ve been introducing myself to new people that I need to engage in meetings including something like “I work in the Eastern time zone but am generally available until about 6PM Eastern if that’s better for you” & asking for a similar response from them. I know some people who live in the Central, Mountain, or Pacific time zones but work 8-5 Eastern. I know others who live in the same area work 9-6 or 11-8 Eastern. We have overseas contractors who work from 3:30 AM to 12:30 PM Eastern, and others who who start working around 10 AM.

Seems like it would make collaborating with others easier if we all had recurring appointments to clarify our non-working hours. A recurring each-weekday appointment like below — away so it doesn’t look like I’m just booked solid at dark-o-clock, recurring, and no reminder (because that would get super annoying). And maybe a recurring weekly one from whatever PM on Friday through whatever AM on Monday if there are a statistically significant of people who’d be working T-Sat or Sun-Thur.

Doesn’t really provide much value implemented in a small group – you generally get a good idea of when your immediate coworkers are working. But it would help a lot reaching out to other groups!


Did you know … you can chat with yourself in Teams?

I’ll admit it — I send myself emails. And text messages. And, back before smart phones, I sent myself voice messages too. That was one item where Teams was as step backwards — I had to make my own Teams space (with just me as a member!) in order to send myself notes here. But not anymore …
You can finally chat with yourself! Note that retention policies may be shorter in chats than Teams spaces … so you might still want to go the route of creating your own Teams space to ensure that note you send yourself for an end-of-the-year task or a list of accomplishments for your annual review are still around when you need them. But for quick notes so you remember something tomorrow (or next week, or three weeks from now), chatting with yourself is perfect for holding short-term reminders.


Did you know … Teams shows timezone offsets for individuals

Teams now shows the timezone offset and local time for individuals — because it’s always 2AM somewhere!

The contact card that comes up when you click on a user in Microsoft Teams now includes the current local time and time zone offset information for the individual — very useful to avoid ringing someone up at 2AM.

Reducing the Size of a PowerPoint File

Anya’s school work submission platform limits files to ten meg – when she embedded a dozen 3d images in a single presentation to create a seventy meg file? That was an easy fix – drop the 3d object down to a PNG. But her most recent presentation was just photos from the web, and it was just over the ten meg limit. Fortunately (or unfortunately in this case) the more recent Office document formats are already compressed … so you cannot just zip up the file to shrink it. We learned a quick way to reduce the size of a PowerPoint presentation.

Select one of the pictures in the presentation. On the “Picture Format” tab, find the “Compress Pictures” button.

If you know there is one really high-resolution picture (or a single picture where you cropped out most of it), selecting just that picture and leaving “apply only to this picture” checked makes sense. But, generally, I apply the compression to all images. Select a resolution that’s reasonable – we’ve used “Print” and reduced an eleven meg file to just over four meg. Using “Web” as the resolution reduced the file to just over a meg.


Exporting Microsoft Stream Transcripts with Timecode URLs

I’d created a couple of quick code snippets to export Microsoft Stream transcripts & someone asked if you could include a way for users to click on a hyperlink and pop into the video at the right spot for the line in the transcript they clicked. Seemed like a good idea — I’ve searched though my meeting transcript & now I want to see/hear that important part in the original video.

The method I’m using to grab the transcript text actually grabs a LOT of information that’s thrown into an object being called ‘t”:

I was only using t.eventData.text to build my transcript. What do you need in order to create a jump-to-this-timecode URL for a Stream video? I had no idea! Luckily, MS supplied an easy answer — if you share a video, one of the options is to start the video at a specific time. If you pass in “st” (which I assume stands for ‘start time’) and the number of seconds ( (17 * 60) + 39 = 1059, so the 17:39 from my video matches up with 1059 seconds in the st)

We still need the unique ID assigned to the video, but … I’m exporting the transcript from MS’s Stream site, which includes the ID in the URL. So I’m able to use window.location.href to get the URL, then strip everything past the ? … now I’ve got a way to create timecoded links to video content. I just need to glom that into the code I am using to export the transcript.

Question is … how to display it to the user? Clicking on a link for 1059 seconds doesn’t really mean anything. If I were doing this at work, I might pass the number of seconds through a “pretty time” function to convert that number of seconds back into hour:minute:second format so the user clicks on 17:39 … but, as a quick example, this builds hyperlinks with the integer number of seconds as text:

var strURL = window.location.href;
strURLBase = strURL.substring(0, strURL.indexOf('?'));

var arrayTranscriptionLines = window.angular.element(window.document.querySelectorAll('.transcript-list')).scope().$ctrl.transcriptLines.map((t) => { 
	var strTimecodeURL = '<a href="' + strURLBase + '?st=' + t.startSeconds + '">' + t.startSeconds + '</a>'
	return strTimecodeURL + "&nbps;&nbps;&nbps;&nbps;" + t.eventData.text;
});
console.log(arrayTranscriptionLines);

I might also just link the transcript text to the appropriate URL. Then clicking on the text “I want you to remember this” would jump you to the right place in the video where that line occurs:

var strURL = window.location.href;
strURLBase = strURL.substring(0, strURL.indexOf('?'));

var arrayTranscriptionLines = window.angular.element(window.document.querySelectorAll('.transcript-list')).scope().$ctrl.transcriptLines.map((t) => { 
	var strResult = '<a href="' + strURLBase + '?st=' + t.startSeconds + '">' + t.eventData.text + '</a>'
	return strResult;
});
console.log(arrayTranscriptionLines);

And we’ve got hyperlinked text that jumps to the right spot: