Category: Office 365

Excel – Including Current Date In String

Here’s a trick to include the current date in an Excel string — especially useful if you want to include the current date on a graph without having to actually type the current date each time. If you just include TODAY(), you get the integer representation. Wrap TODAY() in TEXT() and supply the formatting you want (“yyyy-mm-dd” in my example). Voila, a date like 2020-03-22 instead of 43912.

Office 365 Feature Scale-back

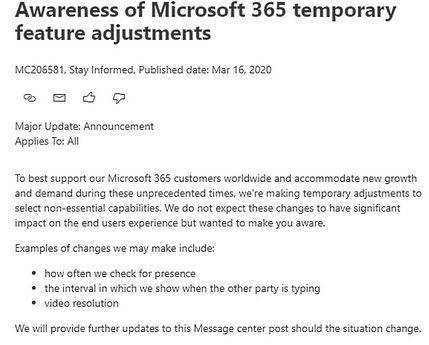
Microsoft is adjusting some non-core features to save capacity while the number of remote workers increased dramatically. This won’t impact core services (signing on, viewing/sending messages, uploading/downloading files), but don’t be concerned if you’re getting replies where the person seemingly didn’t type, presence updates seem slow, avatars aren’t showing up next to someone’s name (or yours in the upper right-hand corner of Teams), etc.

Adding member to MS Teams without admin rights or Graph API

# To run on Linux, you need the preview mode of AzureAD
# Register-PackageSource -Trusted -ProviderName ‘PowerShellGet’ -Name ‘Posh Test Gallery’ -Location https://www.poshtestgallery.com/api/v2/
# Install-Module -Name AzureAD.Standard.Preview

# Windows, the module is
# Install-Module -Name AzureAD

# I’m lazy and just typed my creds for a proof of concept; real implementation would use the SecureString thing in the connect-azuread. See:
# https://www.rushworth.us/lisa/?p=3294
connect-azuread

# Get the object ID for the group and the user
$objMyGroup = get-azureadgroup -SearchString “LJR Sandbox Team”
$objNewMember = get-azureaduser -searchstring “NewGuy”

# Add the user to the group
add-azureadgroupmember -ObjectID $objMyGroup.ObjectId -RefObjectID $objNewMember.ObjectId

Excel – Setting a Cell Value Based on Background Color

I need to programmatically parse an Excel file where items are grouped with arbitrary group sizes. We don’t want the person filling out the spreadsheet to need to fill in a group # column … so I’m exploring ways to read cell formatting so something like color can be used to show the groups. Reading the formatting isn’t a straight-forward process, so I wondered if Excel could populate a group number cell based on the cell’s attributes.

While it is possible, it’s not a viable solution. The mechanism to access data about a cell cannot be accessed directly and, unfortunately, requires a macro-enabled workbook. The mechanism also requires the user to remember to update the spreadsheet calculations when they have finished colorizing the rows. While I won’t be using this approach in my current project … I thought I’d record what I did for future reference.

We need to define a ‘name’ for the function. On the “Formulas” tab, select “Name Manager”.

Select ‘New’

Provide a name – I am using getBackgroundColor – and put the following in the “refers to” section: =GET.CELL(63,INDIRECT(“rc”,FALSE))

Now we can use this name within the cell formula:

Select the rows for your first group and change the “fill color” of the row.

Repeat this process to colorize all of your groups – you can re-use a color as long as adjacent groups have different colors. Notice that the “ColorGroup” values do not change when you colorize your groups.

On the “Forumlas” tab, select “Calculate Now”

Now the colorized cells will have a non-zero value.

Microsoft Teams Meeting Notes

The trick to understanding this is knowing that “Meeting Notes” are, for some reason, Wiki pages and not OneNote documents. There are two types of meetings — those held in a Teams channel and those held outside of a channel — and the ability to get a useful link to the Meeting Notes depends on which type of meeting you have.

Meetings in a Teams Channel:

When your meeting is in a Teams channel, you can use the ellipsis to grab a link to the Meeting Notes location in Microsoft Teams.

This link points to the “Meeting Notes” tab created in the channel. That tab is available without a link, too — so I can access the meeting notes just by going to the channel where the meeting was held.

Meetings Outside of a Teams Channel:

The meeting notes wiki file is stored in your OneDrive. You can find that file by searching your OneDrive for the name of the meeting. In this example, I have a meeting titled “Super Important”. You can right-click on this and select “copy link” to grab a link to the file.

The problem is that it’s an MHT (basically a self contained web page) file. I can give you a link to the file, but it’s not a convenient link to a OneNote page like you’d expect. For some reason, Chrome wants to save it as an EML (email) so the file opens in Outlook (or change the extension to MHT manually). Firefox keeps the MHT extension, and the file opens up in a browser so you can view the notes.


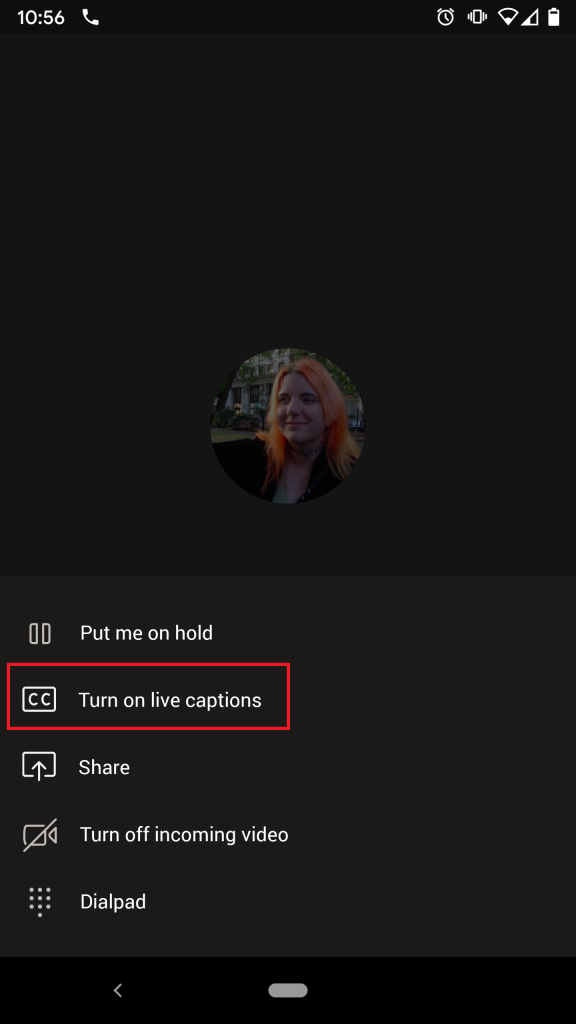
Did you know … Teams meetings now include closed captioning?

When you record a Teams meeting, Stream can generate a transcript of the meeting. Great for making meeting minutes or creating searchable content from meetings. But it doesn’t help someone who doesn’t here so well *participate* in the call. And the attendee at a noisy aeroport? They’re stuck waiting for the transcript to be generated. Microsoft had demonstrated a few new meeting features earlier in the year — background replacement and live captioning. While I still cannot drop the company logo behind me … live captioning has started to show up in tenants. This is currently in preview — which means you may encounter glitches. Instead of waiting for a transcript to be generated for a recorded meeting, live captions provide real-time on-screen transcription.

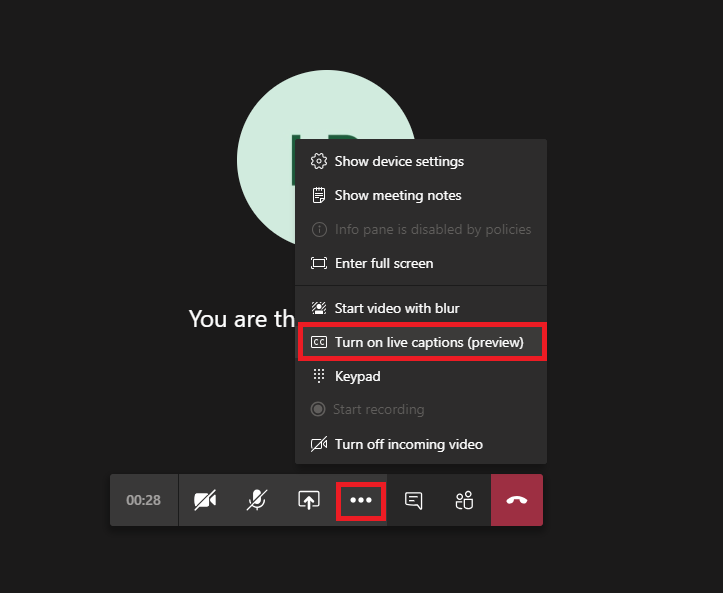
To turn on live captioning, click the ellipsis in the call control bar and select “Turn on live captions”.

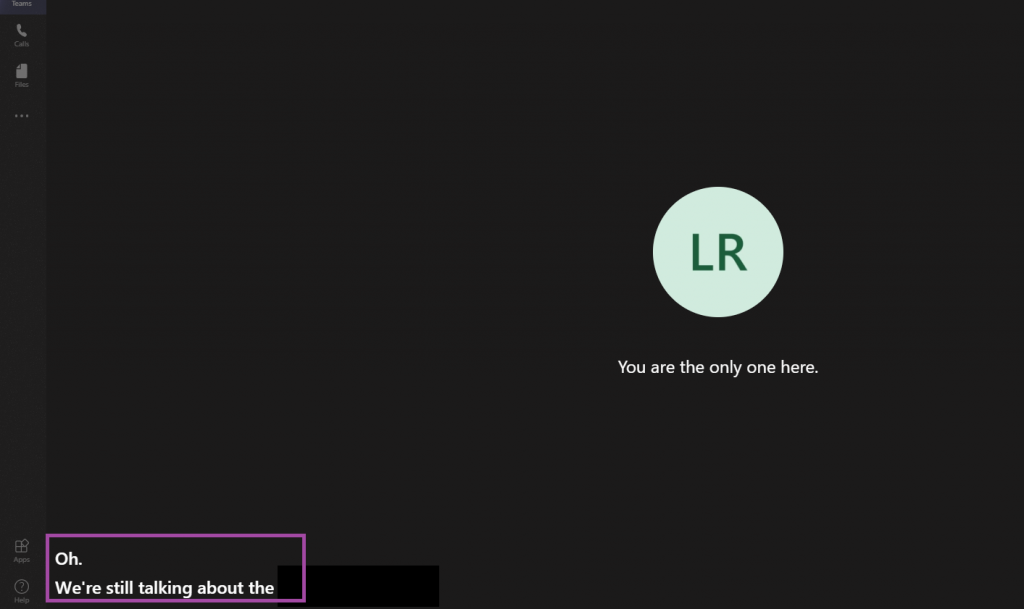
A real-time transcript will appear in the lower left-hand corner of the screen. The text is large and easily read — at least on my desktop.

Their transcription engine picks up random background noise as interjections — the “oh” in my test, of instance, wasn’t actually uttered. Participating in a discussion with esoteric terms might yield a lot of mis-transcriptions. But it did a decent job with Z-Wave, DSLAM, and antidisestablishmentarianism.

Did you know you can control who can present during a Teams Meeting?

Did you know you can control who can present during a Teams Meeting? As of Dec 2019, you can!

There were a few cool Teams features that, when used inappropriately, disrupt the meeting. Anyone can mute other attendees — great when I notice someone is taking another call and can mute them; not great if I accidentally mute the presenter. Anyone can share their screen — great when we’re taking turns showing something and don’t need to transfer control; not great when you accidentally share your screen in the middle of someone’s presentation. And this occurs during meetings among respectful, professional business associates. The amount of control individual meeting participants get invite goofing off (while you can tell who just took over presenting, you cannot tell who just muted you for the seventh time).

Microsoft has introduced “roles” for meetings. As the meeting organizer, you can establish who has what role. By default (i.e. when you don’t define any roles), everyone can do everything. But, after you create the meeting, you can edit it and select “Meeting Options”

Two options will be presented — you can control who can bypass the lobby (avoid having external parties waiting if you anticipate their attendance) and define who can present. The terminology is a bit odd here, but this is the selection that defines who has what roles within a meeting.

As the person who scheduled the meeting, you are the organizer — you can elect to only allow yourself to present. If you select to allow “Specific people” or “People in my organization” to present, they are assigned the “presenter” role. Everyone else is an “attendee”. What can a presenter or attendee do? Consult the MS documentation for a complete list. The big ones, though … an attendee cannot share their screen. The option is grayed out, and they’ll be advised that only organizers and presenters can share.

Attendees cannot start or stop recording — the option, again, is grayed out.

And attendees cannot mute or unmute anyone through the participant listing. This means they cannot mute someone else — the microphone icon will disappear when they put their mouse over it. But it also means they cannot mute or unmute themselves here. They will need to use the meeting control bar to mute or unmute.

What if you’ve restricted someone as an attendee and need them to share their screen? You can modify their role in the participant listing — mouse over their listing and use the ellipsis to select “More options” and select “Make presenter” (or, if you wish to demote a presenter to attendee status, select “Make attendee”).


Exchange Mail & Calendar In Teams (duct tape approach, not official MS solution)

The Exchange web client renders in the Teams website tab now – Chrome and Chromium-based Edge. I use the nightly build of FireFox and it says ‘Blocked by X-Frame-Options Policy’

This isn’t a way to get new mail notifications in Teams – you’ve got to click over to the tab. But it does let you send a quick message without leaving Teams.

It’s a little inconvenient, though, to have to navigate over to the right channel to find the website tab. You can also create a custom Teams application to access the Exchange website. That’s a little more complicated, but you basically need a manifest.json with static tabs to the inbox and calendar.

Install and open “App Studio” in Teams. Create a new app. Fill in the details — use the generate button to get an app ID. Since you’re not going to publish the app to the Microsoft app store, the info you use isn’t super important … the privacy and terms of use, specifically, aren’t something anyone is going to read.

And

In the “Capabilities” section, add a personal tab

Add a tab for the mailbox:

If you wish, add a tab for the calendar – I prefer the weekly view, but you can replace “week” with “workweek”, “day”, or “month”.

In the “Test and Distribute”, click “Download”.

You’ll get a zip file that you can side-load (i.e. it’s not an app published across the company). In “Apps”, select “Upload a custom app”

Locate the downloaded ZIP file and open it

Verify that your app looks right – the permissions are base permissions for all apps (we didn’t add anything special)

Click “Add” and you’ll be able to select the new app from the ellipses in Teams.

And you’ll have an app that can access your mailbox

Or a week view of your calendar