When you wanted to use an image as the background for a document, you often needed an image editor to lighten the picture – the image was too dark for dark text to be legible but too light for white text. Or you’d compose your PowerPoint slide with the image in one frame and the text in another.
Did you know, in the latest Office 365 Update, Microsoft added a feature that allows you to create faded background images within Word, PowerPoint, Excel, and Outlook? Within one of these programs, insert a picture into your work. Select the image. From the Picture Tools Format ribbon, click on Transparency
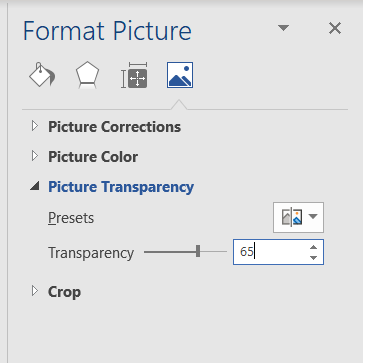
You can select one of the pre-set transparency levels or click on “Picture Transparency Options …” for finer control of the transparency level.
Move the slider (or type a number) to adjust the transparency level – 100% is invisible, 0% is the original image.
Voila – you’ve got a background image and legible text.
There are a lot of other image effects available – the vignette is the “soft edge oval” from the “Picture Styles” section of the ribbon bar. Many of the effects I’ve traditionally used Photoshop or Gimp to apply are also available in the “Adjust” section, so click around and check it out!


