I often need to quickly see if a cert is going to expire — I’ve got nice monitoring scripts too, but something that I can run from the command line right now
echo -n Q | openssl s_client -connect $HOST:$PORT | openssl x509 -noout -dates
I often need to quickly see if a cert is going to expire — I’ve got nice monitoring scripts too, but something that I can run from the command line right now
echo -n Q | openssl s_client -connect $HOST:$PORT | openssl x509 -noout -dates
While Tableau doesn’t have anything nice like a ‘dumpster’ from which you can restore a deleted workbook, it does at least keep tables for historic events like workbook deletion. The following query finds records where a workbook with FOOBAR in its name was deleted. It lists all of the event info as well as info on the user who deleted it. Near as I can tell, the “created” date for the historical_events table is the date the workbook was deleted (from my restore, I know the workbook itself was created last year!)
SELECT historical_events.*, hist_workbooks.*, hist_users.*
FROM historical_events
left outer join historical_event_types on historical_event_types.type_id = historical_events.historical_event_type_id
left outer join hist_workbooks on hist_workbooks.id = historical_events.hist_workbook_id
left outer join hist_users on hist_users.id = historical_events.hist_actor_user_id
WHERE historical_event_types.name = 'Delete Workbook'
and hist_workbooks.name like '%FOOBAR%'
;
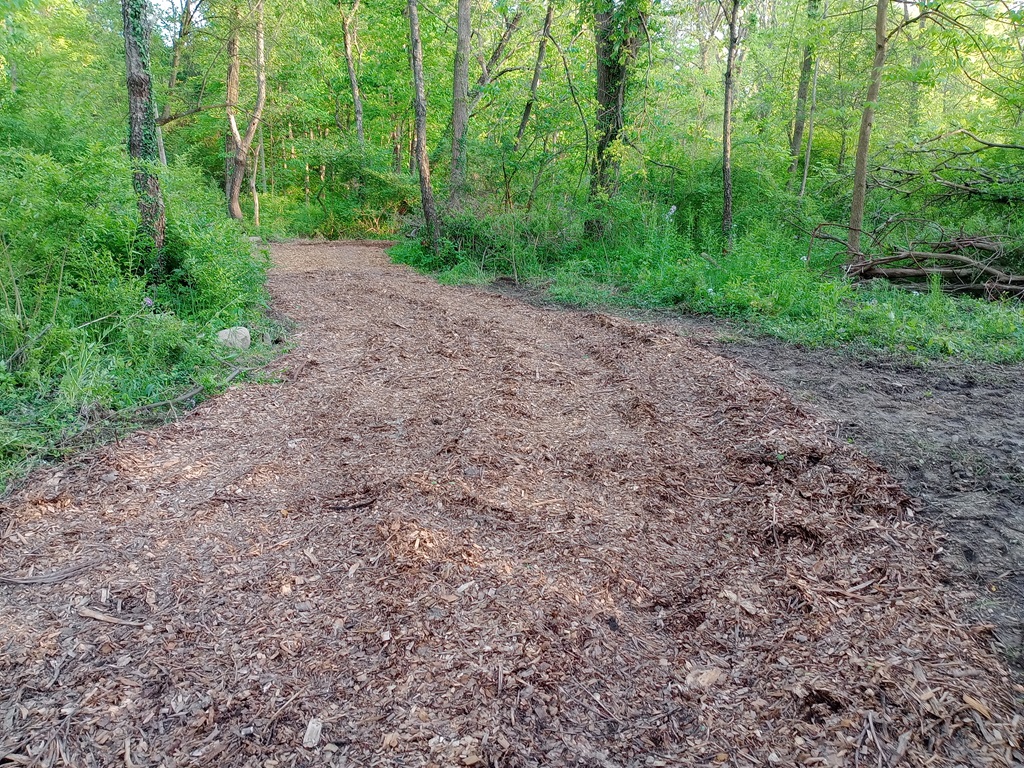
Start of the access path — there’s an old apple tree to the right
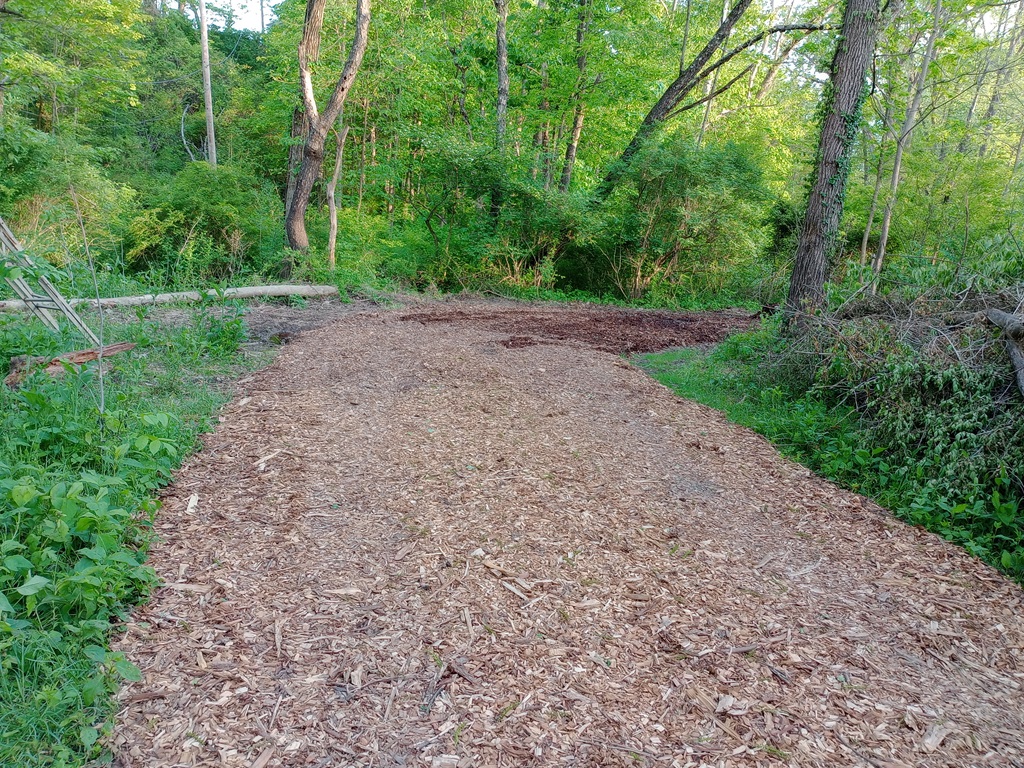
Down the path to the midway point of the wood chips — we’re continuing around the bend to level the ground and lay more chips.
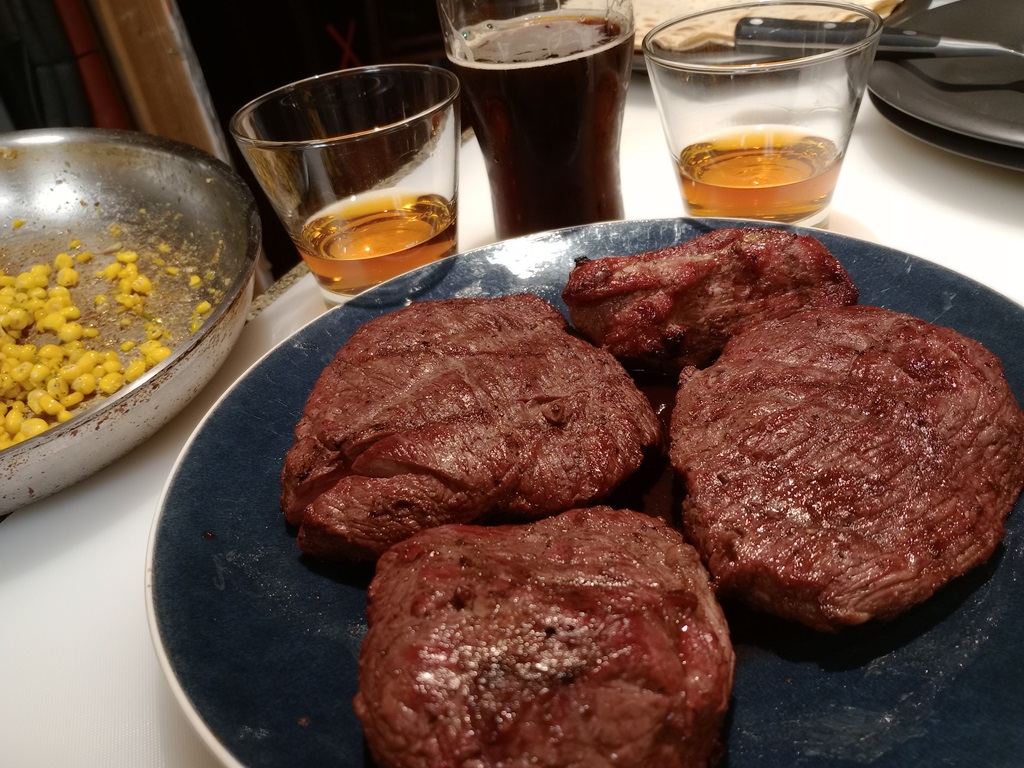
For Mother’s Day, we grilled lamb steaks. Anya made a garlic sauteed corn, and we had some cherry whiskey (since there was cherry wood in the wood fire … figured that would match). Quick salt and pepper on the steaks, then seared over the fire and cooked for about 20 minutes. Rested inside, and we had a delicious meal.
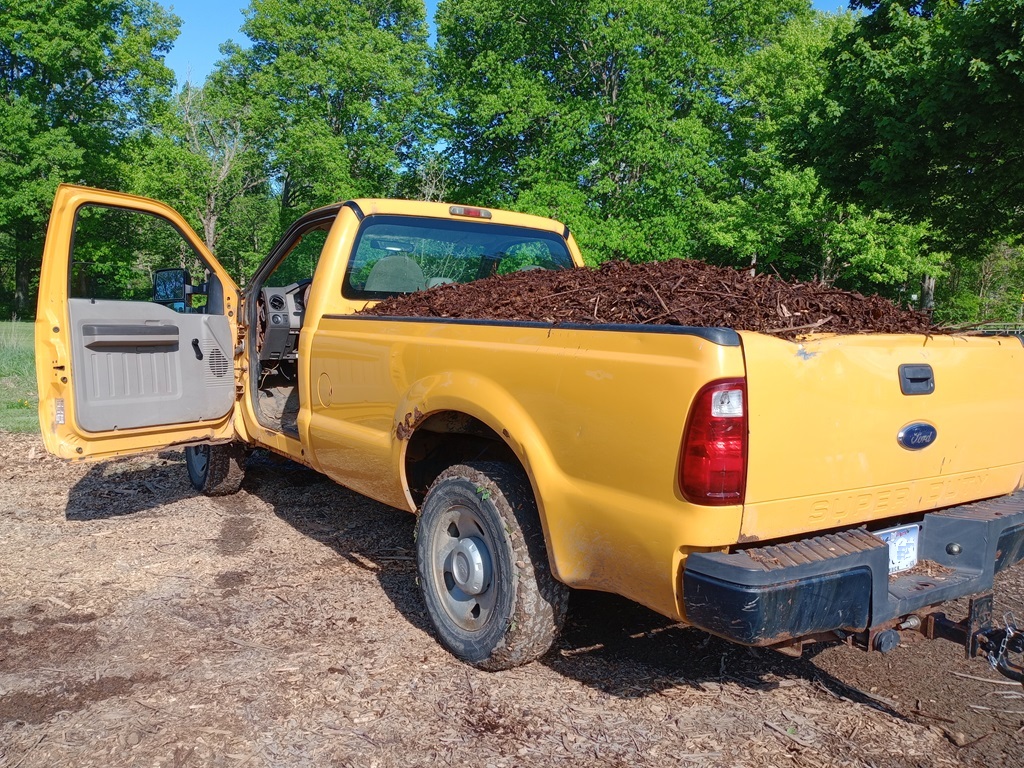
The seemingly endless supply of wood chips … isn’t
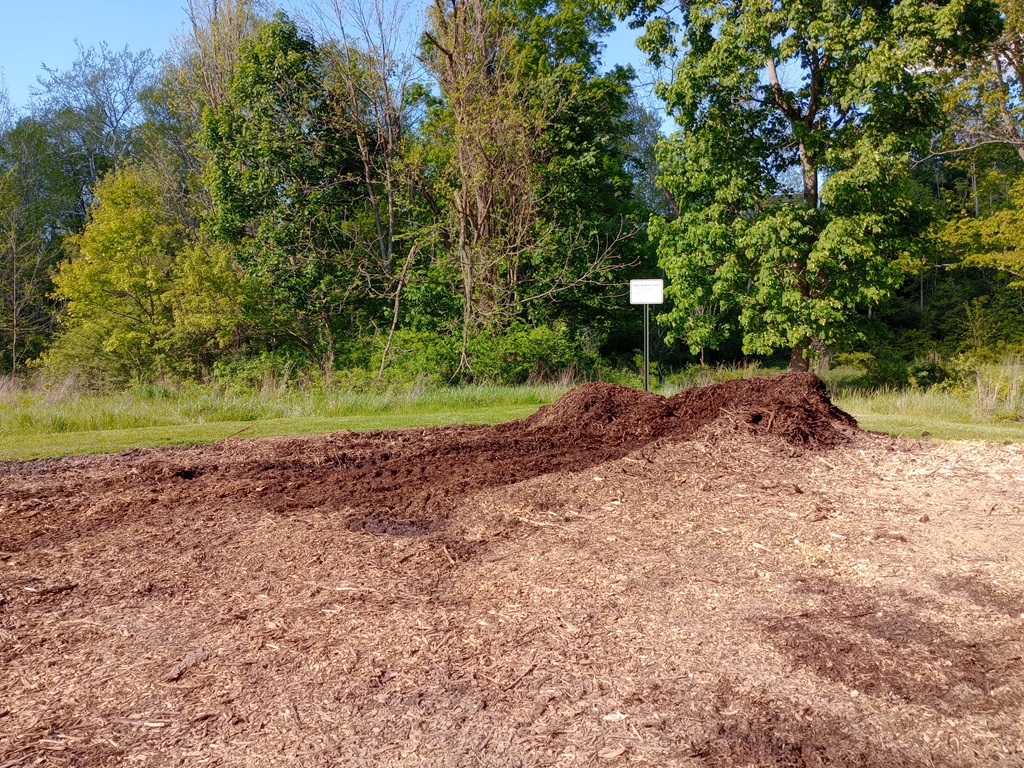
Especially when you grab a couple of truck loads
A very, very long time ago (2002-ish), we moved to using AD to store our Oracle connections — it’s far easier to edit the one connection entry in Active Directory than to distribute the latest connection file to every desktop and server in the company. Frankly, they never get to the servers. Individuals enter the connections they need … and update them when something stops working and they find the new host/port/etc. Unfortunately, Oracle used an anonymous connection to retrieve the data. So we’ve had anonymous binds enabled in Active Directory ever since. I no longer support AD, so haven’t really kept up with it … until a coworker asked why this huge security vulnerability was specifically configured for our domain. And I gave him the whole history. While we were chatting, a quick search revealed that Oracle 21c and later clients actually can use a wallet for credentials in the sqlnet.ora file:
MES.LDAP_AUTHENTICATE_BIND = TRUE
NAMES.LDAP_AUTHENTICATE_BIND_METHOD = LDAPS_SIMPLE_AUTH
WALLET_LOCATION = (SOURCE = (METHOD = FILE)
(METHOD_DATA = (DIRECTORY = /path/to/wallet.file) )
From https://www.oracle.com/a/otn/docs/database/oracle-net-active-directory-naming.pdf
I had clothes drying on the line, and Anya grabbed them just before sunset. She quickly tossed everything into a basket and brought it into the house. A short time later, I got the clothes out of the basket to fold. I took out a pair of Scott’s jeans and … out flies this little bird! No idea how she got in there, and I’m really glad she didn’t seem to be hurt in any way. We turned off all the interior lights, opened the front door, and turned out the outside light. A little following her around and trying to persuade her to go in the right direction and swoop, she flew outside.

RedHat is phasing out ZFS – there are several reasons for this move, but primarily ZFS is a closed source Solaris (now Oracle) codebase. While OpenZFS exists, it’s not quite ‘the same’. RedHat’s preferred solution is Virtual Data Optimizer (VDO). This page walks through the process of installing PostgreSQL and creating a database cluster on VDO and installing TimescaleDB extension on the database cluster for RedHat Enterprise 8 (RHEL8)
Before we create a VDO disk, we need to install it
yum install vdo kmod-kvdo |
Then we need to create a vdo – here a VDO named ‘PGData’ is created on /dev/sdb – a 9TB volume on which we will hold 16TB
vdo create --name=PGData --device=/dev/sdb --vdoLogicalSize=16T |
Check to verify that the object was created – it is /dev/mapper/PGData in this instance
vdo list |
Now format the volume using xfs.
mkfs.xfs /dev/mapper/PGData |
And finally add a mount point
# Create the mount point foldermkdir /pgpool# Update fstab to mount the new volume to that mount pintcat /etc/fstab/dev/mapper/PGData /pgpool xfs defaults,x-systemd.requires=vdo.service 0 0# Load the updated fstabsystemctl daemon-reload# and mount the volumemount -a |
it should be mounted at ‘/pgpool/’
The main reason for using VDO with Postgres is because of its compression feature – this is automatically enabled, although we may need to tweak settings as we test it.
We now have a place in our pool where we want our Postgres database to store its data. So let’s go ahead and install PostgreSQL,
here we are using RHEL8 and installing PostgreSQL 12
# Install the repository RPM:dnf install -y https://download.postgresql.org/pub/repos/yum/reporpms/EL-8-x86_64/pgdg-redhat-repo-latest.noarch.rpmdnf clean all# Disable the built-in PostgreSQL module:dnf -qy module disable postgresql# Install PostgreSQL:dnf install -y postgresql12-server |
Once the installation is done we need to initiate the database cluster and start the server . Since we want our Postgres to store data in our VDO volume we need to initialize it into our custom directory, we can do that in many ways,
In all cases we need to make sure that the mount point of our zpool i.e., ‘/pgpool/pgdata/’ is owned by the ‘postgres’ user which is created when we install PostgreSQL. We can do that by running the below command before running below steps for starting the postgres server
mkdir /pgpool/pgdatachown -R postgres:postgres /pgpool |
Customize the systemd service by editing the postgresql-12 unit file and updateding the PGDATA environment variable
vdotest-uos:pgpool # grep Environment /usr/lib/systemd/system/postgresql-12.service# Note: avoid inserting whitespace in these Environment= lines, or you mayEnvironment=PGDATA=/pgpool/pgdata |
and then initialize, enable and start our server as below
/usr/pgsql-12/bin/postgresql-12-setup initdbsystemctl enable postgresql-12systemctl start postgresql-12 |
Here ‘/usr/pgsql-12/bin/’ is the bin directory of postgres installation you can substitute it with your bin directory path.
or
We can also directly give the data directory value while initializing db using below command
/usr/pgsql-12/bin/initdb -D /pgpool/pgdata/ |
and then start the server using
systemctl start postgresql-12 |
Now we have installed postgreSQL and started the server, we will install the Timescale extension for Postgres now.
add the time scale repo with below command
tee /etc/yum.repos.d/timescale_timescaledb.repo <<EOL[timescale_timescaledb]name=timescale_timescaledbbaseurl=https://packagecloud.io/timescale/timescaledb/el/8/\$basearchrepo_gpgcheck=1gpgcheck=0enabled=1gpgkey=https://packagecloud.io/timescale/timescaledb/gpgkeysslverify=1sslcacert=/etc/pki/tls/certs/ca-bundle.crtmetadata_expire=300EOLsudo yum update -y |
then install it using below command
yum install -y timescaledb-postgresql-12 |
After installing we need to add ‘timescale’ to shared_preload_libraries in our postgresql.conf, Timescale gives us ‘timescaledb-tune‘ which can be used for this and also configuring different settings for our database. Since we initialize our PG database cluster in a custom location we need to point the direction of postgresql.conf to timescaledb-tune it also requires a path to our pg_config file we can do both by following command.
timescaledb-tune --pg-config=/usr/pgsql-12/bin/pg_config --conf-path=/pgpool/pgdata/postgresql.conf |
After running above command we need to restart our Postgres server, we can do that by one of the below commands
systemctl restart postgresql-12 |
After restarting using one of the above commands connect to the database you want to use Timescale hypertables in and run below statement to load Timescale extension
CREATE EXTENSION IF NOT EXISTS timescaledb CASCADE; |
you can check if Timescale is loaded by passing ‘\dx’ command to psql which will load the extension list.
in order to configure PostgreSQL to allow remote connection we need to do couple of changes as below
DNF provides both a history using using dnf history list

And a history for a specific package using dnf history list packagename

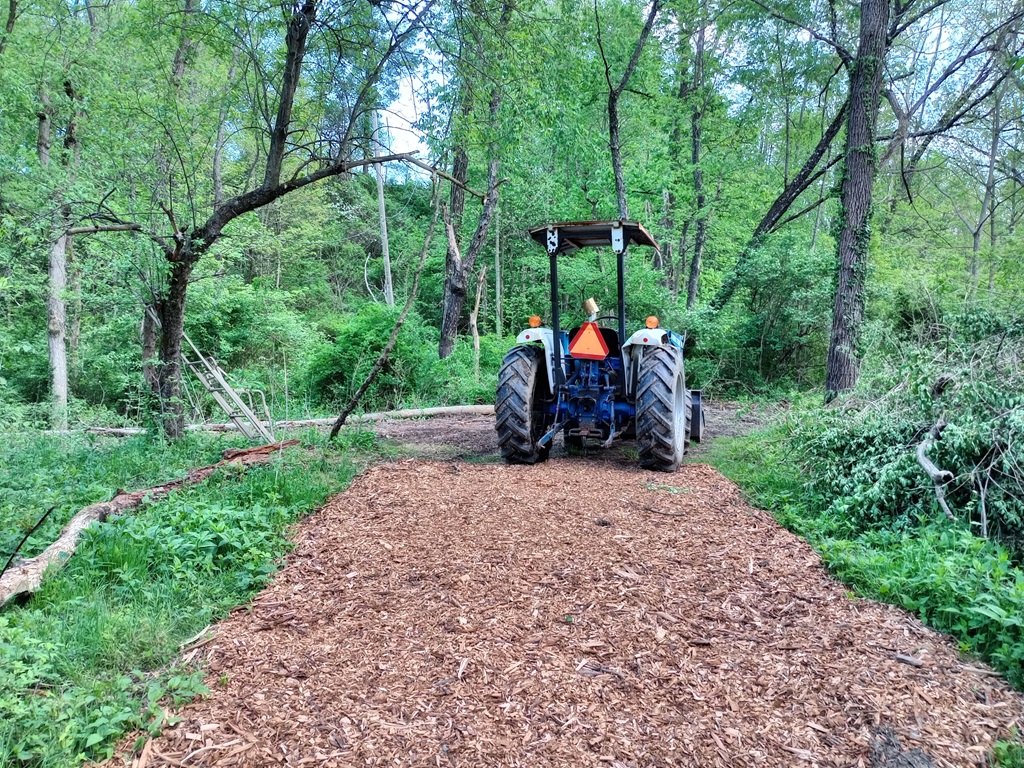
We’re leveling more and ready for more chips — running the tractor over the bed of wood chips compacts them really well!
Then we were ready to dump some more
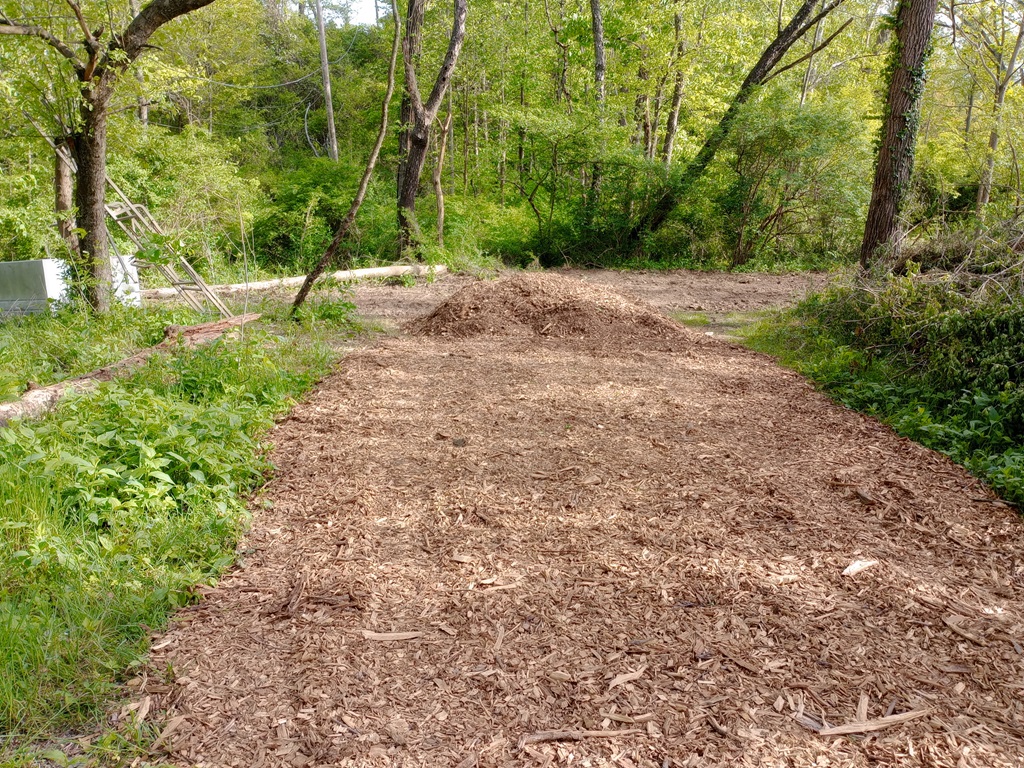
And spread them out
