The old-school tulips that I planted along the driveway are spreading nicely

The old-school tulips that I planted along the driveway are spreading nicely
Today, we flailed most of the field. I walked around and identified the little trees we want to keep – dogwoods, cherries, apples, and of course black walnuts!

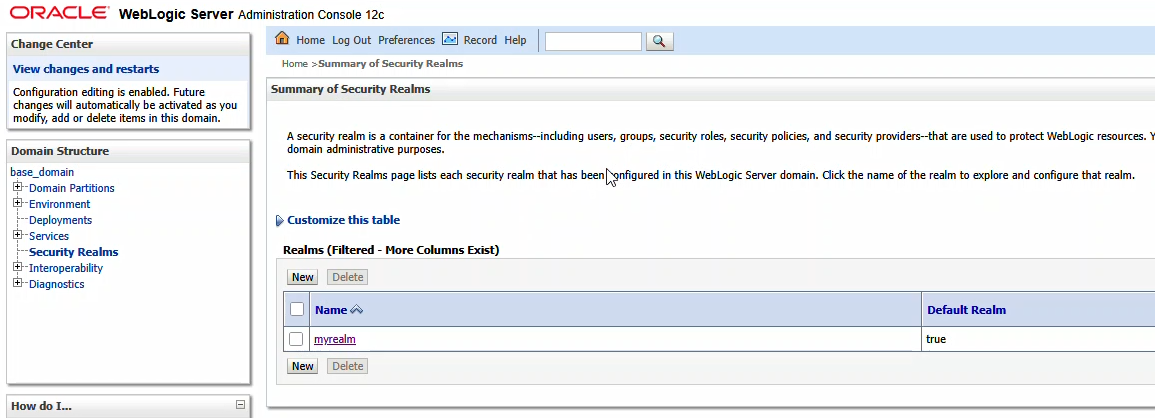
Log into your console. Navigate to “Security Realms” and click on your admin console’s realm – here “myrealm”
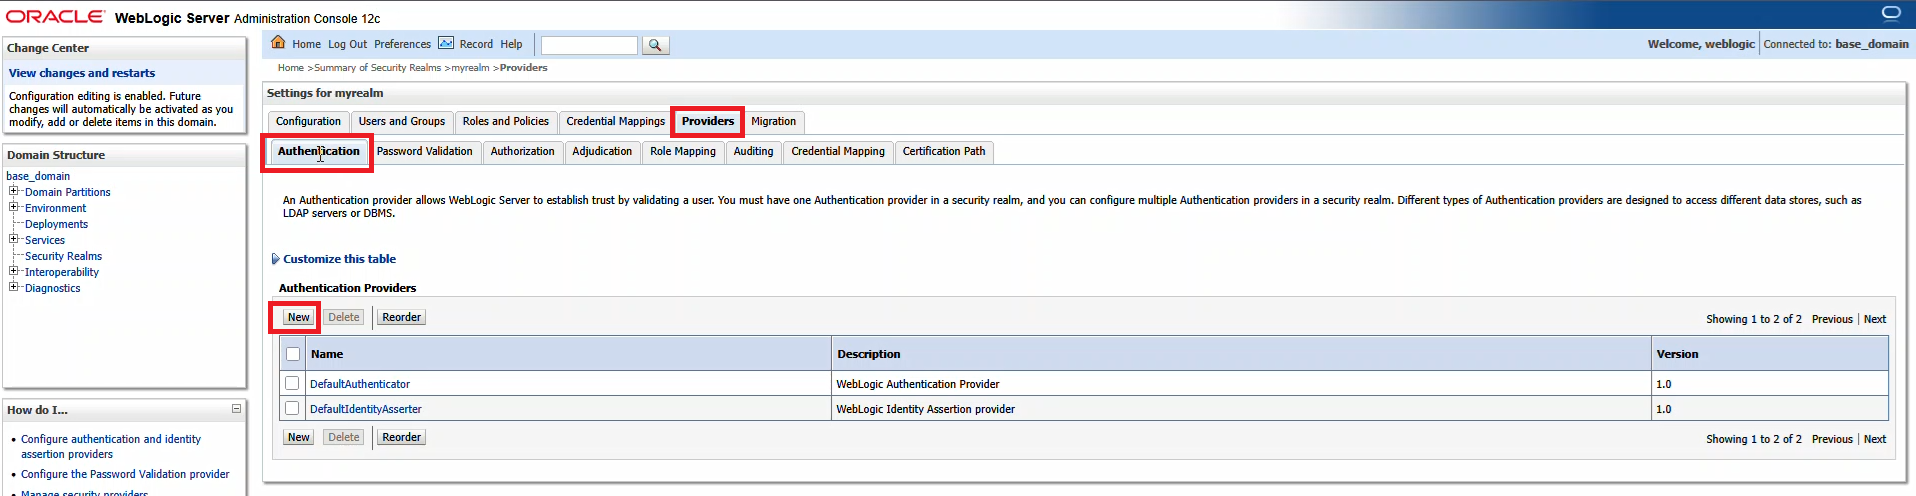
From the first row of tabs, select “Providers”. On the second row of tabs, ensure you are on “Authentication”. Click “New” to create a new identity asserter.
Provide a name – here, it is called SAML_IA – and ensure the type is “SAML2IdentityAsserter”
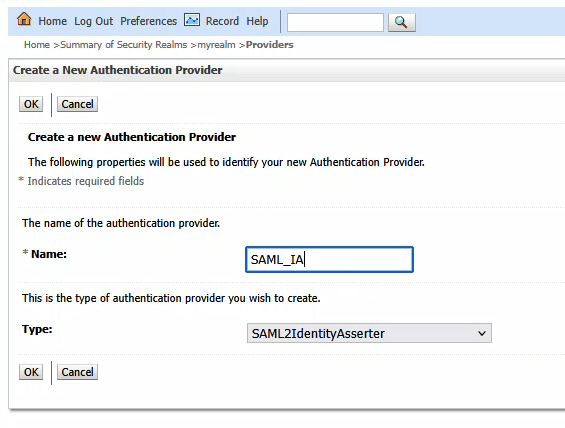
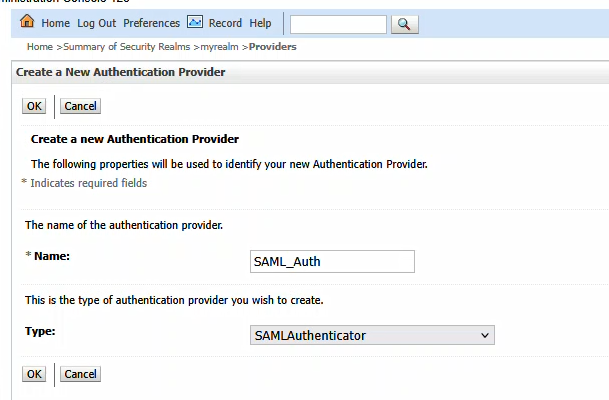
Click OK to create the item. Then click the “New” button again to create a new SAML Authenticator
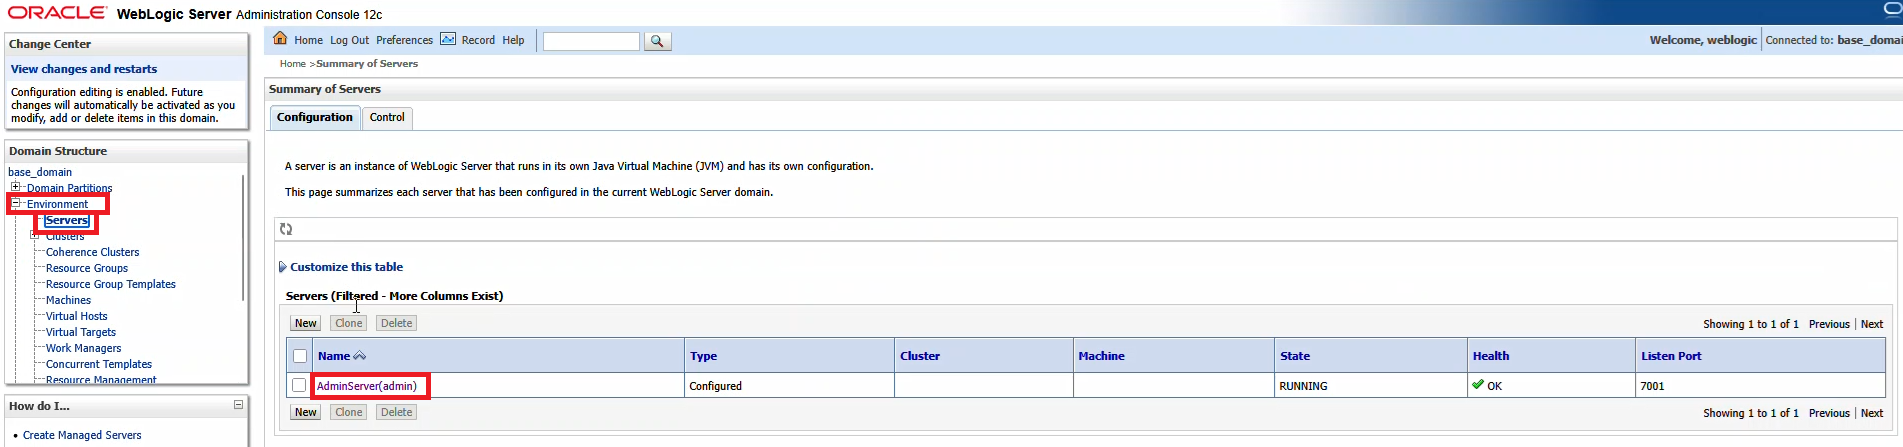
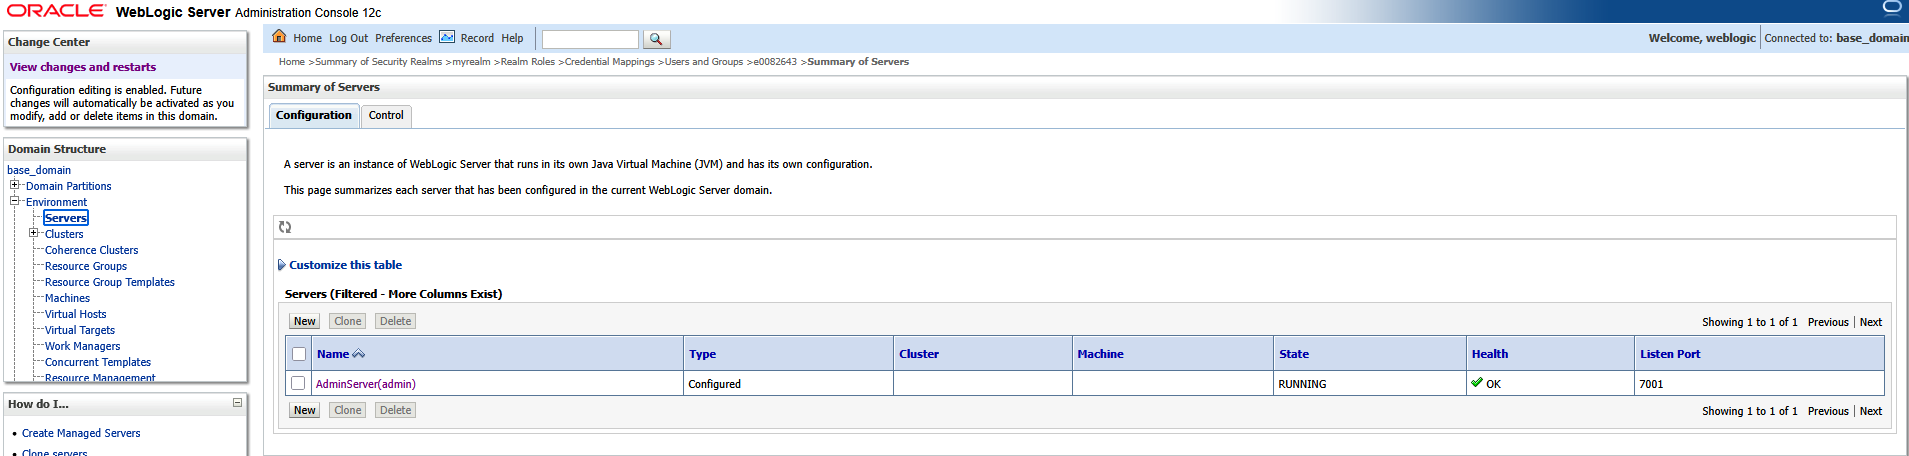
Restart the WebLogic server, then navigate to “Environment” => “Servers” and select the AdminServer
On the first row of tabs, select “Configuration”, on the second row of tabs, select “Federation Servies”, and on the third row of tabs select “SAML 2.0 General”

The published site URL will be your WebLogic host base followed by /saml2
Provide a unique entity ID that needs to match up with what we configure in PingID. Here, I used “LJRWebLogic”
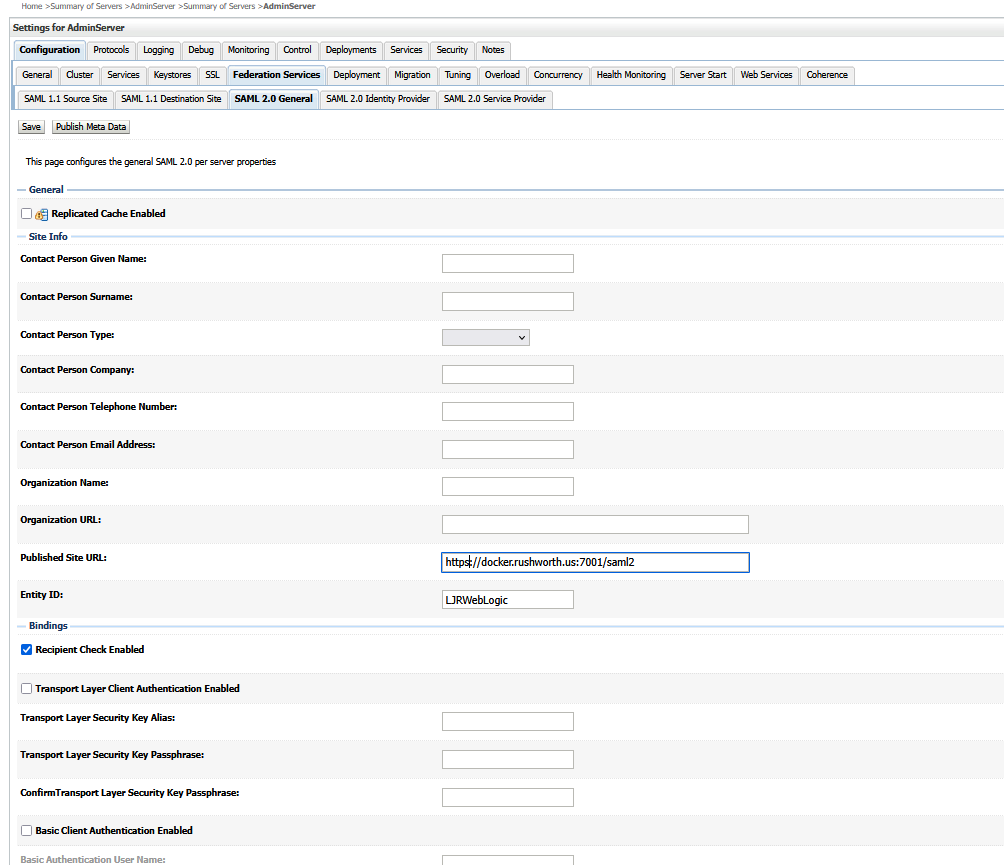
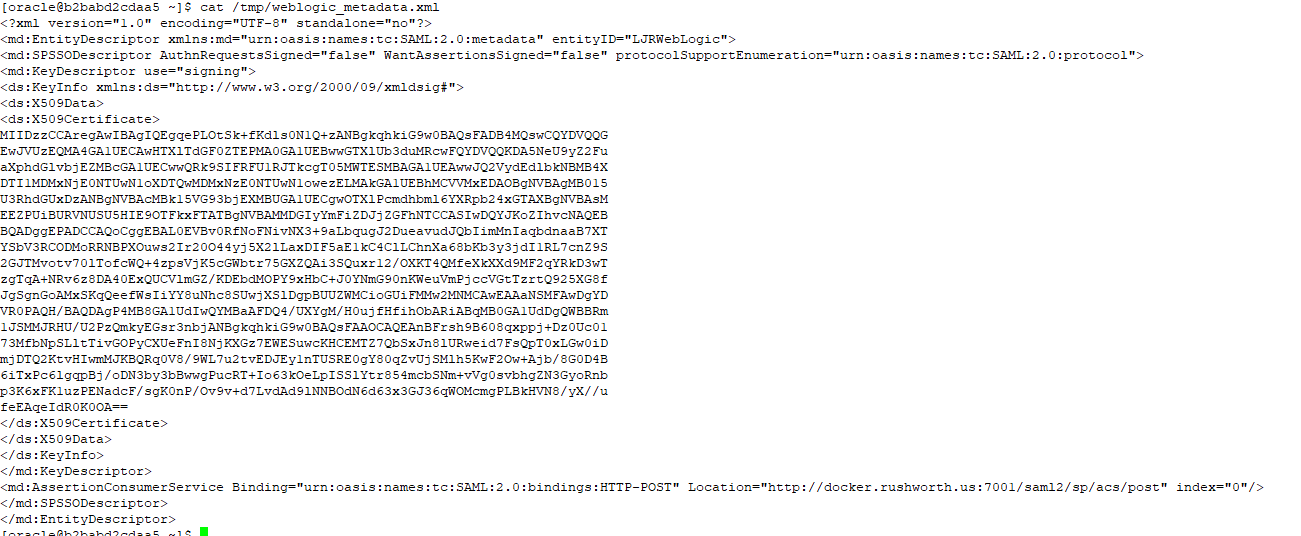
Save the changes and then use the “Publish Metadata” button to save a metadata file that I will use with PingID. You will be saving an XML file
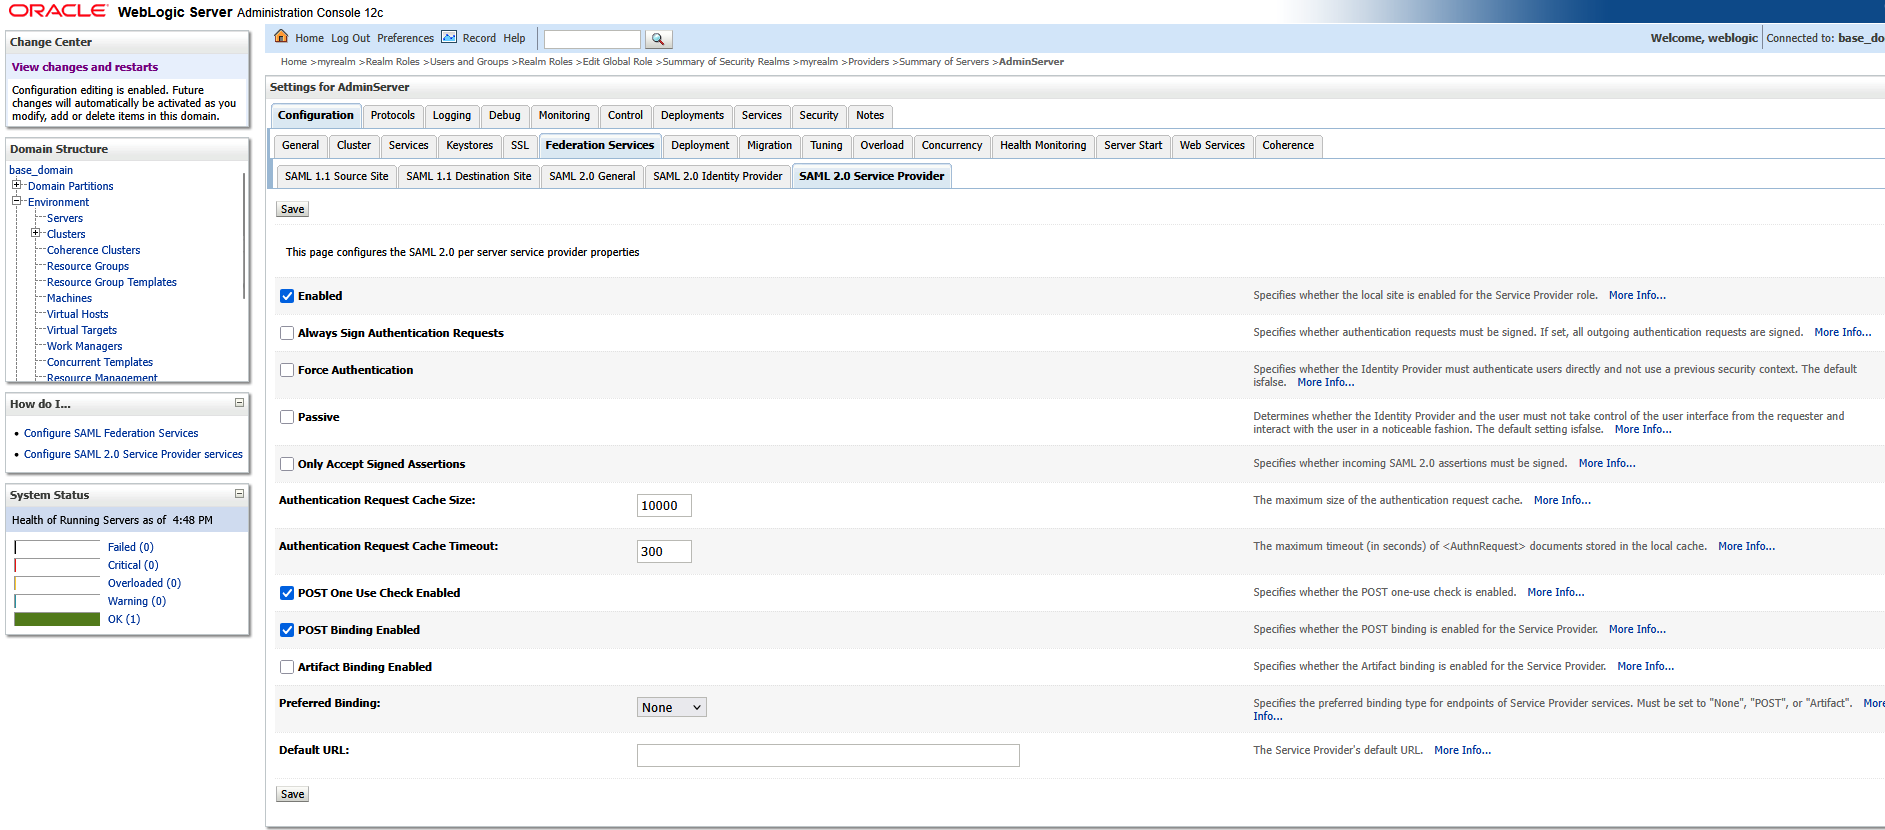
Now select the “SAML 2.0 Service Provider” tab on the third row of tabs. Click “Enabled” to enable the service provider. POST binding should be enabled, but we do not need Artifact binding enabled. Click “Save” to save the changes.
Navigate back to “Security Realms” and select your realm. On the first row of tabs, select “Providers”; on the second row of tabs, select “Authentication”. Click the hyperlink for “SAML_IA”
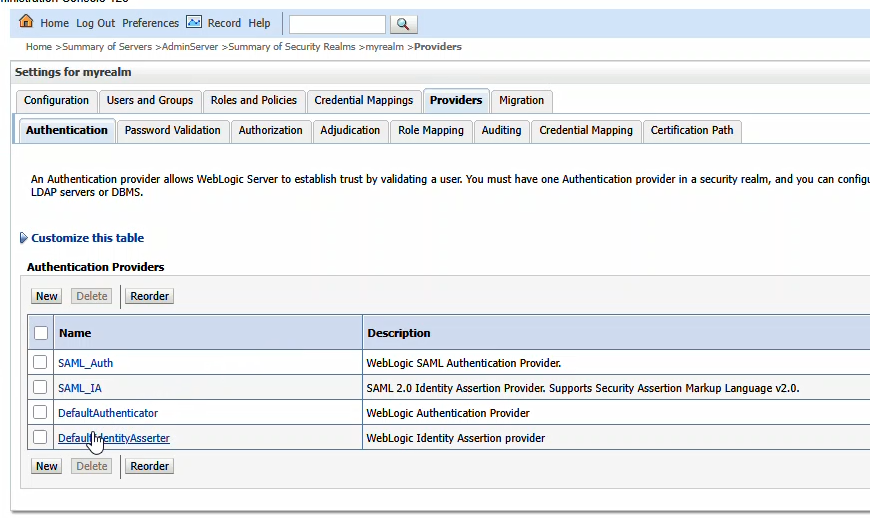
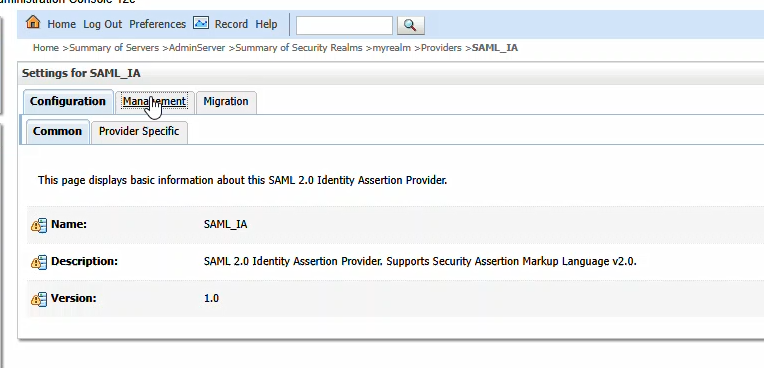
Click the “Management” tab
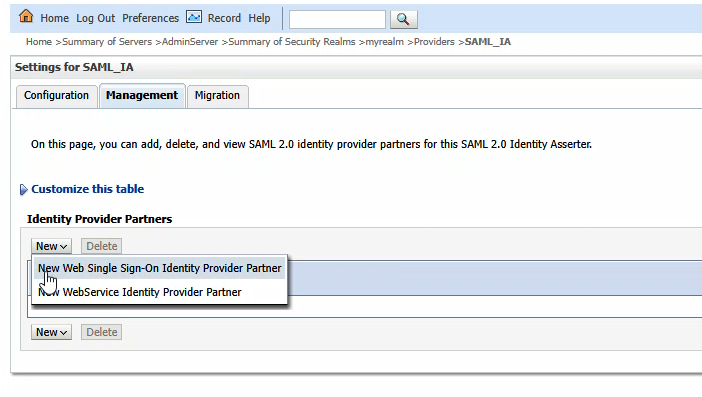
You will be provided a metadata file from PingID. Place that somewhere on your server (I used /tmp). Click “New” and then select “New Web Single Sign-On Identity Provider Partner”
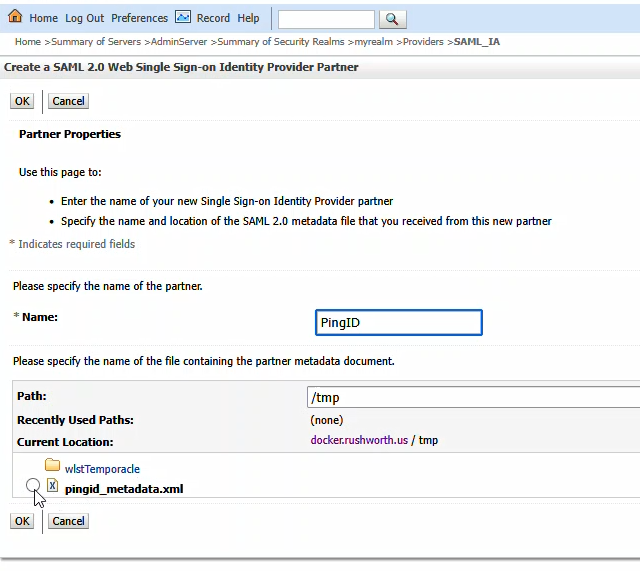
Navigate to the metadata file and select it. Provide a name for the identity provider – here, I used PingID. Cilck “OK” to import the PingID details.
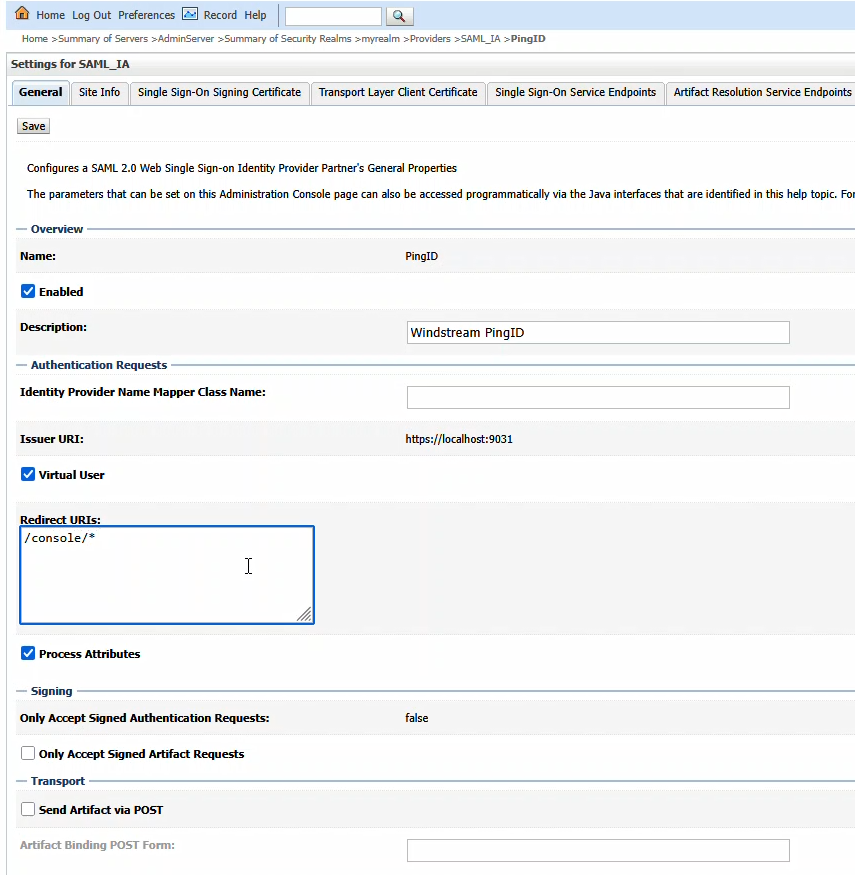
Click on the new entry to configure it
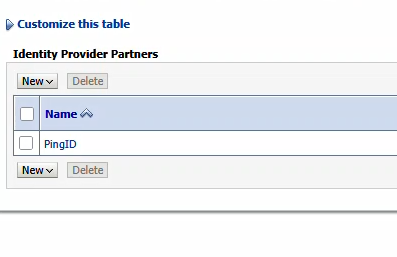
Click “Enabled” to enable the Identity Provider. The redirect URIs should be /console/*
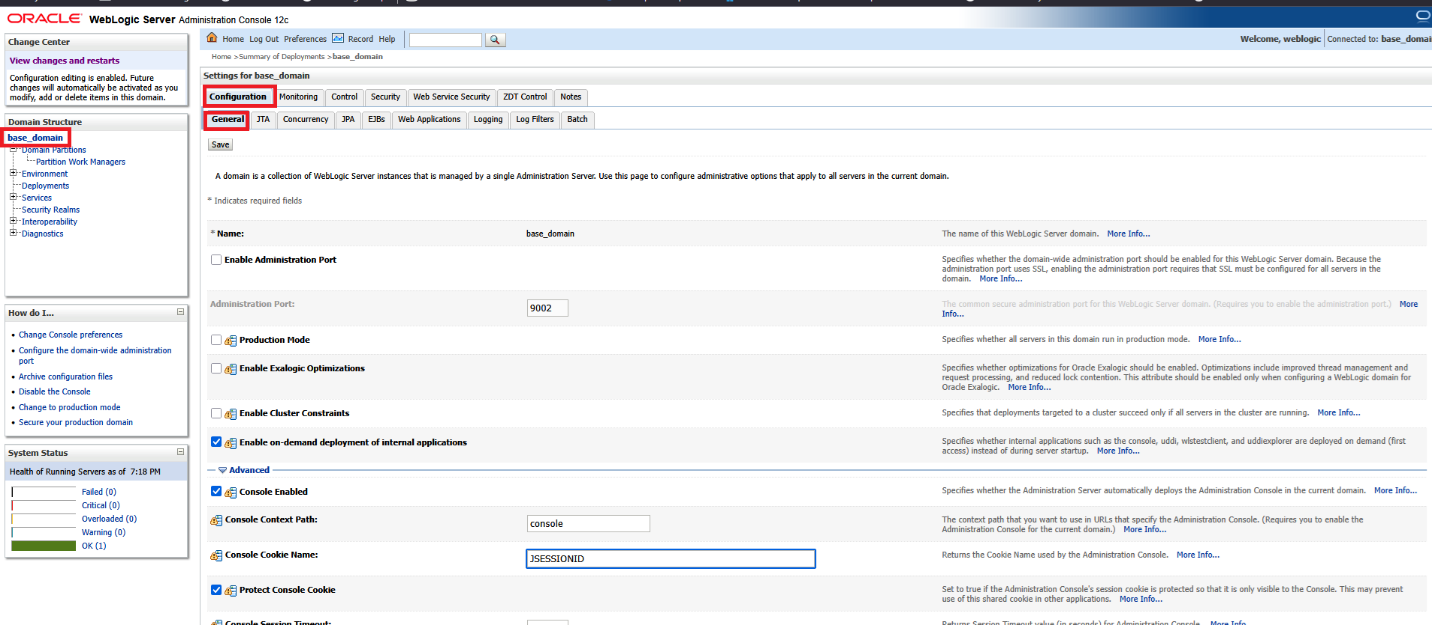
Finally, on the WebLogic Server Admin Console, navigate to the domain name -> [Configuration] -> [General] and expand the [Advanced] link
Update cookie name in WLS admin console to be JSESSIONID.
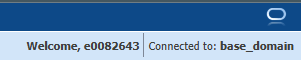
Save the changes and restart the WebLogic server. Navigating to the console, here https://docker.rushworth.us:7001/console, will direct the user to PingID for authentication and then redirect the user’s browser back to the WebLogic server. Looking in the upper right corner of the screen, they will see they are logged in with their directory ID.
Note: You can still access the local authentication dialog by navigating directly to console/login/LoginForm.jsp – e.g. http://docker.rushworth.us:7001/console/login/LoginForm.jsp — but the “normal” URL will redirect users to PingID
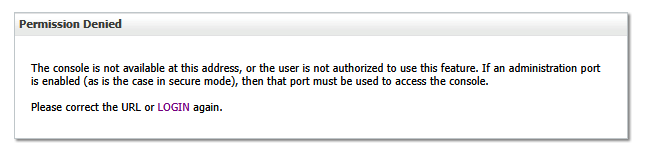
Note Also: There needs to be some step here to map PingID users to a role in WebLogic
Failing to do so, you will complete the PingID authentication but be denied access to the WebLogic Admin Console:
Prior to enabling SAML authentication, please ensure your WebLogic Admin Console is using SSL. You will need a JKS keystore with your public/private key pair.
If you have a base64 encoded public/private key pair, create a JKS file as follows:
openssl pkcs12 -export -out docker.p12 -inkey docker.rushworth.us.key -in docker.rushworth.us.cer -name docker_rushworth_us -password pass:IChangedIt
keytool -importkeystore -srckeystore docker.p12 -srcstoretype PKCS12 -destkeystore docker.jks -deststoretype JKS -deststorepass IChangedIt -srcstorepass IChangedIt
List the keystore contents to confirm your certificate is present using:
keytool -list -keystore docker.jks -storepass IChangedIt

The certificate’s alias will be needed to configure SSL on the console. In this example, my certificate’s alias is docker_rushworth_us
Once there is a JKS file with your keypair located on the server, configure WebLogic to use it. On the WebLogic Admin Console, navigate to [domain]->Environment->Servers and select the system you want to configure. Here, AdminServer(admin)
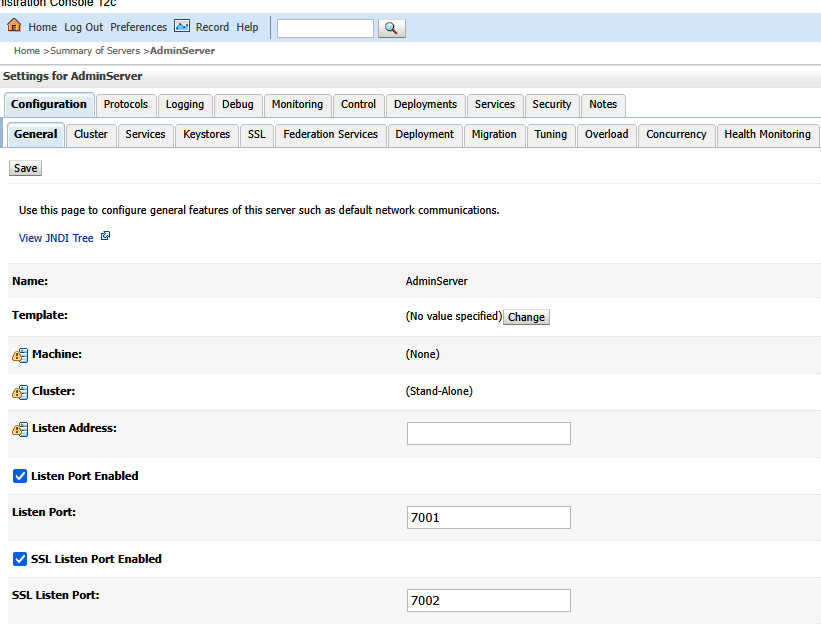
On the “Configuration” tab, select the “General” sub-tab. Check the box for “SSL Listen Port Enabled” and supply a port number.
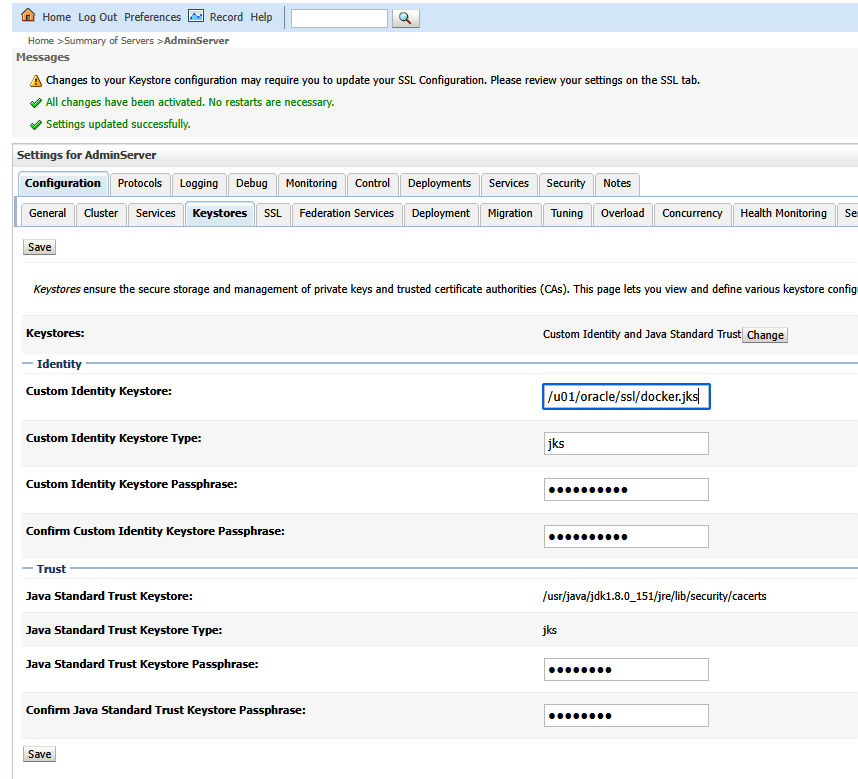
On the Keystores sub-tab, click “Change” to change the keystore being used.

Select “Custom Identity and Java Standard Trust”. Enter the path to your JKS file. The keystore type is jks. Enter and confirm the password you used to create the keystore. Enter the password for the cacerts file (java default is changeit)
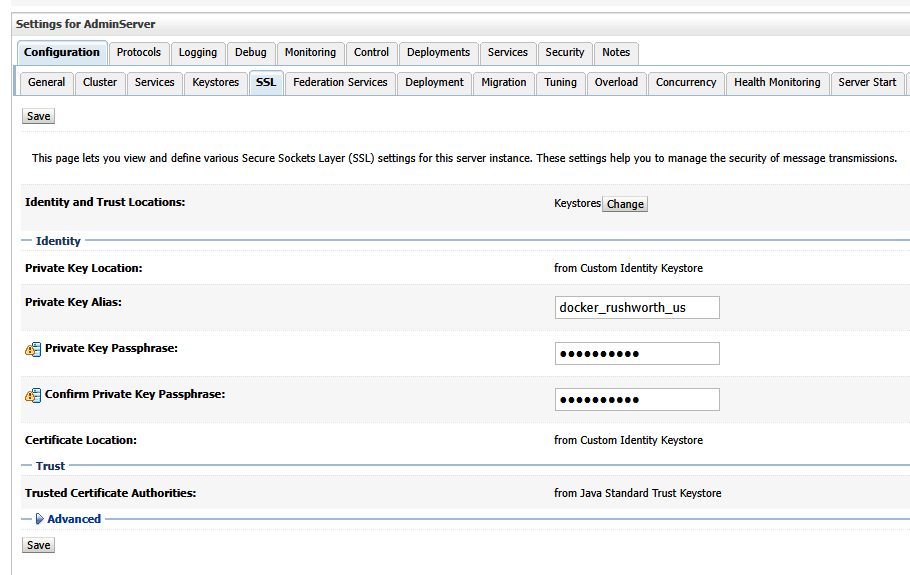
On the SSL sub-tab, input the alias of the certificate. Also enter and confirm the key passphrase.
We’ve got all sorts of actually cozy cat beds for our farm cats – but Ash was absolutely enamored with this pile of pine bark and cottonwood leaves. A great place to take a nap on a warm, sunny day!


Our little cat surveying his territory


I frequently use du -sh to determine what is using all the space on my Linux box … but mounting a data volume makes that simple command really suck (also, the mount point isn’t the problem for my local storage!). And all the /proc errors are just annoying — so pass in exclusions!
du -sh --exclude='/mnt/*' --exclude='/proc/*' /*