Tag: ms teams

Did you know … you can use markdown in Teams messages?

Teams supports markdown within messages – type something like this

And you actually see this:

You’ll know it’s working because the markdown is converted as you type it (pasting a marked down string into Teams doesn’t work — you’ll have the literal characters and not the implied formatting)

You can even type a backtick (`)

To get an inline code block

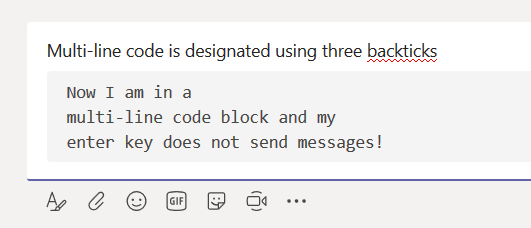
You can insert multi-line code blocks as well. It’s a little trickier to get a code block in a message since you’ve got to use shift-enter to move to a new line then type three back ticks.

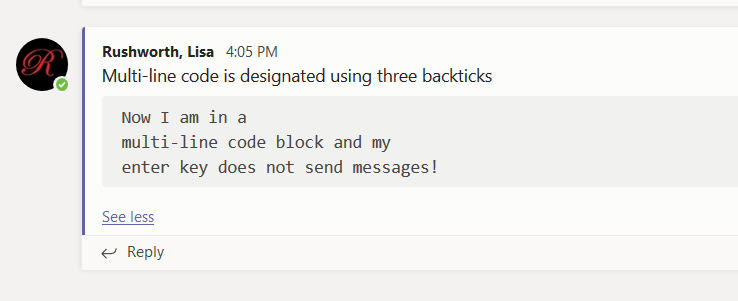
After you type the three back ticks, your cursor will be in the code block. Enter will now move to a new line instead of sending the post.

They’ve got a bug where you cannot do anything after the multi-line code block … but you can always reply to your post if you’ve got something to add.

As of this writing, you cannot paste markdown text into the message and have the formatting rendered. You can paste content into the multi-line code block composer, but you cannot paste *things* with ~markdown in them~ and see “`
pretty output

Did you know … Connectors can be used to display external information in Microsoft Teams Channels?

Microsoft Teams is a single workspace that provides access to a vast array of resources. You’ve got links to important web sites, posts from other Team members, discussion surrounding shared documents … but did you know posts can automatically be created from external systems?

Why? Well … doing so allows Teams to simplify finding and distributing information. Instead of having ten people subscribed to a vendor newsletter or five people trying to remember to check a web site for information, the information comes to every Team member directly in their Teams application.

You can turn vendor-provided patch and outage notifications via RSS or Twitter into Teams posts. Google Analytics data for your site can appear in Teams posts. Jenkins has an Office365 connector that reports pipeline information in Teams posts. Browse the available connectors to see what is useful in your group.

“Best practice” recommendation: some of these connectors rely solely on Microsoft’s Internet connection to an Internet-accessible resource – as in the example I present below. These connectors are essentially self-documenting because you can view the Connector configuration to determine the URL with which the connector communicates. Many connectors, however, use web hooks registered within your application or user credentials to access the remote system. In the “Files” or “Wiki” section of the channel in which the Connector is used, create a document detailing any configuration that was done – instructions for creating a web hook in your system, which account was used to access the remote system (don’t write the password in the document!).

For connectors that require user credentials, do not use a personal account. Create a new account for your Teams feed. Twitter, for example, requires a user account to follow other accounts or hashtags. Were I to use my Twitter account in the configuration … if I transfer ownership of the Team space to someone else, they’re inheriting a configuration with my account; but I’m not going just hand my password over to them. Even if ownership of the Team space never changes, we could cease seeing updates next time I change my Twitter password. Or decide to close my account. Or … point being, if you have a non-user account, the Team owners can maintain control of the account and any changes to it.

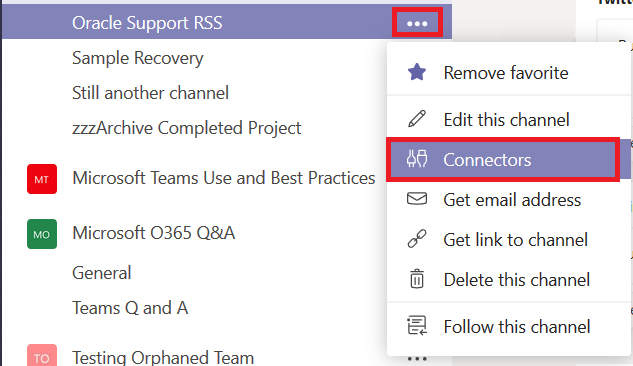
Using Connectors: Decide where you want the data posted – this can be a dedicated channel created just for this connector or it can be an existing one. Click the hamburger menu next to the channel into which you want messages posted. Select “Connectors”.
Browse through the list. Or type in the “Search” box to locate a specific connector. Click “Add” next to the connector you want to use.
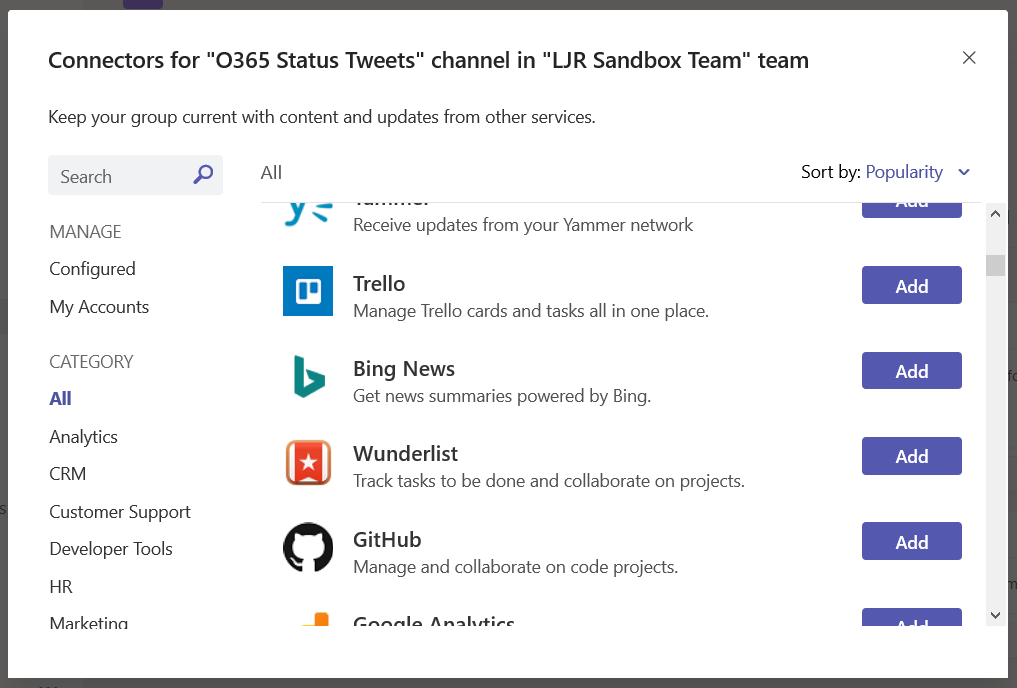
Setup will vary depending on the connector selected – the Jenkins connector provides a URL to paste into your server config, Twitter asks for credentials and individuals or hashtags you want to follow in the channel. In this example, I am adding an RSS data feed.

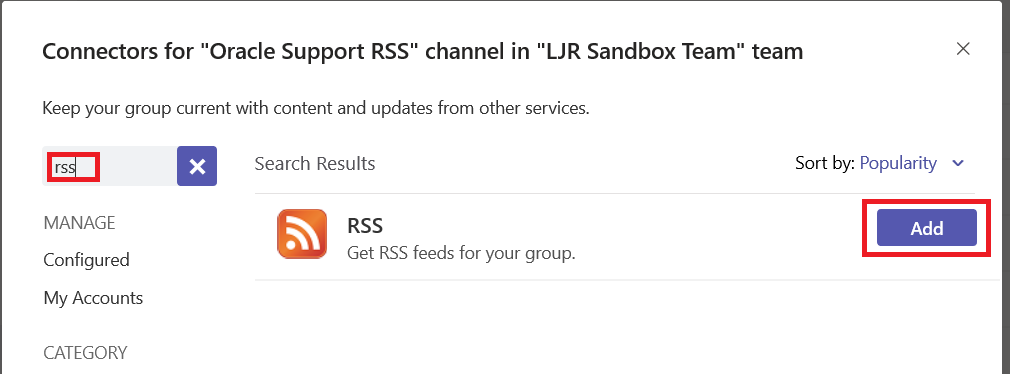
Type ‘rss’ in the search dialog. If this is the first time you’ve used the connector within this Team space, click “Add”.
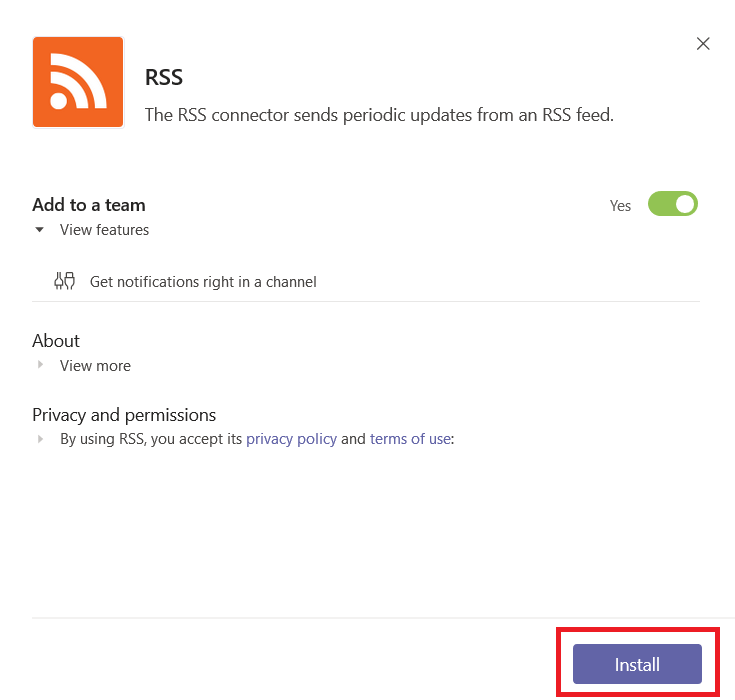
In this case, there’s not much on the next screen – read the privacy and terms of use statements.  Assuming the connector permits your intended use and you agree to all of their terms, click “Install”.
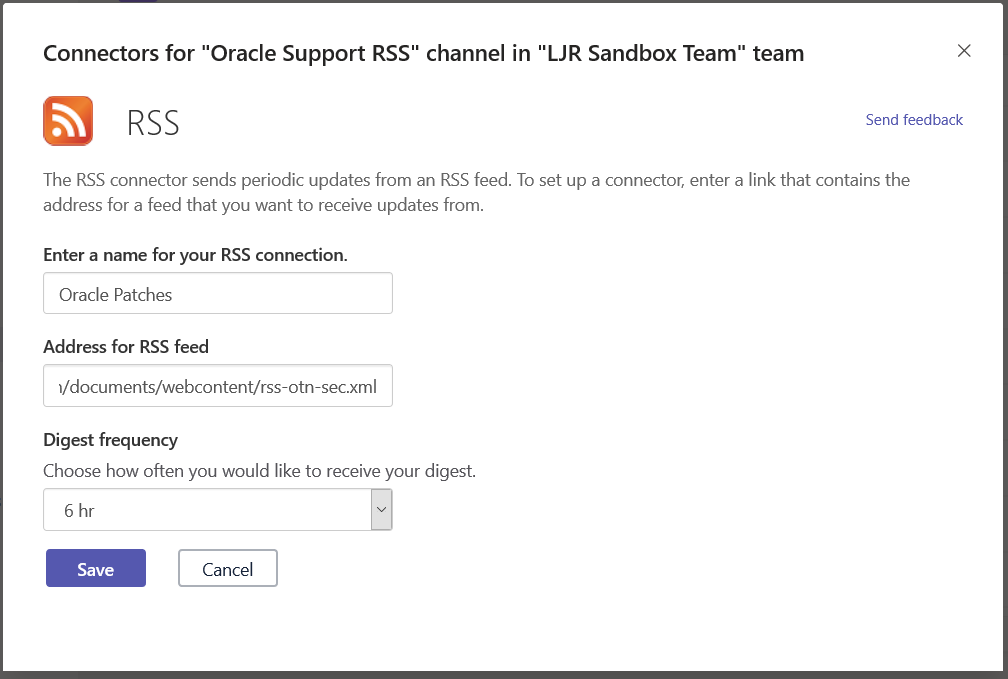
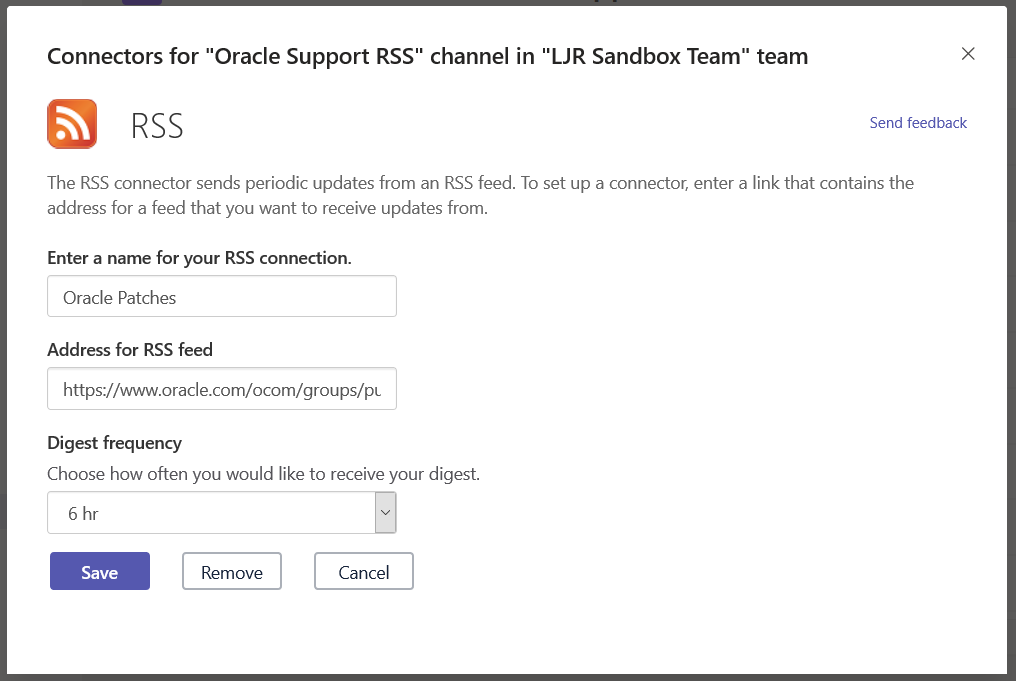
Enter a name for the connector, paste in the RSS feed URL, and select how often you want Teams to check for new data in the feed. Click “Save”
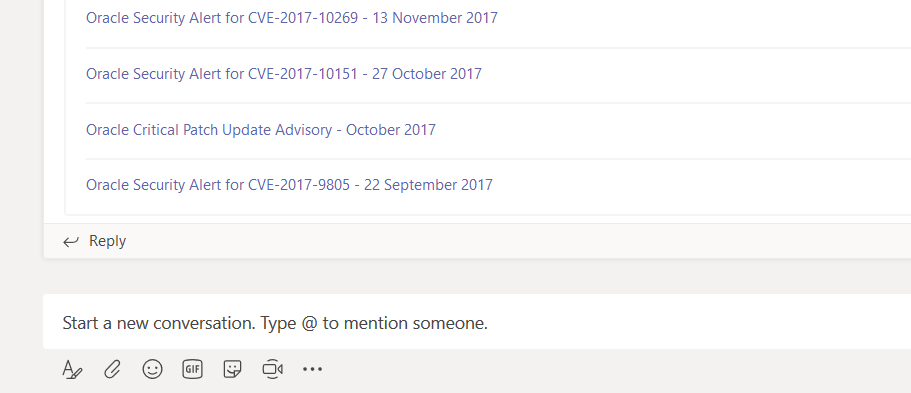
A post will be created in your channel with data from the RSS feed. Some feeds will provide information, some just provide a link. And when new data is posted to the RSS feed, a new post will be created in your Teams space.
If you need to make a change to an existing connector, click the hamburger menu next to the channel on which the connector is configured. Select “Connectors”.

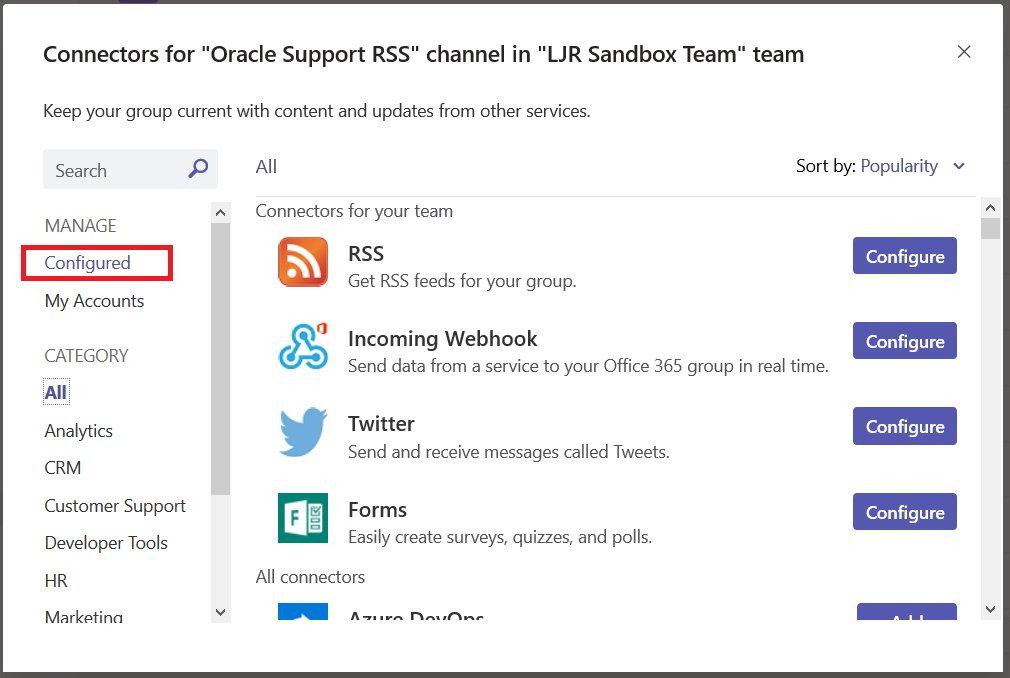
In the left-hand column, select “Configured”
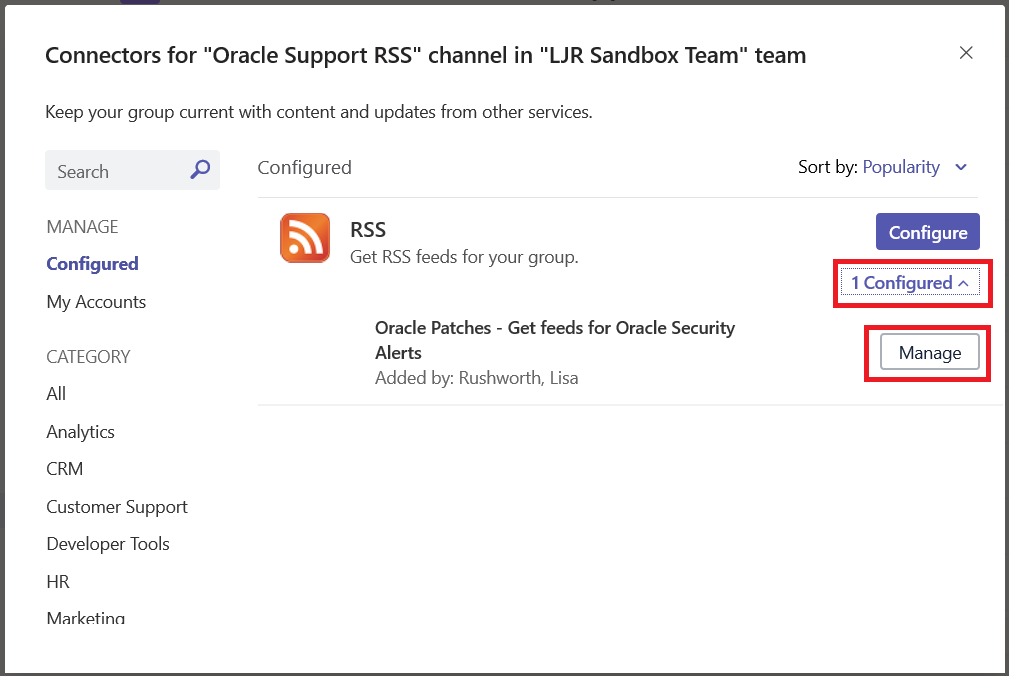
The “Configure” button will set up another connector on the channel. Instead, click the “# Configured” link below the “Configure” button. Then click “Manage” for the connector you want to manage.
Make whatever changes you need to make and click save. Or click “Remove” to remove the connector from the channel.
Did you know … Microsoft Teams provides both public and semi-private Team spaces?

You’ve used Microsoft Teams to collaborate with individuals assigned to a project, and even created Team spaces for ad hoc groups to work on a problem. But what if you want to discuss the office’s community outreach program or plan the next employee engagement activity? Microsoft Teams is a perfect place to host that collaboration too.

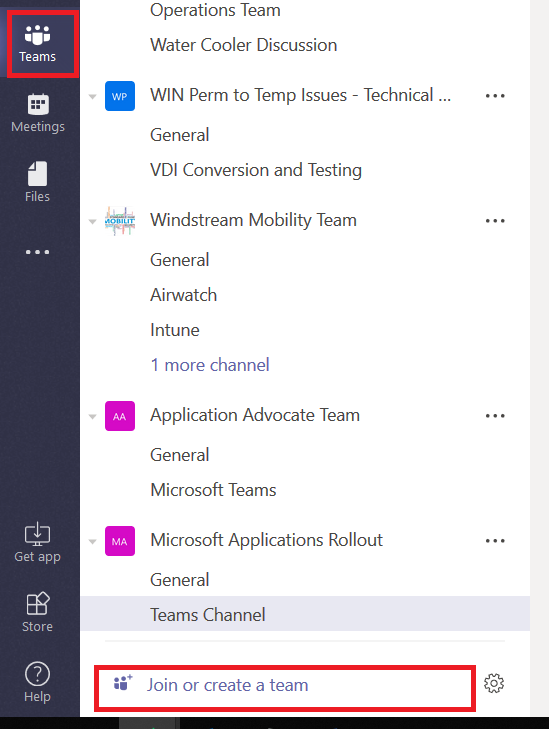
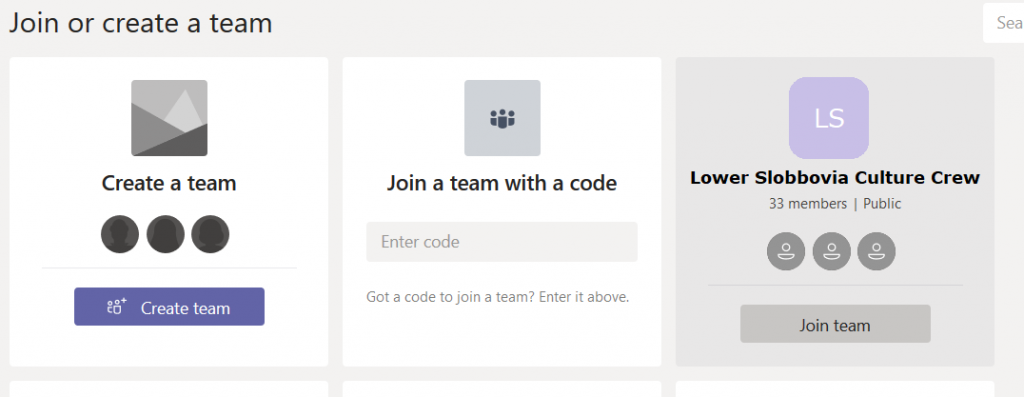
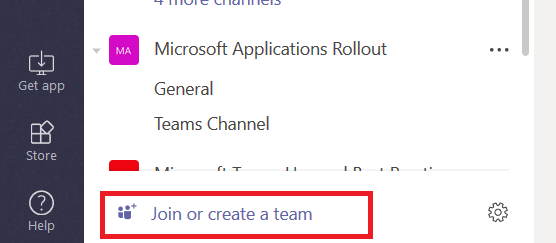
You can create a public Team space – a public Team allows anyone to join without requiring approval. This is great if you do not need to verify qualifications before allowing someone to join a Team. From the “Teams” tile, click on “Join or create a team” at the bottom of your Team list.

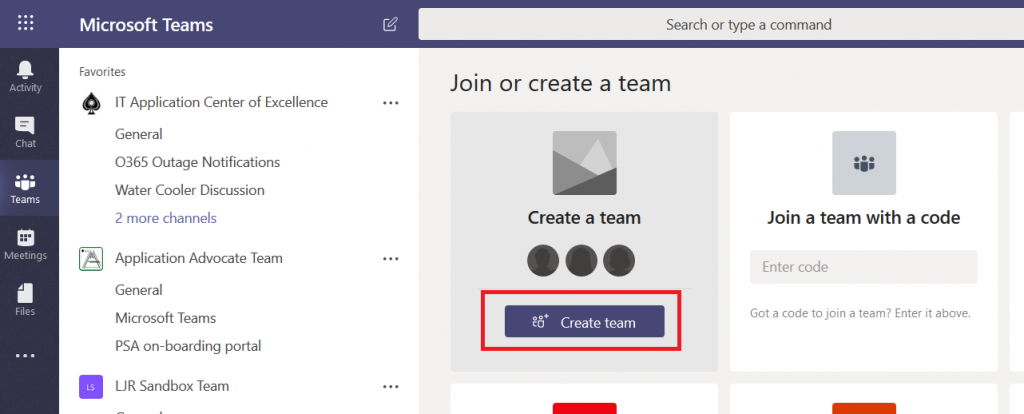
Click “Create team”

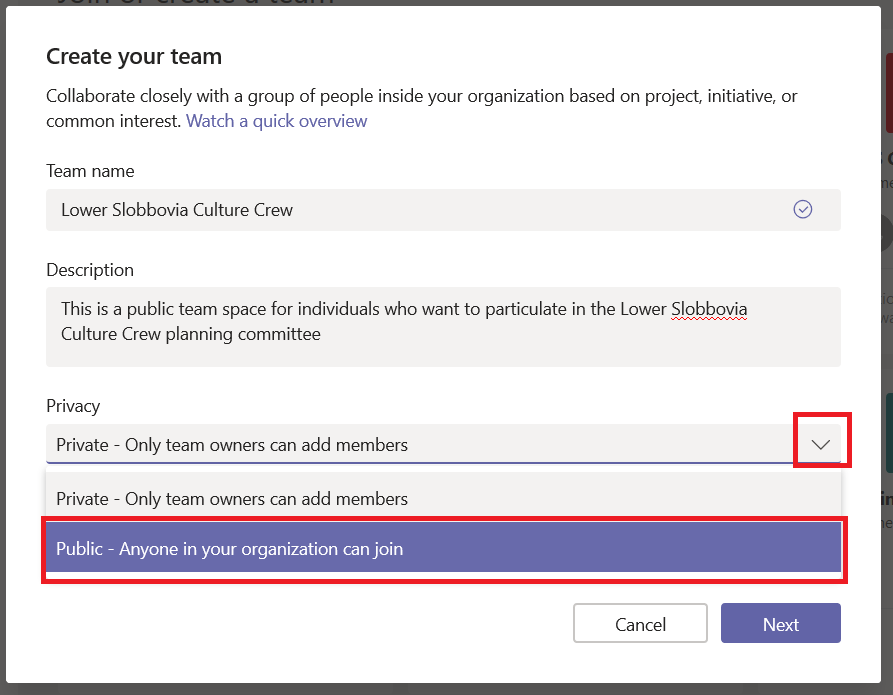
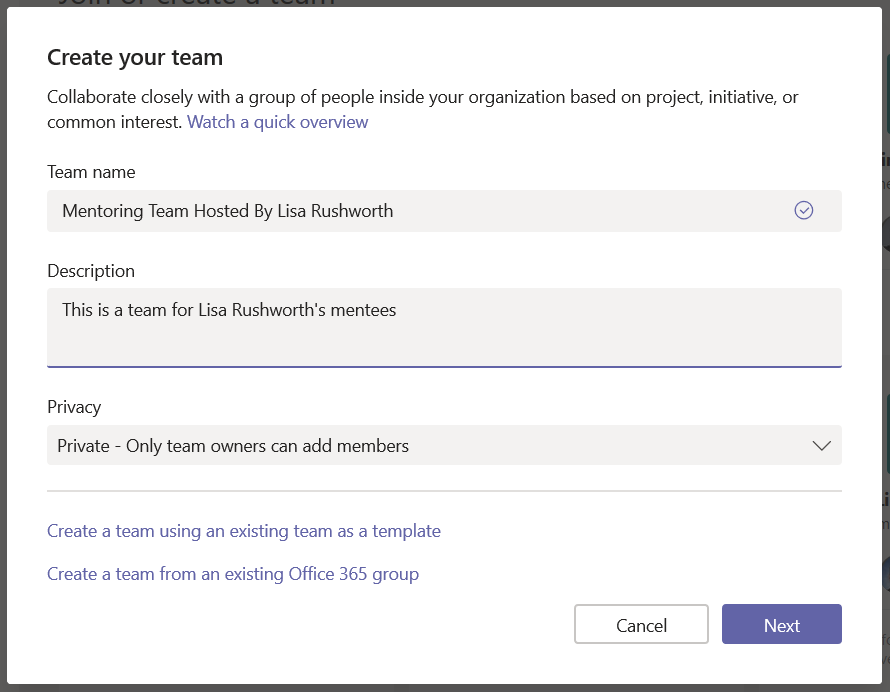
Provide a team name and description so potential members know it’s something that interests them. Now under “Privacy”, click the down arrow and select “Public – Anyone in your organization can join”.

Click Next. You can start your team by adding some members, or you can click “Skip” and let members add themselves. Voila, you’ve got a public team. (Well, give it a few minutes … there’s some background magic that needs to complete). When people click “Join or create a team”, your team will show up in the Team gallery (they may need to search for it – and as of 25 October 2018 it’s a “begins with” search … so Slobbovia will not find my team, but “Lower” or “Lower Slobbovia” will). As soon as they click “Join team”, they will be added as a member of your team.


What if you don’t want your team to be that public? Say we only want people who actually work in East Slobbovia to join up. Then leave the Privacy setting at “Private – Only team owners can add members”. This means your new Team won’t appear on the “Create or join a team” Team list …

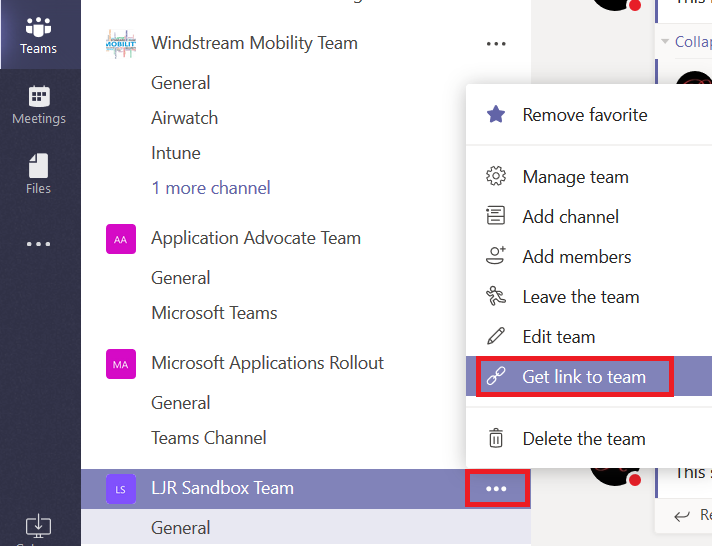
From the hamburger menu next to the team name, select “Get link to team”

The URL will be displayed in a new pane – click “Copy” and you’ll have the URL in your clipboard.

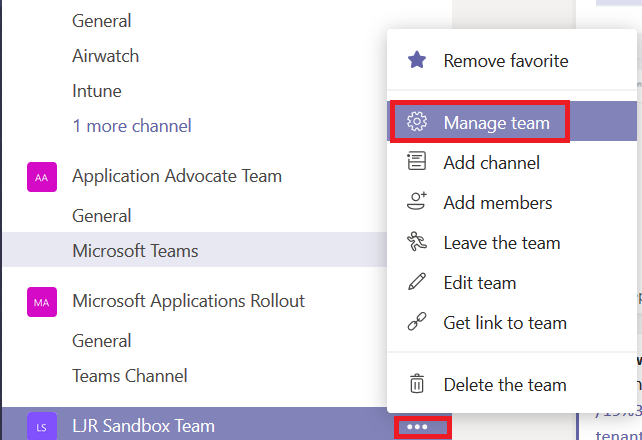
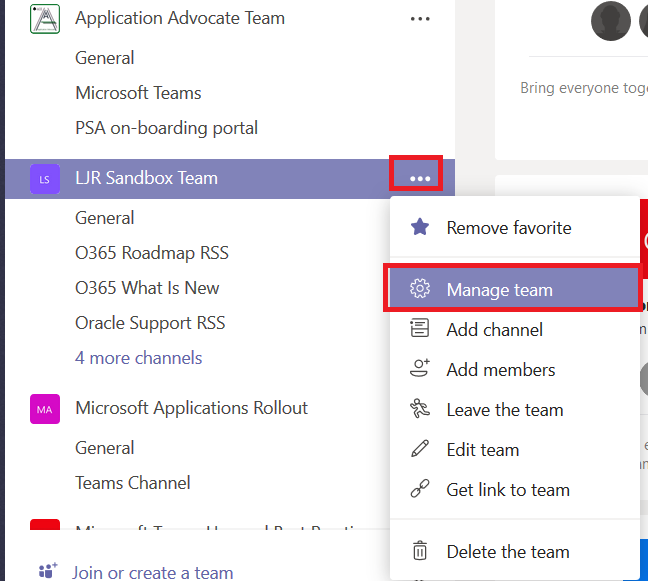
Publicize your URL — you could post it to Stream, have the link included in a local newsletter message, e-mail it to potential Team members … however you let people know about the URL. When someone follows the URL, a membership request will appear on the Team. From the hamburger menu next to the team name, select “Manage team”

Click on the “Pending Requests” tab

You’ll see, well, the pending requests. Click accept to add the person to your team, or click deny if you prefer.

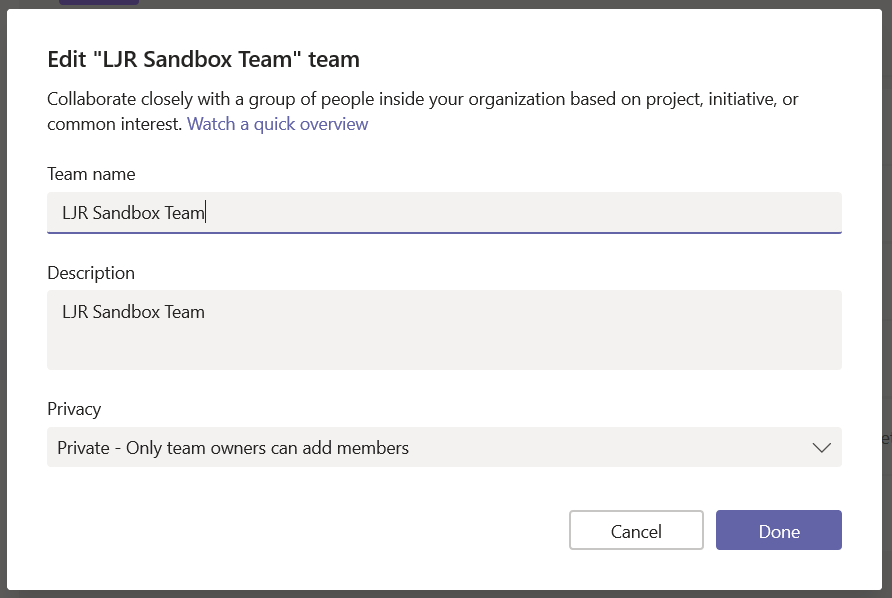
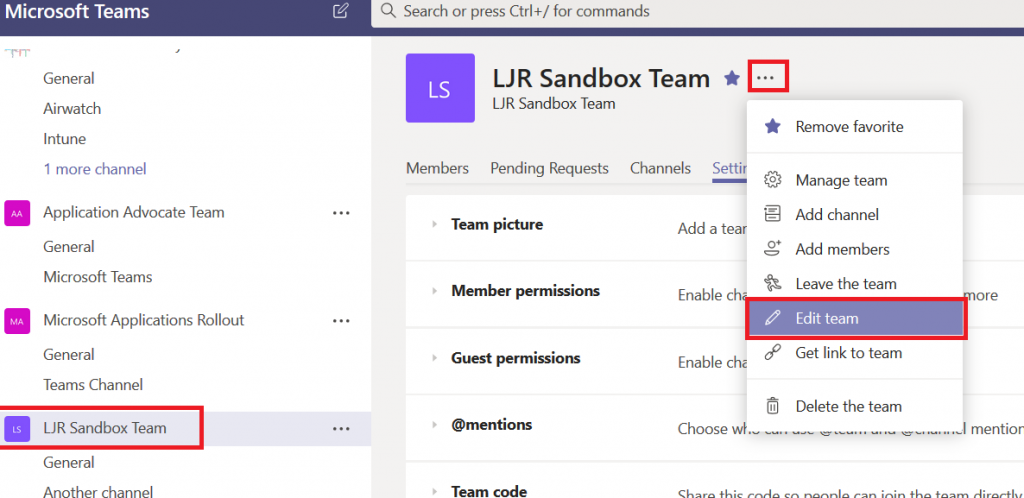
Changing the settings – If you change your mind, that’s OK too. In your Teams list, click on the Team itself (not the hamburger menu next to it, and not one of the channels under it. Then click on the hamburger menu next to the team name in the right-hand pane. Select “Edit team”.

You can change the privacy settings and click “Done”

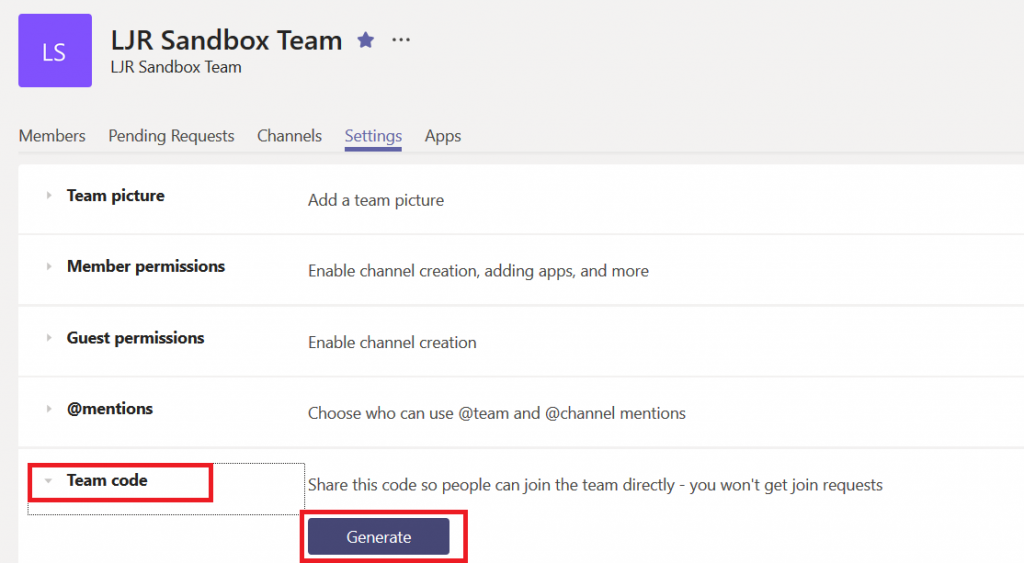
Bonus option … for those of you who have stuck with me this far! You can create a code for your team that allows invited individuals to join the team without waiting for your approval. Click the hamburger menu next to the team name and select “Manage Team”. On the “Settings” tab, expand the “Team code” section. Click “Generate”

Now there’s a code associated with your team.

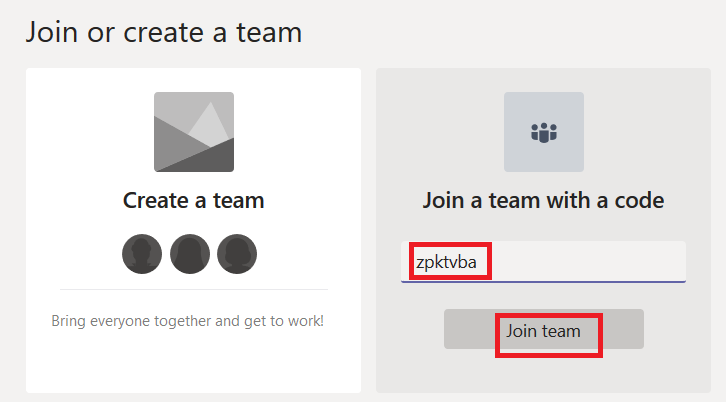
Individuals who have the code can go to the Teams gallery and enter the code in the tile that says “Join a team with a code”

Do you know … Teams Activity View?


The very first icon on the left-hand navigation menu, “Activity”, isn’t just a listing of all unread Teams activity. This view provides a customized view of important Teams communications, allowing you to focus on the most important communication first. 

This isn’t a list of every thing that has been posted to every one of your Teams spaces. It doesn’t even include chat messages sent to you –new chat messages will show up as a red circle with a message count on the“Chat” view icon.

So what shows up in the Activity feed? Missed calls – missed calls are only displayed in your Activity feed. Clicking on the entry will display a chat with the caller; you can reply with a chat message or click the phone icon to return their call.

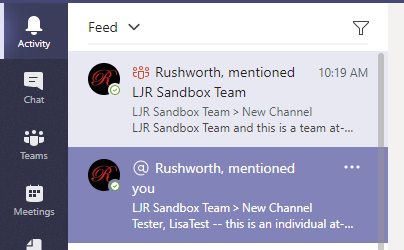
Posts with @mentions – both your individual mentions and mentions for Teams of which you are a member – will appear in the Activity feed.

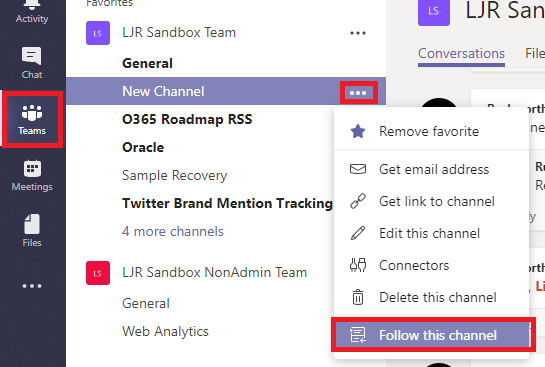
Beyond that, you control what appears in your feed. Posts to channels you follow will appear in your feed. To follow a channel, click the“Teams” icon. Click the not-quite-a hamburger menu next to the channel name and select “Follow channel”.

When messages are posted to the channel, you’ll see a red circle with the number 1. This indicates that there is one thread with unread post(s). There may be a bunch of replies in that thread, but the thread is only counted once. This doesn’t mean replies won’t be highlighted – if someone replies to a thread you’ve already read, that thread will again be counted as a thread with unread post(s).

You can click on an entry to display the specific thread. Clicking on a reply will focus on the reply – which helps identify what part of the thread you haven’t seen.

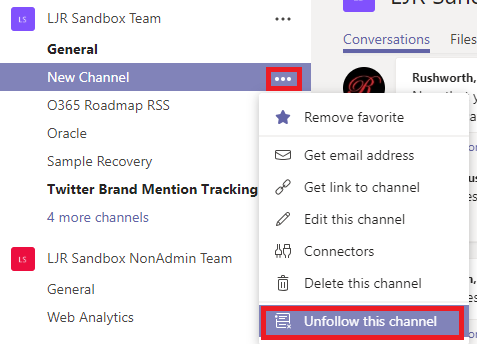
If a channel becomes prolific and irrelevant to you, you can simply stop following the channel. Click the not-quite-a hamburger menu next to the channel name and select “Unfollow this channel”. Anything from the channel in your feed will remain there, but new activity in the channel will cease appearing in your Activity feed.
In addition to a feed of activity from other individuals, you can use the activity feed like the “Sent Items” in your mailbox. Click the inverted caret next to “Feed” and select “My Activity”. You’ll see two weeks of your Teams posts.

Microsoft Teams – Creating A New Team

Anyone can create a Team space – this makes Teams an amazing resource for collaboration because you have all of the features of Teams without filling out a request form, writing a business justification, and waiting for someone to complete your request. Whether you want to call it a quote from the Spiderman comics, Churchill, or the Decrees of the French National Convention … responsibility follows inseparably from great power.

The first consideration is should you create a Team? Teams is an amazing platform for interactive communication, but not all communication is meant to be interactive and collaborative. If you want to broadcast information to thousands of people (and maybe get a little feedback too), then a Stream site may be a better choice. If you want to solicit feedback about a specific topic and analyze the results, a Forms questionnaire or SharePoint form will likely better suit your needs. If you want to share documents, OneDrive for Business or a SharePoint site may be more appropriate. But if much of your content warrants responses, you want to increase collaboration, you share documents and Planner boards and OneNote notebooks … then you probably want a Teams space.

Can my Team have too many members? Well, from a technical perspective … no. There’s a limit to the number of members you can add to a team – the service won’t let you add too many people. Practically, though, the question isn’t if there are too many members but rather if the information stored in the Teams space is relevant to the individuals. Maybe you’ve got a topic that fifteen hundred people should be discussing – the information helps them do their job, their input helps others. In that case, a team of fifteen hundred people isn’t too many. But if I add thirty people to my Team space and the information is only relevant to eight of them … then I’ve got too many members of my team.

Once you’ve decided that a Teams is a great place to host your collaborative efforts and identified the people who will find the information relevant, here are some “best practice” guidelines for creating and managing your Team.

Click on “Join or create a team” at the bottom of your Teams list.

The Teams carousel will be displayed – search your organization’s public teams to make sure there’s not already one out there doing exactly what you want. At the time of writing, this is a starts with search so searching for “Falcon” will not find “Project Golden Falcon”. To create a new team, click “Create team”.

When creating a Team, the first step is to create a name. Team names do not have to be unique, but it will be confusing for members if they have six “Engineering” teams in their list. Use something descriptive. Filling in the Team description will help members identify the purpose of the Team space too. Click “Next” and optionally add team members.

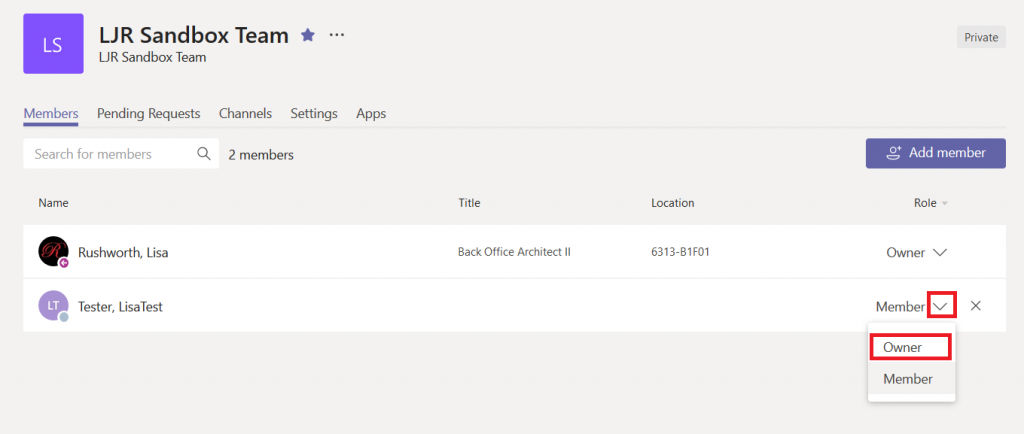
After your team is created, add another owner. While members can perform most functions within a Team space, there are a few rights limited to Team owners. Adding another owner now ensures you’ve got back-up when you go on holiday or are otherwise unavailable.

Click the hamburger menu next to your team name and select “Manage Team”.

You can add additional members here. And click the drop-down next to any member you wish to become an owner and select “Member” – voila, another owner.

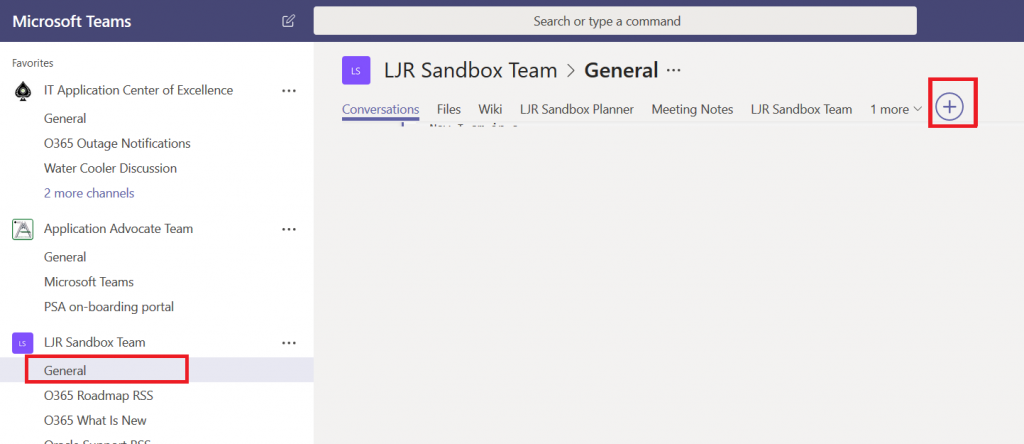
On the “General” channel, add tools and resources that are frequently used – that might be a link to a vendor’s web site (in the Team where we discuss updates and issues with a vendor’s product, having a link to the vendor’s support site is really helpful) or a Planner board to keep track of tasks <ref out to ‘did you know’ on adding the auto-created ones!>. Click the “General” channel then click the + next to the channel’s tabs.

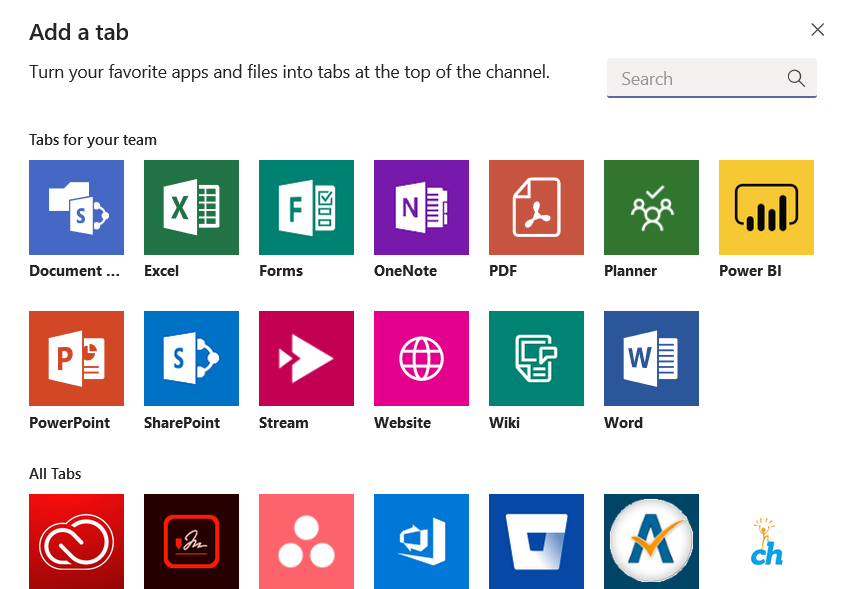
You’ll be presented with a list of resources you can add to your Teams space.

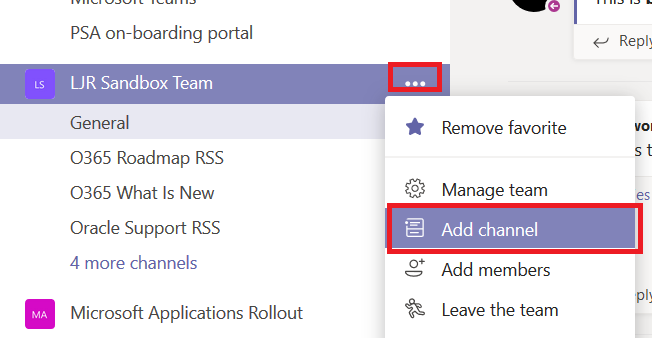
To separate discussions into different channels, click the hamburger menu next to your Team name and select “Add channel”. We will create a new channel for different projects and sub-groups to avoid confusion and information overload.