Tag: cooking

Stromboli Recipe

I made, well not quite a stromboli (as I understand it, stromboli have tomato sauce inside, and this was completely without tomato sauce). The bread part is easy enough — you can use whatever pizza dough recipe you fancy. I had purchased KAF’s Artisan Bread Flour when it was on sale a few months ago. Or their French style flour and used a traditional baguette recipe (3c flour, 1t salt, 1c or so water, and 2 1/4t yeast kneaded for a long time to make a chewy bread. Normal bread process – mix/knead, sit until doubled in bulk). For additional flavour, I added 1T of Italian spices to the flour. Once the dough has finished rising, preheat the oven to 550 F.

Take a chunk (I used about a quarter of the dough) and roll it out onto a silicone baking mat. The dough shouldn’t be too thick – somewhere around an eighth of an inch. I made very large stromboli to be cut when served, so the rectangle of dough was about 12″ x 9″. Brush the dough with roasted garlic butter (1T melted salted butter, 1-2 cloves roasted garlic)

Spread filling in the rectangle – leaving some dough on either side to fold in, some dough on the bottom to seal the thing, and a lot of dough on the top to fold over.

Fold the sides along the line shown below — this will seal the ends.

Fold the large piece of dough down to cover the filling. Then stretch the small piece of dough up over stromboli and seal it to the other piece of dough.

Place on a half sheet pan seam side down. If a glossy, crunchy crust is desired, brush with egg wash (mix an egg with a splash of water), let sit for a minute, and then brush again with egg wash. For a softer crust, brush with roasted garlic butter or butter.

Using a sharp knife or bread lame, slice five diagonal lines along the stromboli. I sliced almost completely through the dough and allowed it to split open as it baked. Bake for 10-15 minutes.

What can you put in a stromboli? Traditionally, you cover the dough with tomato sauce, sprinkle on cheese, add Italian meats, then sprinkle more cheese. I wasn’t in the mood for tomato sauce. I made two fillings – 1c ricotta cheese, 1/2c shredded sharp cheddar, and 1c shredded broccoli (this is a great way to use up broccoli stems if you have some left over from another recipe). The other filling was 1c ricotta, 1/2c shredded sharp cheddar, 1c shredded chicken, and 2 diced peaches.

Curried Egg Salad

I had planned to make a curried egg salad (shredded carrots, diced onions, diced hard boiled eggs, Greek yogurt, and Penzey’s sweet curry powder) so we could use up the Easter eggs. Got the flatbread cooked. Everything was diced up & ready to go in a bowl. Got another bowl for the yogurt (when you use curry POWDER, mixing it into the yogurt first to make sure it’s all smooth & hydrated makes a really nice sauce. For some reason stirring in yogurt and then adding curry powder makes a mess. I think it’s because powder bits cling to the chunks of food & never get hydrated). Grabbed the yogurt container from the fridge … and it’s almost empty. Umm … hungry people, food ready for the curry sauce. So I decided to try making mayo again (that’s what the recipe calls for anyway). I’ve tried a few times, and never gotten anything vaguely useful.

So I searched for a never breaking mayo recipe and got something that actually worked for me:

http://www.inspiredtaste.net/25943/homemade-mayonnaise-recipe/

They add some Dijon mustard to the egg/vinegar mixture & uses the whole egg instead of just the yolk. Which means you don’t end up with spare egg whites that you’ve got to use somewhere (although they do freeze just fine). There’s certainly some flavour from the Dijon (and colour – it’s not a pure white cream), but it’s tasty.

Sauteed Hop Shoots

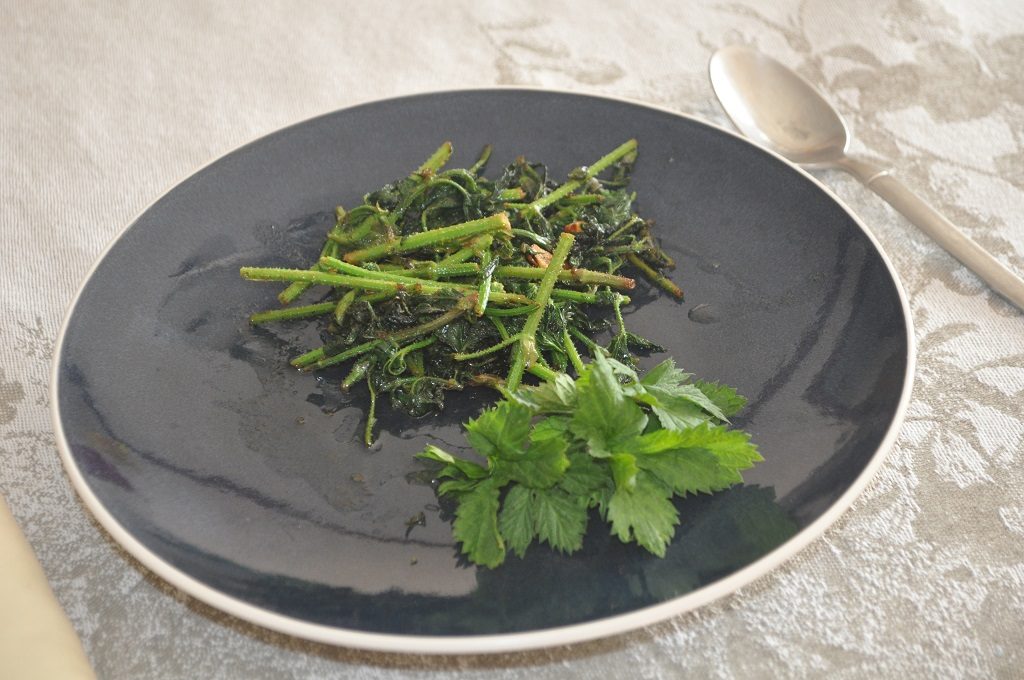
Our salad course for Easter was a sauteed hop salad. We have both cascade and centennial hops, and the ones that are in the ground have grown incredibly in the past week or so. Before the snow, we had little sprouts barely nudging through soil. Now some of our vines are two feet long!

So I missed the really tender early sprouts. I sauteed the thicker stems in a little olive oil, lemon juice, and garlic. Then garnished with fresh hop leaves. It was really good – and I only used about half of the trimmings.

DIY Bitters

Sometimes when I research the process to replace a manufactured something-or-other with a homemade version, it ends up being a significant effort. Other times, though, the process is shockingly simple. Bitters fall into the later category. To make bitters, you soak stuff in alcohol (vodka or whiskey) for a few weeks. What you soak changes the flavor of the bitters, so there’s a bit of an art to it. But the actual process is simple and straight forward.

I am going to make hop bitters using frozen whole hops that we grew last season. The base will be cascade hops soaked for two weeks in vodka. If that is not sufficiently bittering, I will take some centennial and boil it in water to make a hop tea. Reduce the hop tea by at least 50% and add that to the vodka/hop mixture. I thought it could be stored with some whole hops in the bottle for aesthetics.

Spent Grain Banana Muffins

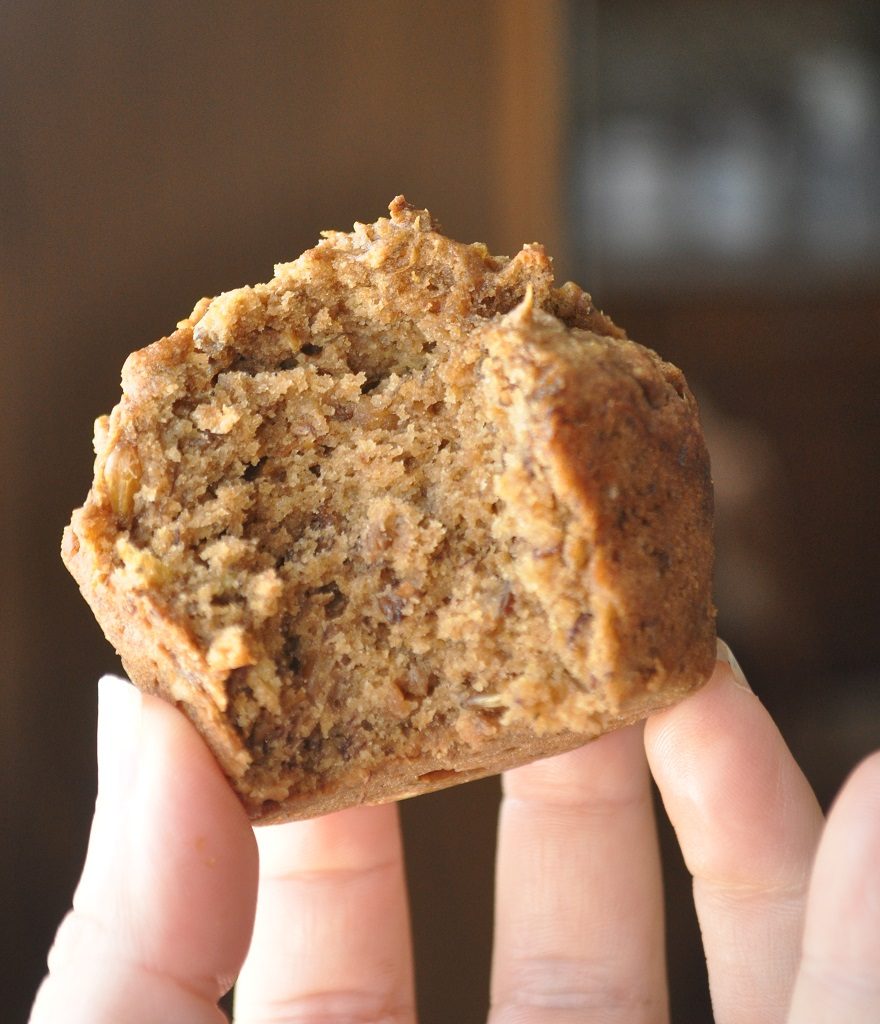
We made the Medusa Cream Ale last night, and it seems so wasteful to throw out the steeping grains (a.k.a. ‘spent grains’). I’ve added a cup to a 4c flour pizza dough recipe before – it makes a nice whole grainy crust. Anya has taken the ‘self service’ approach to bananas, but she leaves somewhere between an empty peel and 7/8th of a banana sitting on the kitchen counter. I’ve been collecting her banana bits in the refrigerator … so I wanted to make something with bananas.

Banana Muffins With Spent Beer Grains

5 T butter, melted
3.5 bananas
1/3 c dark brown sugar
1 large egg
1/2 t salt
2 t vanilla
1 t baking soda
2 t Penzey’s apple pie spices
2 cups spent beer grains — this batch was from a light cream ale, you’ll get a different taste using grains from a darker beer
1 1/2 c whole wheat flour

  1. Preheat oven to 350 degrees F
  2. Melt the butter in a large bowl
  3. Mash the bananas into the butter
  4. Add the brown sugar and stir until dissolved
  5. Stir in the egg, salt, vanilla, baking soda, and spices
  6. Add the spent grains and mix well
  7. Add the flour, half a cup at a time, and stir until no streaks of flour are seen
  8. Scoop batter into muffin tin (I use a non-stick tin from Williams Sonoma and filled each one about 90%)
  9. Bake for 20-25 minutes, until a tester inserted into the middle of a muffin comes out without raw batter (a little moist is OK, uncooked batter not OK)

Broccoli Tots

I’ve seen a lot of recipes for broccoli tots, but really haven’t been impressed with the end result. I created two of my own recipes that we like a lot more – although neither approach is potato-free. The first ‘recipe’ is to take your favorite latke (potato pancake) recipe and add 8 ounces of shredded broccoli. I make a lot of ‘stuff’ (soups, stir fries) that uses the broccoli crowns, but I’ve never cared for slices of the stem in dishes. Shreds of broccoli stems, however, work wonderfully in cheddar broccoli soup and broccoli tots. Grate the left-over stems and steam them for a few minutes, allow to cool, then use or freeze. I squeeze them out before using – otherwise you get a lot of water.

The second recipe:

1 lb potatoes
8 oz shredded broccoli
3 oz shredded cheddar cheese
1 t salt
1 t pepper
1/4 t cayanne pepper
1 T corn starch
1 egg

Preheat oven to 400 degrees F.

Shred half of the potatoes and set aside. Chop the remaining potatoes into small chunks and cook in boiling water (~10 minutes). Mash the potato chunks.

Sauté the shredded potatoes in oil (butter, olive oil, peanut oil) until they are crispy and golden.

Combine all of the ingredients except for the shredded potatoes. Mix well. Carefully stir in the sautéed shredded potatoes.

Line a half-sheet with a silicon baking mat. Scoop small amounts (1-2 teaspoons) of the mixture into your hand and roll into a ball. Place the balls onto the baking sheet and flatten a little bit.

Bake for ten minutes at 400 degrees. Turn tots over and continue baking for ten more minutes.

Ingredient Delivery Services

I keep getting promotions from companies that offer fresh meal ingredients delivered – Blue Apron, Hello Fresh, Home Chef, and Plated. Each provides recipes and ingredients that show up on your doorstep – some services offer a selection of meals, others give you what they give you. I’ve been curious to try one of these services, but it’s not something I want to pay to test. I finally got an offer of free. I’ve tried it  – and, honestly, if the other services offer up free food … I’ll take those offers too. But I wouldn’t pay for this service.

(1) Convenience – Their advertising is centered around how terrible grocery shopping is and how you can avoid such drudgery with their service. Problem is, there’s no plan that provides anything like the groceries you’d need for a week. Even if you got seven dinners (which may require purchasing multiple plans, quite a few of these services are the 3-4 meal a week type) … what are you eating for breakfast or lunch? Maybe for someone who eats out a LOT, these services eliminate grocery shopping (or more likely reduce it to a once-a-month trip). But for me to feed three people three meals a day … didn’t eliminate a thing.

(2) Cost – This is meant to be cheaper than grocery shopping because you aren’t overbuying. But I usually make enough food for dinner to allow leftovers for lunch the next day. Larger packages are cheaper – a savings that is only realized if the food isn’t allowed to spoil. I’m still learning to preserve everything we buy. I buy a large package of something, and break it into smaller portions and freeze most of it. I buy things to use in multiple meals. I am trying to cook food into something preservable before it spoils – turn bananas into banana bread, milk into yogurt, blanch and freeze veggies. I am certain that buying just the quantity you need for one meal is cheaper than overbuying for one meal, but their cost estimates don’t include *using* the rest of the stuff to make a second and third meal. If I pay 15$ for one meal or 18$ for three, there’s a big difference.

(3) Logistics – I don’t know why I expect companies who are shipping something perishable in unfriendly weather to have come up with some great solution to the problem. I’ve bought plants online and had them arrive dead because of this incorrect assumption. Had the same problem with fresh produce. It is Winter. It is WELL below freezing (lows around 0 degrees F kind of cold). My “fresh” veggies arrived frozen solid – and the ‘cold’ stuff was packed between two ice packs … during a week where the high’s were in the low 20’s, this seemed a bit wasteful. Freezing fresh produce is OK for some things (a lemon that is going to be juiced), but other veggies are only useful for making stock. I don’t want to have to track the long term weather forecast to decide if the weekly meal subscription should be put on hold or not. And it certainly isn’t convenient to be missing ingredients (back to #1, I had to go shopping to replace the things that froze).

(4) Effort – As I mentioned, I usually make a large dinner that is used for lunch the next day. Bonus if some portion of it can be used for breakfast too. Since they have single portion meals, that’s a no go. So I had to make dinner last night, then make something completely different for lunch today.

(5) Meal composition and portion – They quite simply didn’t provide enough food for two people. I’d have had hungry cranky people if I served JUST what was in the planned meal. I serve a lot more vegetables. I supplemented their meals with a salad course, or you can add an additional vegetable side dish … but you’re shopping again. And having to come up with something.

Meal ingredient delivery services are certainly not for me. There’s some convenience to allowing someone else to decide what we’re eating a few nights each week, and there were a few interesting recipes that I’d not seen before. Their promotional e-mails, random cooking blogs, Food TV’s page, cooking magazine web sites all provide new recipes that someone else has selected too.

I know a time when I could have used a service like this (couldn’t have afforded it, but eh): When I left University and lived on my own for the first time. I didn’t have any staples (and it’s expensive to stock a kitchen with spices, flours, and such). I didn’t really have any idea what to buy at the grocery store. Or what to make.

I have had a lot of friends who literally eat every meal from a restaurant – I could see someone like that who wanted to cook a few times a week using a service like this. Sure there are other ways to figure out a few meals and get the ingredients … but this requires you to put about as little effort into cooking as possible.

Anya’s 4th Birthday Cake

This year, I made a banana caramel cake for Anya’s birthday. She assembled her own cake & put the candles on it – messy, but she had a lot of fun. I’d have done more dulce de leche if it wasn’t melting the whipped cream. I made it in the pressure cooker – 15 mins on high @ about 10AM, let the whole thing sit until we made the cake. Microwaving the caramel enough to get it pourable made it too hot to be near the whipped cream. So we spread the caramel on the cake, let that cool a bit, then spread out the cream and topped it with bananas.

Chocolate Chip Butter Cake

Ingredients:

    • 3 cups cake flour, plus more for dusting the pans
    • 3 teaspoons baking powder
    • 1 cup unsalted butter, at room temperature, plus more for coating the pans
    • 2 cups granulated sugar
    • 1/2 teaspoon kosher salt
    • 4 large eggs
    • 2 large egg yolks
    • 1 cup sour cream
    • 2 teaspoons pure vanilla extract
    • 3/4 cup semisweet chocolate chips

Method:

  1. Preheat to 350 F.
  2. Coat three 8″ round cake pans with butter. Line the bottoms of the pans with a circle of parchment paper. Lightly butter the parchment. Dust with flour.
  3. Sift the flour and baking powder together.
  4. In the bowl of a stand mixer fitted with the paddle attachment, beat the butter, sugar, and salt on medium-high speed until lightened and fluffy. Add the eggs and yolks 1 at a time, beating well after each addition. Scrape down the sides of the bowl a few times while beating.
  5. Remove the bowl from the mixer. Add half of the sifted dry ingredients and beat by hand until combined. Beat in the sour cream and vanilla. Add the remaining dry ingredients and the chocolate chips, beating until combined.
  6. Divide the batter among the pans .
  7. Bake until a toothpick inserted into the center of the cakes comes out clean, about 20 minutes.
  8. Set the pans on a wire rack to cool for about 10 minutes. Invert the cakes onto the racks, peel off the parchment, and let cool before frosting.

Whipped cream — mix 1 1/2 cups heavy whipping cream, 2 tbsp maple syrup, and 1 1/2 tsp vanilla. Whip until firm peak stage.

Dulce de leche — Pour one can of sweetened condensed milk into a canning jar. Place lid on jar and lightly screw on. Place canning jar in the pressure cooker pot and add enough water to come about halfway up the side. Pressure cook on high for 40 minutes followed by a fifteen minute natural steam release. Remove jar from pressure cooker and allow to cool for another ten minutes. Open jar and stir to smooth out the caramel.


Assembling the cake — take a cake, cover in caramel, top with whipped cream, add slices of bananas, and then add another cake. I sliced off the domes of each cake to ensure the whole thing was relatively flat and stable.

Stollen

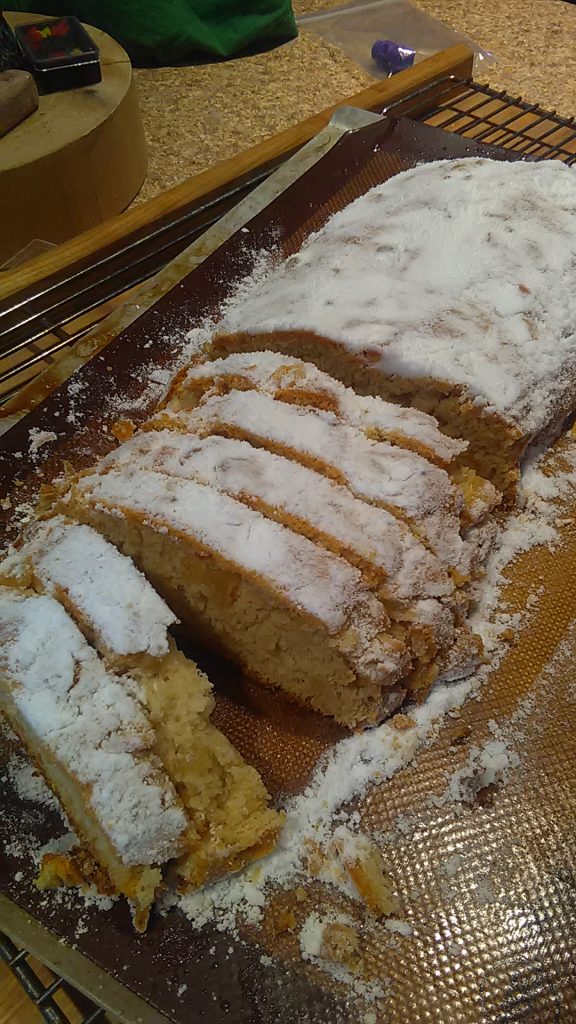
Another entry in my “fruit cakes and breads do not suck” series – Christmas stollen. It’s coated in powdered vanilla sugar. We made a vanilla stout a few years ago — and I pulled out the vanilla husks, poured some white sugar into a container, and mixed the husks into it. Those vanilla husks are still making a vanilla flavored/scented sugar. To make castor sugar, you can just throw a cup or two of sugar into a blender (make sure it has a glass container, the sugar will scratch plastic) and blend for a minute or two. This is *not* a replacement for commercial powdered sugar – that’s a blend of corn starch and finely ground sugar.

Anya really enjoyed this bread (probably because of the sugar coating!)

Penguin Snacks

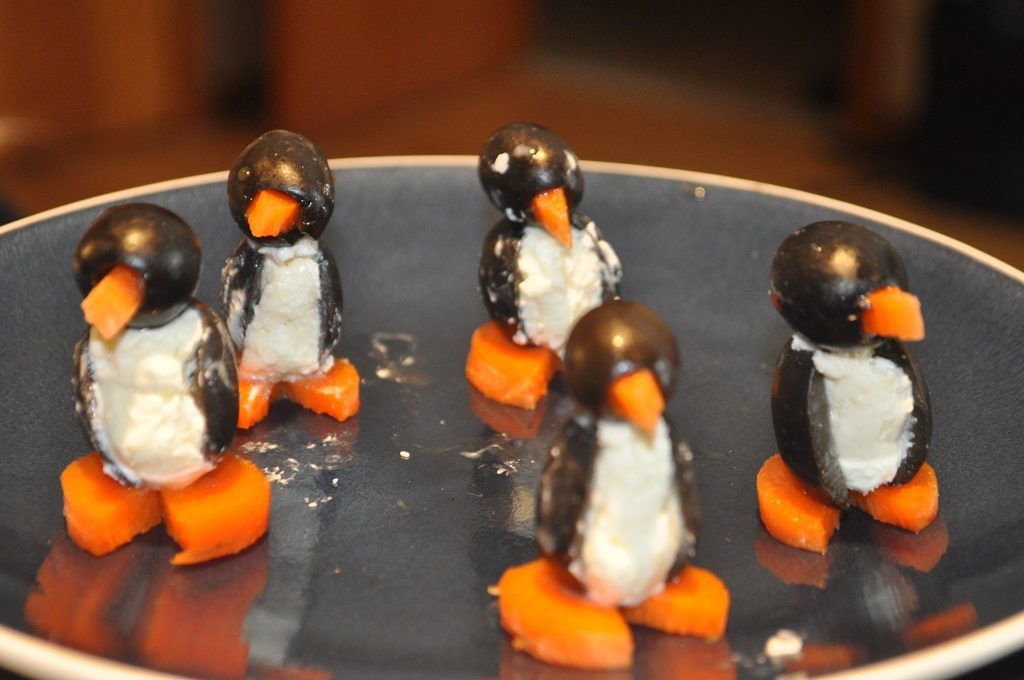
While looking for a healthy snack for Anya’s preschool Christmas party, I came across quite a few cute but not-for-bunches-of-kids snacks. One of them was penguins made of olives, cream cheese, and carrots. The not-kid-friendly part was the toothpick that holds the whole thing together. Well … turns out you can make them without toothpicks. Don’t move them afterward, walk softly … and there is a lot of intricacy that means I’m not making enough for a party tray. But Anya loved having half a dozen little penguin snacks to munch on today.

Use a small olive and a jumbo olive. Slice a section from the jumbo olive. Roll cream cheese into an oblong shape & stuff into the olive. Slice a carrot into circles, and cut a small triangle from each circle. Set the stuffed jumbo olive on the carrot circle. Put the carrot triangle into the small olive, smear a little cream cheese on the ‘neck’ part of the small olive, then stick it onto the jumbo olive. Voila, one penguin.