Tag: Office 365

Did you know … you can customize Teams channel notifications?

Microsoft has created additional notification options in Microsoft Teams – and you can now customize those settings for individual channels to ensure you’re getting notifications when and were you want to see them.

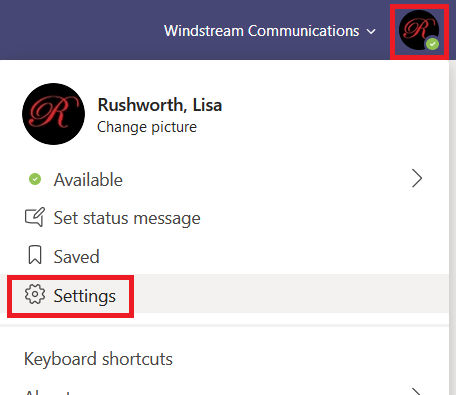
To access your general notification settings, click on your avatar in the upper right-hand corner of the Teams window. Select “Settings”.

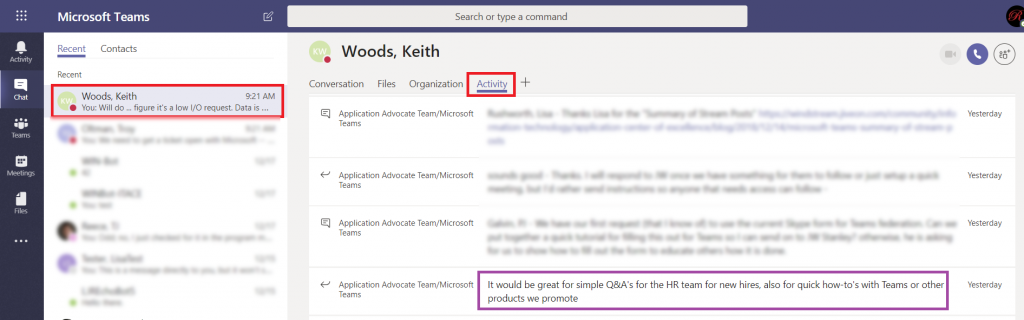
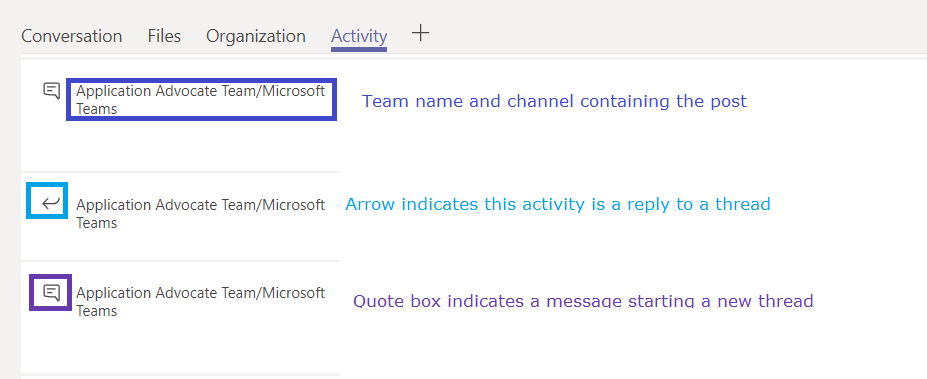
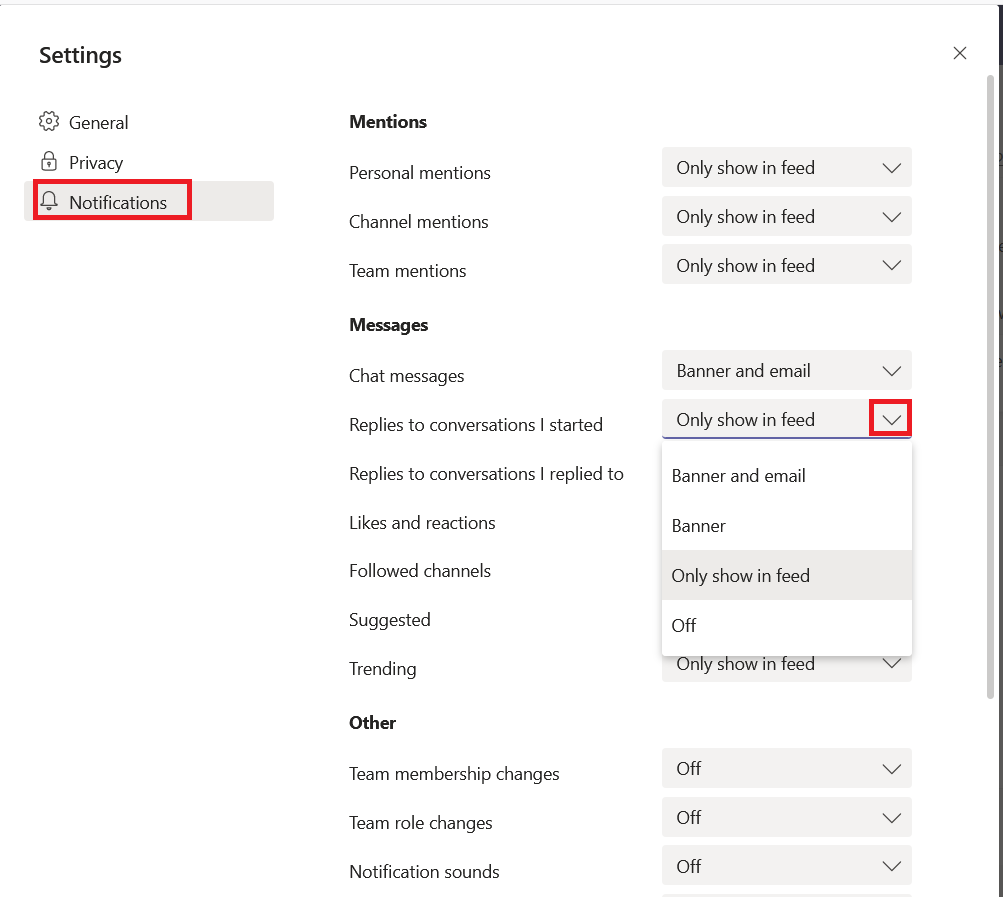
Click on “Notifications”. You will be presented with a long list of activities and can select the type of notification you wish to receive for each activity. Notice “Show only in feed” is now an option – this means new activity will appear in the “Activity” section of Teams but not display the big purple notification box (a.k.a. “the banner”) in the lower right-hand corner of your screen.

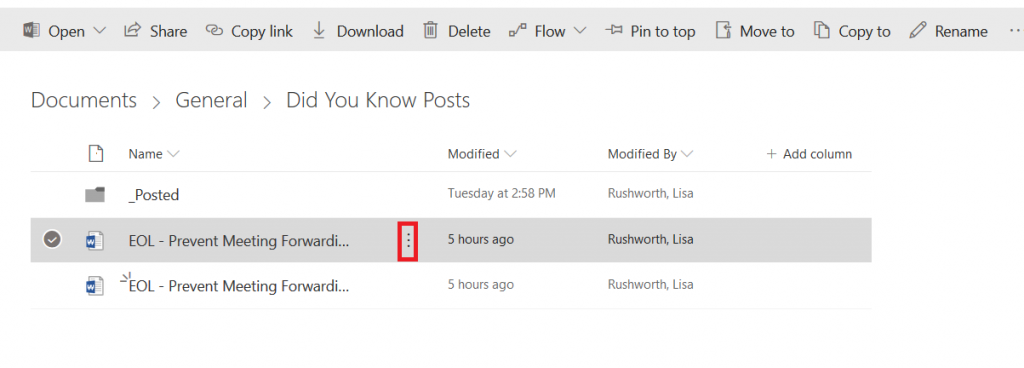
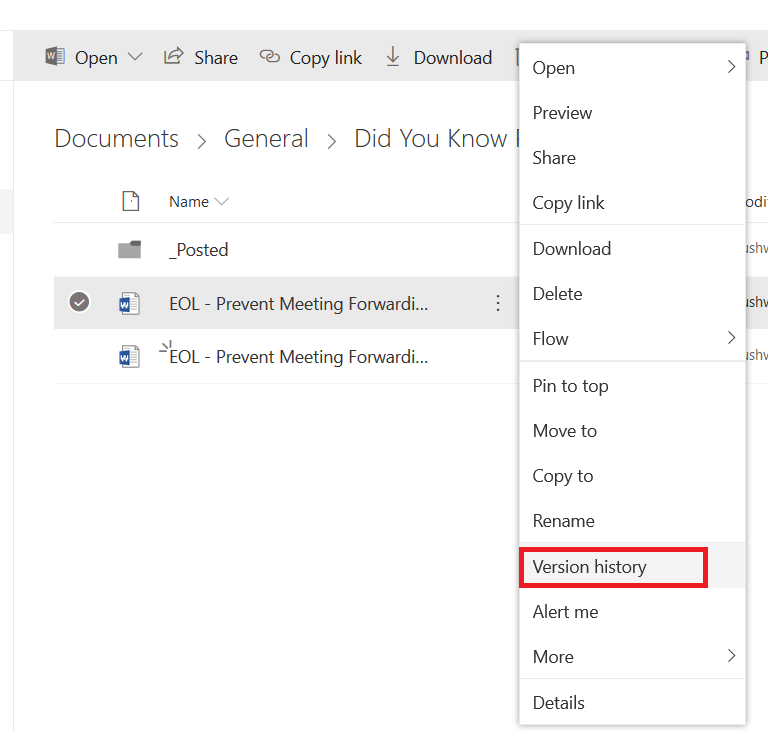
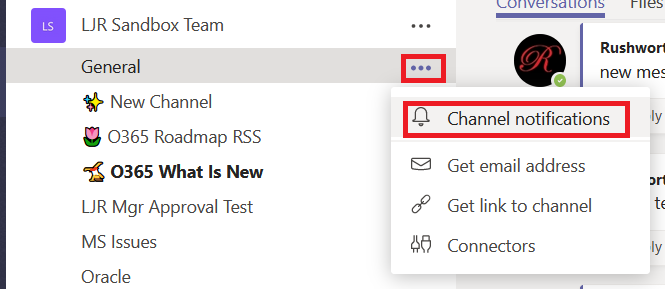
You can also customize notifications for individual channels – maybe you want a banner notification for a really important channel, or you don’t want to be notified about every reply to a message. Click the ellipsis next to the channel name and select “Channel notifications”

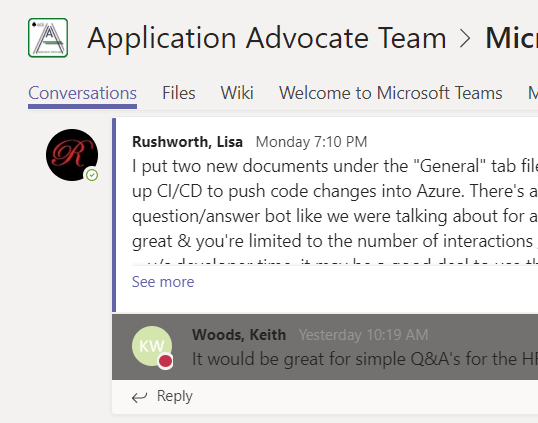
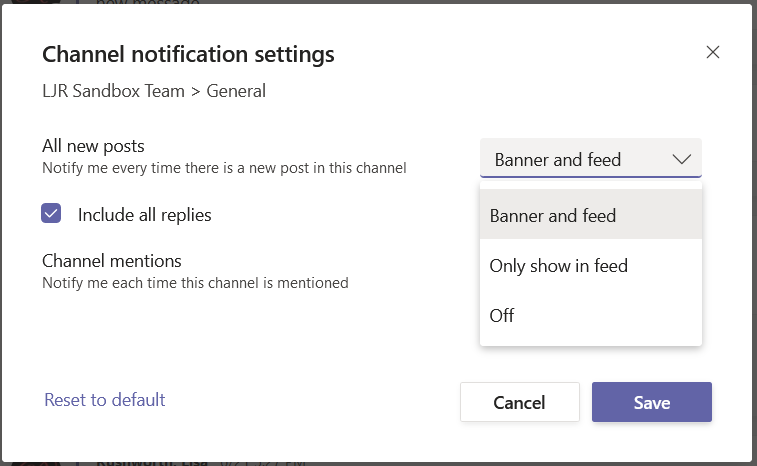
Here you can customize the notification you will receive for channel posts and at-mentions (you’ll still get notified about Team or individual at-mentions). You can also un-check the “Include all replies” box to get notified about new threads.

All of the channels that you followed previously will use your Teams-wide notification settings. Channels that you weren’t following will have notifications off. Newly created channels will have new post notifications turned off and channel mentions set to “Only show in feed”.

** If you still see “Follow” and not “Channel Notifications”, click on your avatar in the upper right-hand corner of the Teams app and select “Check for updates”. Once the updates have been applied, click the tip to “refresh” Teams.


Do you know … where you saved that Office 365 document?

Being able to save documents directly to Teams, to sync documents and work on them locally, and to just store documents locally provides a lot of options when you’re saving a document. For me, though, a lot of options also means I’m not always sure which option I chose 😊 In which Teams space is this document saved? Did I stash it locally because I’m not ready for other people to peruse it?

Luckily where the document is saved can quickly be displayed in the Office 365 applications. Click “File” on the ribbon bar.

The “Info” section contains the path to the document – a document that is stored in a SharePoint document library (be that a Teams Channel file space or some other SharePoint document library) will include the SharePoint site name (the Team name in the case of Teams Channel files). Clicking “Open file location” will open a browser tab to the SharePoint document library which contains the file.

A document on a local or network drive will have a path starting with the drive letter. Clicking “Open file location” will open a File Explorer window to the folder containing the document.

And a document that hasn’t been saved won’t have any file information listed.


Did you know … Microsoft Teams Chat can help you find messages others post into Teams spaces?

I am a member of multiple Teams, and I can remember that Keith posted something about creating a Q&A a few days ago … but I don’t remember where he posted that message. I cannot reply to it until I find it. Search can help — chat conversations are searchable. But did he type QnA, Q&A, Q and A … 

Instead of clicking through all of the channels in all of my Teams spaces trying to find a single post or working my way through the various ways of phrasing “questions and answers”, I can look at my chat with Keith. Click the “Activity” tab. Now I am looking at things Keith has posted to our shared Teams spaces in the past two weeks.

The Team and channel into which the activity was posted is included before each message. An icon indicates if the activity is a reply to an existing thread or a message starting a new thread.

You can click on any entry in the activity log.

Your Teams client will show you the message in its context – you are in the correct Team and Channel, and the message is briefly highlighted. This makes replying to the message we found in the activity feed quite quick.

What if you’ve never chatted with the person? Start a new chat and type in their name. You don’t have to send a message to them (although I could totally see myself writing “ignore this message – I just needed to get you listed in my recent conversations”), just click away and there will be a draft chat with them. Click on that draft chat, and you’ll have an “Activity” tab.

Did you know … Excel performs logical tests?

I have been writing a lot of “did you know” articles as part of our Microsoft Teams reintroduction, and I have an Excel file that lists topics for which we want articles. To avoid posting the same article twice (or worse, writing the same article twice!), I mark off when the article is written and posted. With a long list, though, it is difficult to identify which articles still need to be posted (yeah, I know I’m not apt to have posted an article that hasn’t been written so I could have just used a filter on the ‘Posted’ column … but there are plenty of cases where a simple filter does not suffice). Sometime you can build an advanced filter that isolates the specific data you need, but there’s an easier way — the Excel IF function.

In my spreadsheet, I added a column, named “Status”. The “IF” function displays different text when the test evaluates to TRUE and FALSE: if(B2=”x”,”Written”,”Not written”) displays “Written” in all of the rows where column B has an x, and “Not written” in the remaining columns.

In conjunction with IF, I can use the Boolean AND function to display “Finished” in any row where both columns B and C contain an X:      =IF(AND(B2=”x”,C2=”x”),”Finished”,”In Progress”)

The content of the Status cells can be used as a filter. On the “Data” tab, select “Filter”.

Click the drop-down menu on the “Status” column, deselect whatever values you do not wish to display, then click “OK”.

Voila! Now I see only the articles where the status is not “Finished”.

Did you know … A OneNote notebook and Planner board are automatically created for each Microsoft Team space?

They are! But to make them reallyuseful, add them as tabs to one of your channels. Pick the channel where you want the OneNote and/or Planner tabs to appear. In that Channel, click the “Add a tab” button. 

OneNote is straight-forward – select OneNote 

And then select the notebook with your new team’s name. Click “Save” and the notebook will be available as a tab on the channel.  

Planner is a little trickier – the automatically created Planner board does not show up until it is used (you’ll be asked to create a new Planner board if you try adding a Planner board before the automatically created one has been used). But how do you use the one that’s already there instead of making a new one? Open Planner from https://portal.office.com and select “All plans”. Find the Planner board with your new team name. Click on it to open it.

And then close it 🙂 Now you can add the Planner board to your Teams space. Click on the “Add a tab” button within your channel.   

Select “Planner” 

Click the radio button before “Use an existing plan”, then click the inverted caret, and the automatically created Planner board is a valid selection.  

  Click “Save” and the Planner board will be available as a tab in your channel. 

Did you know …OneNote can extract text from images?


You’ll need to use the application, not the OneNote website. Insert the picture – from the ribbon bar, select “Insert” then “Pictures”. Select the image you want and click OK.

Right-click on the image. “Copy Text from Picture” does exactly that – if your image is low resolution or really blurry, it’ll take a minute for this option to be available. Wait a bit and right-click again.

The text from the image is now in your clipboard. I’m pasting it into the same OneNote page, but you can paste it anywhere.

Voila! Text:

Did you know … you can use Microsoft Excel to count the number of records within a range?

I’ve been generating reports to track our Microsoft Teams adoption – how many people are using Teams, how many messages are being sent in Teams, how many Teams are there. Some of these metrics have easily visualized count-per-unit-time summaries available. Some, like the number of Teams, do not.

Team Created On
Directory Services 1/19/2017
App Proxy 1/19/2017
LDAP 1/19/2017
ADFS 1/19/2017
Nagios 1/19/2017
File Cluster 1/19/2017
Exchange Online 1/19/2017
Active Directory 1/19/2017
Commvault 1/19/2017

But it’s easy to turn a list of groups and creation dates into visualizable data. Paste the data into Excel. To find the number of items where “Created On” falls in a range, we need to be able to define that range. 01 January 2017 is easy enough, but how do you get the end of January? Excel has a function, EOMONTH, that returns the last day of a month.

Date is any date object. Offset is an integer number of months prior (negative numbers) or after (positive numbers) Date for which you want the last day of the month. I can list the dates to start and end quarters with =EOMonth(Date,2). With 01 January 2017 in cell D2, the last day of January is =EOMonth(D2,0)

 I don’t want to type01 Feb, Mar, April … flash fill and the fill handle need a few values before they can figure out the rest of a sequence. But I can use the last day of the month to get the first day of the next month – just add one! With 31 January 2017 in cell E2, I want =E2 + 1 in cell D3. (Yes, there are other ways to do this – probably dozens.)

Now that we’ve got a formula for the start and end of the month, just fill down to produce the ranges we need to see how many Teams were created each month. Then we just need a formula to do the counting for us. I use the COUNTIFS function.

=COUNTIFS($B$2:$B$1000,”>=”&D2,$B$2:$B$1000,”<=”&E2)

Counts the number of items in the range $B$2:$B$1000 (the cell range is static as the formula is copied elsewhere, hence the

Fill down – you’ll see the range remains static, and the comparison is to the D and E columns on the current row.

Voila – easily visualized data. And a graph 😊

Did you know … Excel can transpose data?

Have you ever gotten data where the column headers are along the left-hand side and each record is a column? I’m sure there are people who prefer each record to be a column too, and they probably hate my data where the headers run along the top and each row is a record. Did you know Excel can swap between these two formats?

Here I have a spreadsheet where each column is a record. Highlight and copy the records. Yes you can use ctrl-c to copy … but there’s no way to make a screen-print of my keyboard actions.

Click elsewhere – below the data you copied, on a new sheet, even a new spreadsheet. Right-click & expand “Paste Special” – find the icon for Transpose and click it.

Look – now each row is a record, just like I wanted. You can even delete the original data if you want – the pasted information will still be there.

Did you know … there’s version history for Microsoft Teams files too?

There is — which is obvious once you start thinking about how Teams data is stored. The “Files” tab is a pretty front end for a SharePoint document library, and document libraries store version history. The problem is I didn’t know a good way to walk an end user through accessing that document library. I’d generally do a screen sharing session with the user & navigate them to the right place myself. And then I saw this — on the Files tab, there is an “Open in SharePoint” button. You don’t need to drill down to find the specific file you want to revert – as long as you are on the proper channel, we’ll be able to get to the document.

Voila! A new tab opens and shows you the SharePoint document library that underpins the Teams Files tab. Now drill down until you find the file for which you are looking.

Click on the not-quite-a hamburger menu – the one between the file name and modify time.

Select “Version History”

To view the previous version, click on the hyperlinked modify timestamp. To restore the previous version, hover your mouse over the modify timestamp of the iteration you want.

On this menu, “View” will show you some information about the file – not actually view the file. Select restore “Restore” to replace the current version (the one that shows up in Teams) with the selected – you’ll be asked to confirm that you want to overwrite the current version.

Once the document has been restored, you’ll have a new entry on the version history pane – so you can even revert your document reversion if needed.


Did you know … Screen Sharing in Teams Chats Is Rolling Out!

I’ve been tracking an RFE for screen sharing in Teams chat — it’s super-simple in Skype, and while it’s possible in Teams (schedule a meeting), it isn’t a one-click simple process. But today, we’ve got a new button in our chat sessions — start sharing your screen!

I don’t see the option in the web client on Firefox or Chrome, but I hope it is coming there too.