Yes, I know it’s old and no longer maintained … but it’s also what my function already uses, and I don’t want to take a few hours to get moved over to pycryptodome. You can install pycrypto on Windows 10 running Visual Studio 2017. But there’s a trick. Find the location of stdint.h in your VS installation.
Open x86_x64 Cross Tools Command Prompt For VS 2017
Run:
set CL=-FI"C:\Program Files (x86)\Microsoft Visual Studio\2017\Enterprise\VC\Tools\MSVC\14.14.26428\include\stdint.h"
where the bit in quotes is the path to your stdint.h (VS build version may differ, which will change the path).
Now, from within the Cross Tools Command Prompt, run:
This post contains more niche “for developers” information than most of my Teams info series 😊
You’ve seen third-party services with connectors in Teams – both services with connectors published to Teams and services that can use the “Incoming Webhook” connector to post data. Youcan use the “Incoming Webhook” connector within your code too. If you want to allow others to post information into their Teams spaces, you’ll need a configuration option that allows end-users to supply the webhook URL. If you want to post information into your Teams space, then you can include it directly in your code. If you are doing the former, provide something like the “Creating a Teams Webhook URL” instructions below to your end users. In this example, I am doing the later. The example script is Python code that gathers statistics and posts a summary to my Teams space.
Creating a Teams Webhook URL:
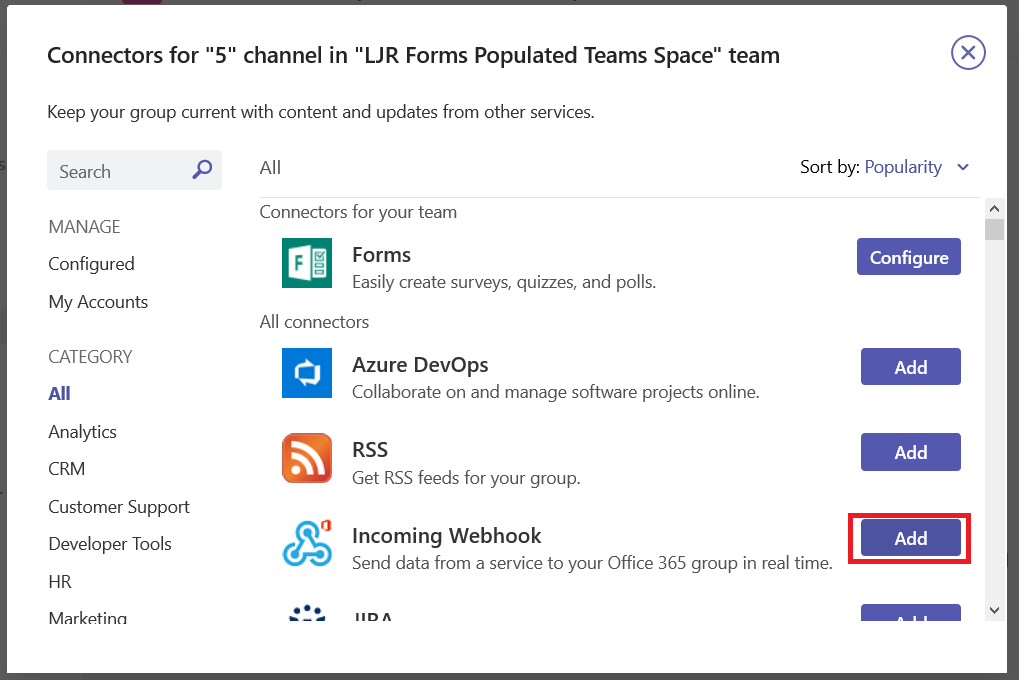
Create a URL for your incoming webhook – from the not-quite-a hamburger menu next to the channel into which you want to publish your data, select “Connectors”, find “Incoming Webhook”, and click “Add” (if you have already configured a webhook in your Teams space, you will see “Configure”instead, and will not have to ‘install’ the webhook)
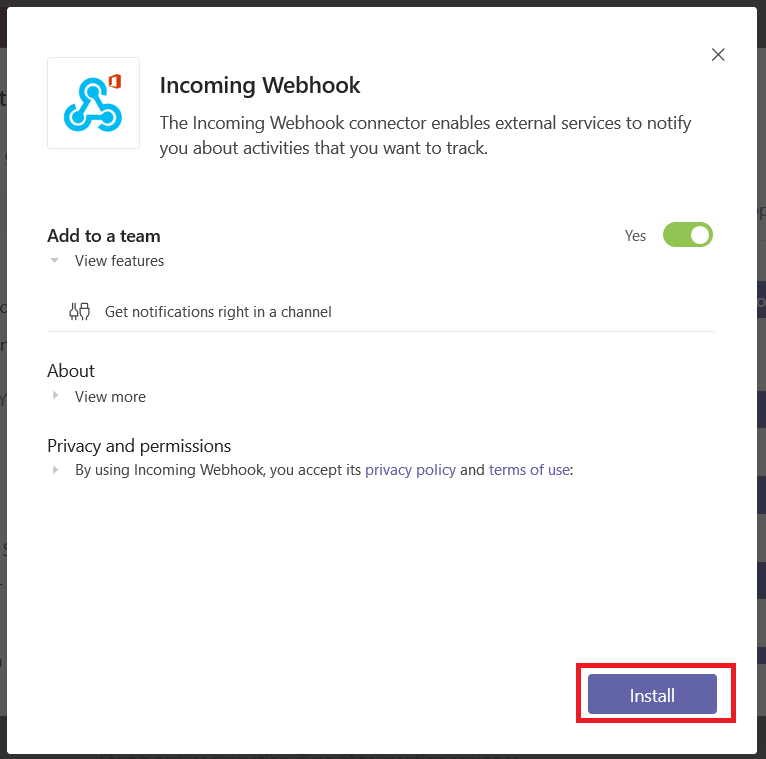
Read the privacy policy and terms of use, and if they are acceptable click “Install”
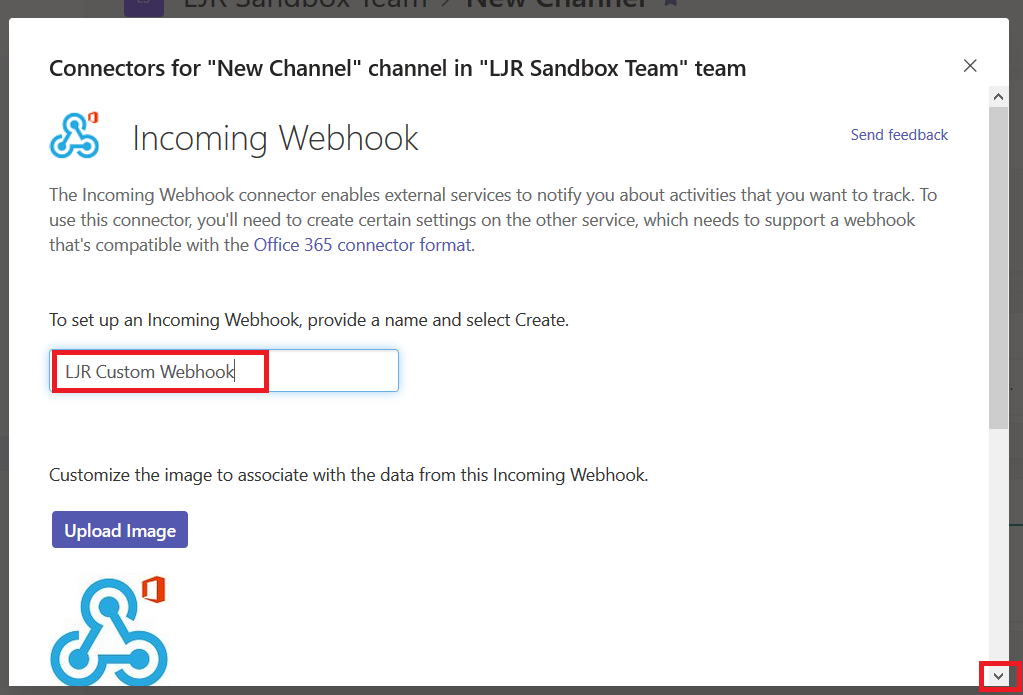
Provide a name for your webhook – this name will be displayed on all posts made via this webhook. Scroll down.
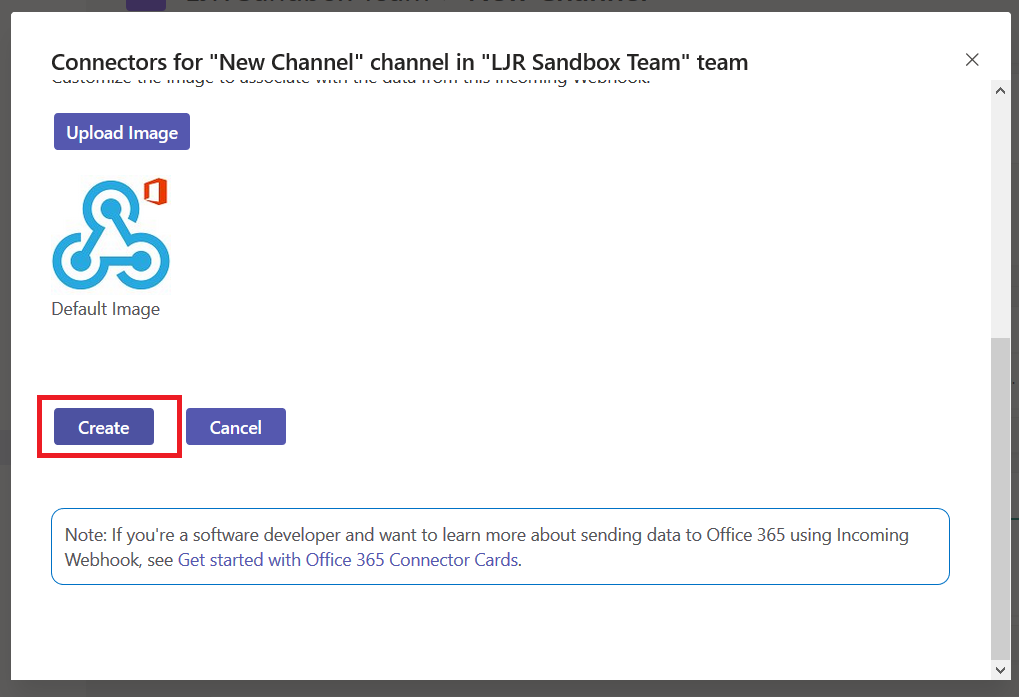
You can customize the logo associated with your webhook posts – nice if your application has a well-known logo. Click create to generate the webhook URL.
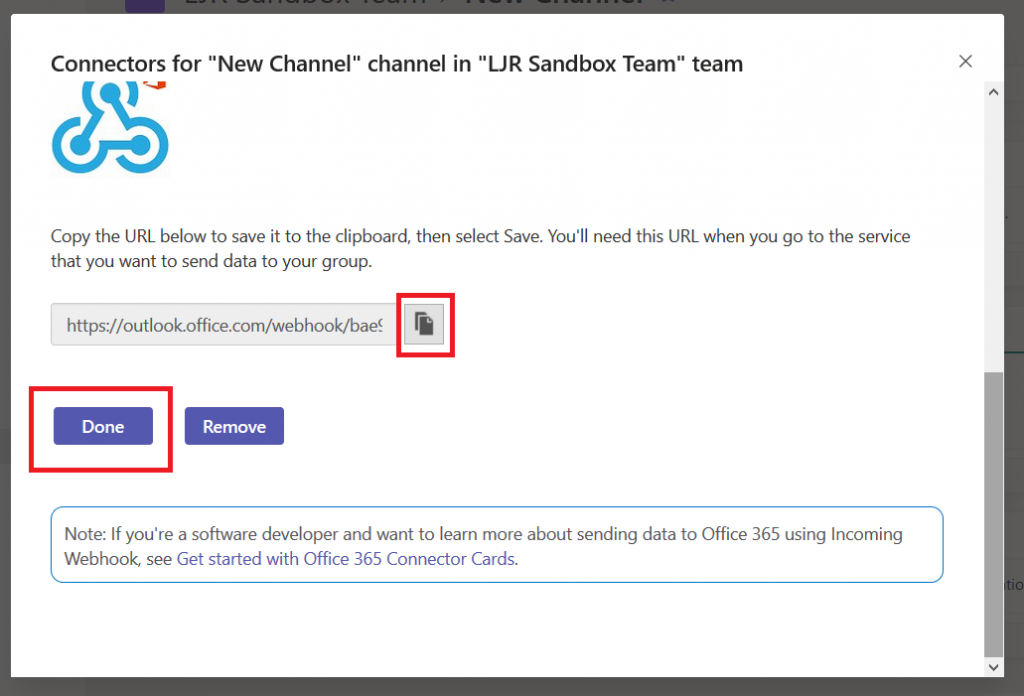
Copy the URL somewhere, then click ‘Done’.
Using Teams Webhooks Within Code:
OK, now you’ve got something like this in a text document (no, I didn’t post a real webhook to the Internet – the long pseudo-random alphanumeric string is hex, and there aren’t a whole lot of m’s and q’s in hex!):
What do you do with it? You make a POST call to that URL and supply JSON-formatted card content in the data. Microsoft provides a complete card reference, but you’ll need to use the O365Connector Card with the incoming webhook connector.
The card requires “summary” or “text” be included – you’ll get a bad data HTTP response if you fail to set one of these values. Card text can be formatted in markdown or HTML – if you want to use HTML, you need to set markdown to false.
You’ll need a function that POSTs data to a URL:
################################################################################
# This function POSTs to a URL
# Requirements: requests
# Input: strURL -- URL to which data is posted
# strBody -- content to be sent as data
# strContentType -- Content-Type definition
# Output: BOOL -- TRUE on 200 HTTP code, FALSE on other HTTP response
################################################################################
def postDataToURL(strURL, strBody, strContentType):
if strURL is None:
print("POST failed -- no URL provided")
return False
print("Sending POST request to strURL=%s" % strURL)
print("Body: %s" % strBody)
try:
dictHeaders = {'Content-Type': strContentType}
res = requests.post(strURL, headers=dictHeaders,data=strBody)
print(res.text)
if 200 <= res.status_code < 300:
print("Receiver responded with HTTP status=%d" % res.status_code)
return True
else:
print("POST failed -- receiver responded with HTTP status=%d" % res.status_code)
return False
except ValueError as e:
print("POST failed -- Invalid URL: %s" % e)
return False
And you’ll need something to create a card and call the HTTP POST function. Here, I define a function that takes statistics on Windstream’s Microsoft Teams usage, formats a card with the values, and POSTs it to my webhook URL.
################################################################################
# This function posts usage stats to Teams via webhook
# Requirements: json
# Input: strURL -- webhook url
# iPrivateMessages, iTeamMessages, iCalls, iMeetings -- integer usage stats
# strReportDate - datetime date for stats
# Output: BOOL -- TRUE on 200 HTTP code, FALSE on other HTTP response
################################################################################
def postStatsToTeams(strURL,iPrivateMessages,iTeamMessages,iCalls,iMeetings,strReportDate):
try:
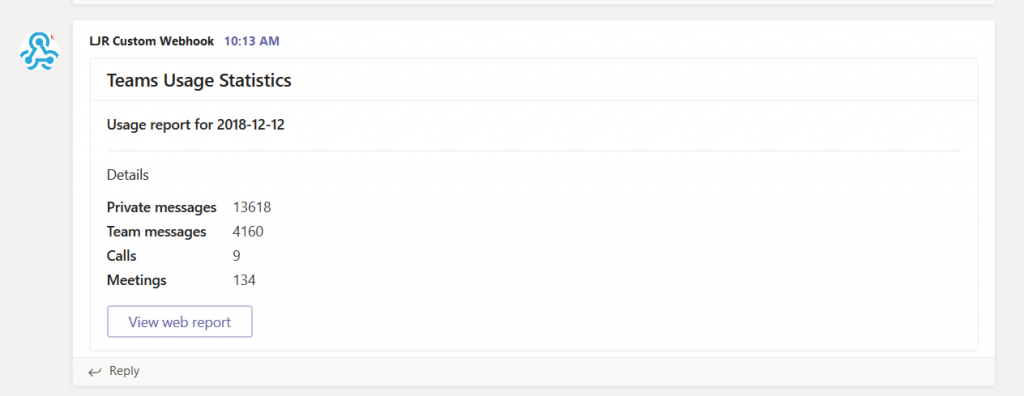
strCardContent = '{"title": "Teams Usage Statistics","sections": [{"activityTitle": "Usage report for ' + yesterday.strftime('%Y-%m-%d') + '"}, {"title": "Details","facts": [{"name": "Private messages","value": "' + str(iPrivateMessages) + '"}, {"name": "Team messages","value": "' + str(iTeamMessages) + '"}, {"name": "Calls ","value": "' + str(iCalls) + '"}, {"name": "Meetings","value": "' + str(iMeetings) + '"}]}],"summary": "Teams Usage Statistics","potentialAction": [{"name": "View web report","target": ["https://csgdirsvcs.windstream.com:1977/o365Stats/msTeams.php"],"@context": "http://schema.org","@type": "ViewAction"}]}'
jsonPostData = json.loads(strCardContent)
if postDataToURL(strURL, json.dumps(jsonPostData),'application/json'):
print("POST successful")
return True
else:
print("POST failed")
return False
except Exception as e:
print("ERROR Unexpected error: %s" % e)
return False
Run the program, and you’ll see information in Teams:
A personal recommendation based on my experience with third-party code that uses generic incoming webhooks — have a mechanism to see more than a generic error when the POST fails. It takes a lot of effort to pull apart what is actually being sent, turn it into a curl command to reproduce the event, and read the actual error.Providing a debug facility that includes both the POST body and actual response from the HTTP call saves you a lot of time should your posts fail.
I’ve encountered a few web applications (including more than a handful of out-of-the-box, “I paid money for that”, applications) that perform LDAP authentication/authorization every single time the user changes pages. Or reloads the page. Or, seemingly, looks at the site. OK, not the later, but still. When the load balancer probe hits the service every second and your application’s connection count is an order of magnitude over the probe’s count … that’s not a good sign!
On the handful of sites I’ve developed at work, I have used cookies to “save” the authentication and authorization info. It works, but only if the user is accepting cookies. Unfortunately, the IT types who typically use my sites tend to have privacy concerns. And the technical knowledge to maintain their privacy. Which … I get, I block a lot of cookies too. So I’ve begun moving to a token-based scheme. Microsoft’s magic cloudy AD via Microsoft Graph is one approach. But that has external dependencies — lose Internet connectivity, and your app becomes unusable. I needed another option.
There are projects on GitHub to authenticate a user via LDAP and obtain a token to “save” that access has been granted. Clone the project, make an app.py that connects to your LDAP directory, and you’re ready.
The authentication process is two step — first obtain a token from the URL http://127.0.0.1:5000/auth/request-token. Assuming valid credentials are supplied, the URL returns JSON containing the token. Depending on how you are using the token, you may need to base64 encode it (the httpie example on the GitHub page handles this for you, but the example below includes the explicit encoding step).
You then use the token when accessing subsequent pages, for instance http://127.0.0.1:5000/
Run and you get a token which provides access to the base URL.
[lisa@linux02 flask-ldap]# python authtest.py
The token is eyJhbGciOiJIUzI1NiIsImV4cCI6MTUzODE0NzU4NiwiaWF0IjoxNTM4MTQzOTg2fQ.eyJ1c2VybmFtZSI6ImdhdXNzIn0.FCJrECBlG1B6HQJKwt89XL3QrbLVjsGyc-NPbbxsS_U:
The base64 encoded token is ZXlKaGJHY2lPaUpJVXpJMU5pSXNJbVY0Y0NJNk1UVXpPREUwTnpVNE5pd2lhV0YwSWpveE5UTTRNVFF6T1RnMmZRLmV5SjFjMlZ5Ym1GdFpTSTZJbWRoZFhOekluMC5GQ0pyRUNCbEcxQjZIUUpLd3Q4OVhMM1FyYkxWanNHeWMtTlBiYnhzU19VOg==
Hello, world
A cool discovery I made during my testing — a test LDAP server that is publicly accessible. I’ve got dev servers at work, I’ve got an OpenLDAP instance on Docker … but none of that helps anyone else who wants to play around with LDAP auth. So if you don’t want to bother populating directory data within your own test OpenLDAP … some nice folks provide a quick LDAP auth source.