Tag: microsoft teams

Did you know … you can bookmark Teams posts for quick access?

There are a few posts to which I frequently refer – support contacts for a product, time reporting codes to use for our projects, etc. These posts aren’t updated frequently, so looking for them takes some scrolling. Searching for the post helps, but I still find myself scrolling through a dozen results.

You can save a post for later – essentially add a bookmark to the post – by clicking the little ribbon in the upper right-hand corner of the post.

To access saved posts, click on your avatar in the upper right-hand corner of Teams and select “Saved”.

Or, if you prefer to keep your hands on the keyboard, use CTRL + E to move to the command bar and type /saved

Either method brings you to the same place – your saved posts.


Do you know … if you should create a new Team or new Channel?

Do you know … if you should create a new Team or new Channel?

It’s certainly a good idea to break topics into different locations in Microsoft Teams – cognitive research on how efficiently people multi-task suggests this, it’s easier for non-impacted individuals to ignore information that’s not relevant to them if it’s not interspersed with information they need, and spreading topics out reduces the frequency of posts – ten new conversations don’t appear while you’re reading a thread. But should you create a new channel or a new Team?

There are a few technical limitations that make “Team” generally the right answer. Each channel in a Teams space has the same permissions – if you want to restrict access to confidential information or if you want to involve additional people – people who don’t need access to your other channels, you need to create a new Team.

You can archive a Team, but you cannot archive a channel. If you create a new channel for every project, your Teams space can become cluttered with old projects. The channels get collapsed into a “more channels” fly-out, but I still find myself renaming channels “zzSomething Or Other” to get really done projects sorted to the bottom of the more channels fly-out.

You cannot move a channel into another Team. If the project moves to another group (such transitions are common in IT – there’s a development/implementation phase, then the project moves to production support under a different group) … there’s no way to transition the information in a channel to another group. Even if that’s not standard operating procedure in your organization, reorgs happen. A supported system becomes big enough to warrant its own group or staff is re-aligned –having the historic knowledge of the Teams discussion available to the new organization is beneficial. (Not to mention, if you could move a channel into another team, you could indirectly archive channels by moving them into an archived Teams space!)

There are some scenarios where a new channel makes sense – that daily e-mail chain where people decide where to eat lunch could become a channel. There’s no reason to move the historic restaurant selection to another group – or, for that matter, retain it. If group lunches become ‘not a thing’ – just delete the channel. And anyone not heading to lunch today can ignore the channel. Similarly, “Water Cooler” discussions – a place where the comradery we took for granted when sitting in the same physical space can re-emerge – make sense as channels.

Cognitive Theory & Microsoft Teams

We’ve been using Microsoft Teams for most of this year, and I find it to be an incredibly efficient way to work. That’s not just a personal preference — years ago, I followed research on how human brains multi-task. TL;DR? Rarely well! Performing multiple natural activities, those that don’t put much demand on the prefrontal cortex, did not greatly diminish efficiency (I can walk and chew gum at the same time!). But fMRI scans performed by the Institut National de la Santé et de la Recherche Médicale in Paris showed that the prefrontal cortex has a left and right side which cooperate to focus on a single task but work independently when the subject was given two tasks. And when the subject was given three tasks? The rate at which a task was forgotten increased and errors were three times as likely for the tasks that were performed.

The recommendation was to dedicate chunks of time — 20 or 30 minutes — to a particular subject, then move on to a new subject rather than bounce back and forth between topics. Sounded great in theory, but each morning I’d sit down and start going through e-mail. The epitome of rapid topic shifting — read through something, switch to the next message/topic, maybe do a little work on that topic, go to the next one.

Starting my day in Teams is completely different — any channel that has had activity is bold. I can click on a channel, finish everything related to that topic, then move on to the next channel. Instead of jumping from topic to topic, and wasting time mentally “shifting gears”.

During a busy day, multiple channels light up with activity … but having each topic contained to its own location helps me maintain focus on that topic. Extrapolating — it makes sense to create a new channel or team for different projects instead of having multiple projects discussed within the same channel.

Did you know … you can archive a Team in Microsoft Teams?

Sometimes a project is done. You’ve used Teams to plan, coordinate, and implement the projected … and there’s a lot of good information in the Teams space … but there’s no need to continue the discussion. Did you know a Team can be read-only? This is called “Archived” – members can search and read content, but no new files or posts can be created.

To archive a Team, view your Teams. At the bottom of the Teams list, click the little gear.

I recommend changing the Team description to let others know it is archived – this is especially valuable if your team is Public as people may join intending to participate in an active discussion. To modify the Team description, select the sideways hamburger menu next to the Team name and select “Edit team”.

I prefix the description with “ARCHIVED:” … hoping people at least glance at the description. Click ‘Done’ to save your change.

To archive your Team, click the sideways hamburger menu again. Select “Archive team”.

You will be asked if you want to make the SharePoint site for the Teams space read-only as well – the answer is generally yes, but if you’re using the SharePoint site for more than just the Team then you do not want to check this box. Click ‘Archive’ to archive the Team.

Should you need to begin accepting new content in your Teams space, you can find the archived teams by expanding the “Archived” section.

Click the sideways hamburger menu and select ‘Restore Team’. This will move your Team back to the “Active” section and allow members to continue posting content.


Did you know … Microsoft Teams will mute your microphone when joining a large meeting?

Several offices ago I sat across from a L.O.U.D talker. A loud talker who was constantly on a conference call. I’d try to remember to mute my line before joining a bridge but didn’t always remember. Random background noise isn’t so bad when you’re about to talk to two or three close colleagues, but background noise becomes inundating when the twenty-something people in my department all join a bridge.

Microsoft Teams helps you avoid a deluge of background noise in your call. When you join a “large” meeting –more than five people already in the meeting – your microphone is muted as you join. A notification is displayed prior to joining the meeting to remind you the microphone will be muted.

You can click the microphone button in the meeting control bar to un-mute your microphone and begin speaking.


Did you know … you are talking on mute?

Well, probably not *right this second*. But we’ve all heard — err, not heard — someone else do it. We’ve all done it too. The Teams desktop client helps you avoid saying “Sorry, I was talking on mute”.

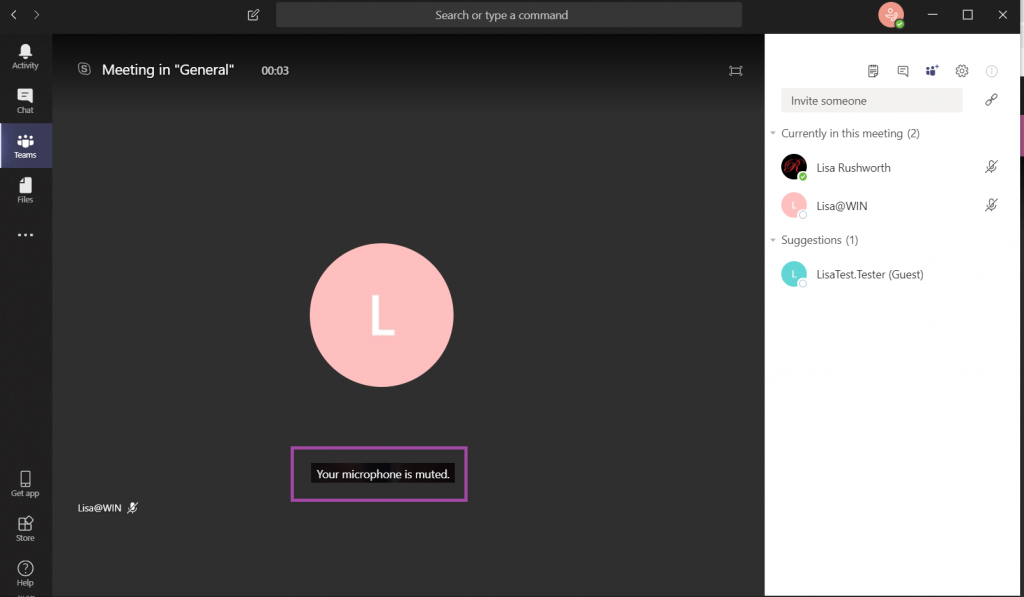
In the Teams desktop client, you will see an alert when your microphone is muted and sound is detected. Maybe you’re talking to someone who stepped into your office — just ignore the warning. If you’re trying to speak to the meeting, this is a great way to avoid having to repeat your entire thought because no one else heard it the first time!

Creating An Azure Bot – Internally Hosted

While hosting a bot on the Azure network allows you to use pre-built solutions or develop a bot without purchasing dedicated hardware, the bots we’ve deployed thus far do not have access to internally-housed data. And program execution can be slow (expensive, or a combination of the two) depending on the chosen pricing plan. But you can build an Azure bot that is essentially a proxy to a self-hosted bot.

This means you can host the bot on your private network (it needs to be accessible from the Azure subnets) and access internal resources from your bot code. Obviously, there are security implications to making private data available via an Azure bot – you might want to implement user authentication to verify the bot user’s identity, and I wouldn’t send someone their current credit card information over a bot even with authentication.

How to Communicate with a Self-hosted Bot from Azure:

Register an Azure bot. From https://portal.azure.com, select “Create a resource”. Search for “bot” and select “Bot Channels Registration”.

On the pane which flies out to the right, click “Create” (if you will be deploying multiple self-hosted bots to Azure, click the little heart so you can find this item on “My Saved List” when creating a new resource).

Provide a unique name for your Azure bot. If you have not yet created a resource group, you will need to create one. Make sure the hosting location is reasonable for your user base – East Asia doesn’t make sense for something used on the East coast of the US!

Select the pricing tier you want – I use F0 (free) which allows unlimited messages in standard channels (Teams, Skype, Cortana) and 10,000 messages sent/received in premium channels (direct user interaction … which I specifically don’t want in this case). Then provide the endpoint URL to interact with your locally hosted bot.

Click “Create” and Azure will begin deploying your new resource. You can click the “Notifications” bell icon in the upper right-hand portion of the page to view deployment progress.

When deployment completes, click “Go to resource” to finish configuring your Azure bot.

Select “Settings” from the left-hand navigation menu, then find the application ID. Click “Manage”.

This will open a new portal – you may be asked to sign in again. You are now looking at the application registration in Microsoft’s developer application registration portal. There’s already an application secret created but beyond the first few letters … what is it? No idea! I’m a cautious person, and I don’t know if MS has embedded this secret somewhere within the bot resource. Since an application can have two secrets simultaneously, I do not delete the automatically-created secret and click “Generate New Password”.

A new pane will appear with your new secret – no, the one in the picture isn’t real. Copy that and store it somewhere – you’ll need to add it to your bot code later.

Close the application registration tab and return to the Azure portal tab. Click on “Channels” in your bot and add channels for any interactions you want to support. In this case, I want to publish my bot to Teams. There aren’t really settings* for teams – just click to create the channel.

* You can publish a bot to the Microsoft App Source … but is your bot something that should be available to the Internet at large? It depends! If you’re writing a bot to provide enterprise customers another support avenue, having the bot available through App Source makes sense. If you’re creating a bot to answer employee-specific questions, then you probably want to keep the bot out of App Source

Once the channel has been created, click on the “Get bot embed codes” hyperlink to obtain the bot URL.

Individuals can use the hyperlink provided to add your bot to their Teams chat.

Ok, done! Except for one little thing – you need something to answer on that endpoint we entered earlier. You need a bot! Microsoft publishes an SDK and tools for building your bot in .NET, JavaScript, Python, and Java.

In this example, I am using a sample Python bot. For convenience, I am handling SSL on my reverse proxy instead of using an ssl wrapper in my Python service. Grab the BotBuilder package from git (https://github.com/Microsoft/botbuilder-python.git)

Install the stuff:

pip3 install -e ./libraries/botframework-connector

pip3 install -e ./libraries/botbuilder-schema

pip3 install -e ./libraries/botbuilder-core

pip3 install -r ./libraries/botframework-connector/tests/requirements.txt

In the ./samples/ folder, you’ll find a few beginner bots. Rich-Cards-Bot requires msrest that has some async functionality and the branch in requirements.txt doesn’t exist. Tried a few others and never got anything that worked properly. Same problem with EchoBot-with-State. I am using Echo-Connector-Bot because it doesn’t have this msrest problem, and I can add my own state support later.

Edit main.py and add your Azure bot application id & secret to APP_ID and APP_PASSWORD

APP_ID = ”

APP_PASSWORD = ”

PORT = 9000

SETTINGS = BotFrameworkAdapterSettings(APP_ID, APP_PASSWORD)

ADAPTER = BotFrameworkAdapter(SETTINGS)

I stash my personal information in a config.py file and added an import to main.py:

from config import strDBHostname, strDBUserName, strDBPassword, strDBDatabaseName, strDBTableName, APP_ID, APP_PASSWORD

Tweak the code however you want – add natural language processing, make database connections to internal resources to determine responses, make calls to internal web APIs. I also added console output so I could debug bot operations.

When you’ve completed your changes, launch your bot by running “python main.py”

Now return to the Azure portal and select “Test in Web Chat” – this will allow you to test interactions with your bot. Ask questions – you should see your answers returned.

Once you confirm the bot is functioning properly, use the URL from the Teams channel to interact with your bot within Teams —

URL for my bot in Teams: https://teams.microsoft.com/l/chat/0/0?users=28:9699546d-fc09-41bf-b549-aed33280693a

The answer is served out of our home automation database – data that is only accessible on our private network.

Security – as I said earlier, you’ll probably want to take some measures to ensure access to your locally hosted bot is coming from legit sources. The app ID and secret provide one level of protection. If a connection does not supply the proper app ID & secret (or if you’ve mis-entered those values in your code!), you’ll get a 401 error.


But I don’t want the entire Internet DDoS’ing by bot either, and there is no reason for anyone outside of Microsoft Azure subnets should be accessing my locally hosted bot. My bot is hosted in a private container. The reverse proxy allows Internet-sourced traffic in to the private bot resource. Since communication from Azure will be sourced from a known set of networks, you can add a source IP restriction that prevents the general public from accessing your bot directly. See https://azurerange.azurewebsites.net/ for a convenient-to-use list of addresses.


Did you know … Microsoft Teams has a GUI text editor?

I like keeping my fingers on the keyboard, so I like using markdown in Teams messages (had to learn it for GitHub anyway!). The fact that hitting enter sends my posts in Teams? Generally awesome. I am not, however, the most succinct person; and a long series of thoughts is difficult to read as one continuous paragraph.

And using a new paragraph can serve to highlight a sentence without resorting to big bold text.

You can use shift-enter to move to a new line. Enter will still send your message.

But Teams has a GUI-driven composition mode — just click “Format” — that allows you to easily compose multi-line messages. In this editor, enter doesn’t send the message. It just moves the cursor to the next line.

There are a lot of formatting options available too. Basic typographical emphasis can be added to your text, and anything you type into the ‘Subject’ section will automatically be large, bold text.

The little highlighter icon will highlight text.

The underlined “A” changes the font color.

The icon with two A’s controls the text size.

So you can add really tiny or larger text.

Allowing you to use smaller or larger text.

You can create a bulleted list by clicking the icon with bulleted lines (or a numbered list by clicking the one with numbered lines). To end the list, either click the icon again or hit enter twice.

The quotation marks highlights text as a quote (two enters returns you to normal paragraph format here too), and hitting the drop-down next to “Paragraph” provides a list of pre-formatted text options.

A really cool feature for programmer-types – click the ‘code snipped’ icon.

A new composition window will be displayed – click the drop-down text to “Text” and select the programming language.

Text formatting will be applied to your code – the code I paste into Teams looks exactly like it does in my IDE.

When you have finished composing your message, you can click the little paper aeroplane to send your message. Or, if you prefer keeping your hands on the keyboard, hit ctrl-enter.


Did you know … you can use Microsoft Teams outside of work too?

There are a lot of tools we use at work that are silly overkill in your personal life – I don’t want to open a Remedy ticket for every squeaky hinge! But some of our tools are quite helpful away from work too – making flyers in Word or using Excel to keep track of the softball league standings. “Is Teams useful in my personal life” seems like a purely hypothetical question – it’s not like I can invite the rest of the Parent Teacher Organization to join us here in Teams (and even if I could, that’s hardly an appropriate use of company resources!). But did you know Microsoft offers a free version of Teams?

Signing up for a free account, you don’t get access to all of the Teams features we’ve got here – you cannot schedule meetings, record meetings, there isn’t a Planner board, you don’t have access to the full suite of Office 365 applications. But you do have a Teams space, can use the integrated apps and connectors, have some file storage space, have persistent chats in channels, and can even have group audio/video calls.

To sign up for a free Teams account, visit https://products.office.com/en-us/microsoft-teams/free

Don’t use your company e-mail address to sign up – this will need to be your personal address.

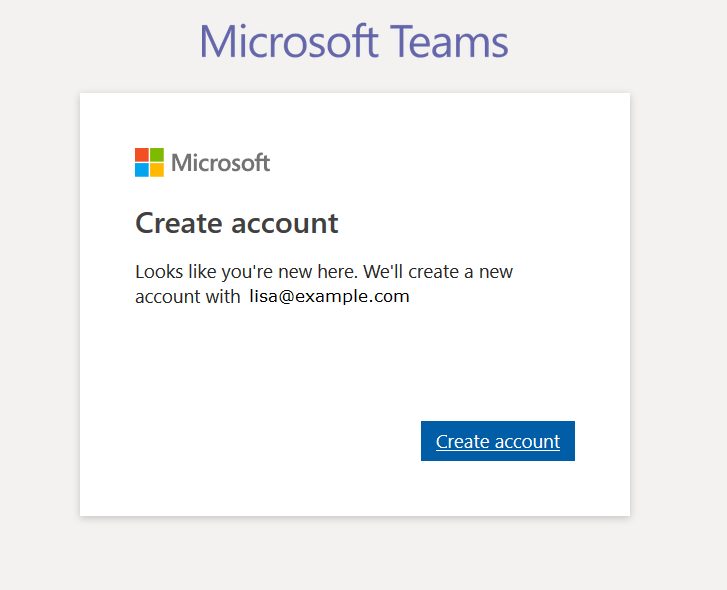
If you don’t already have a Microsoft account associated with the e-mail address, you’ll be asked to create a new Microsoft account.

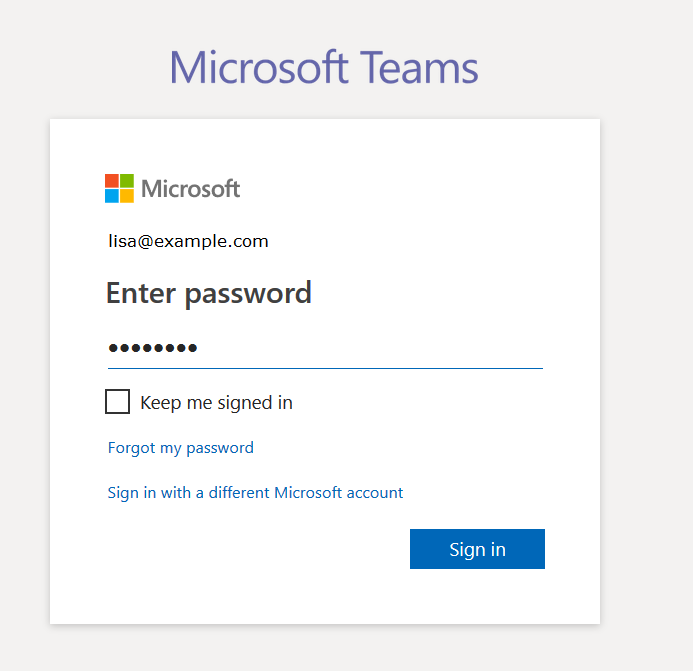
Otherwise you’ll be asked to sign in to your Microsoft account.

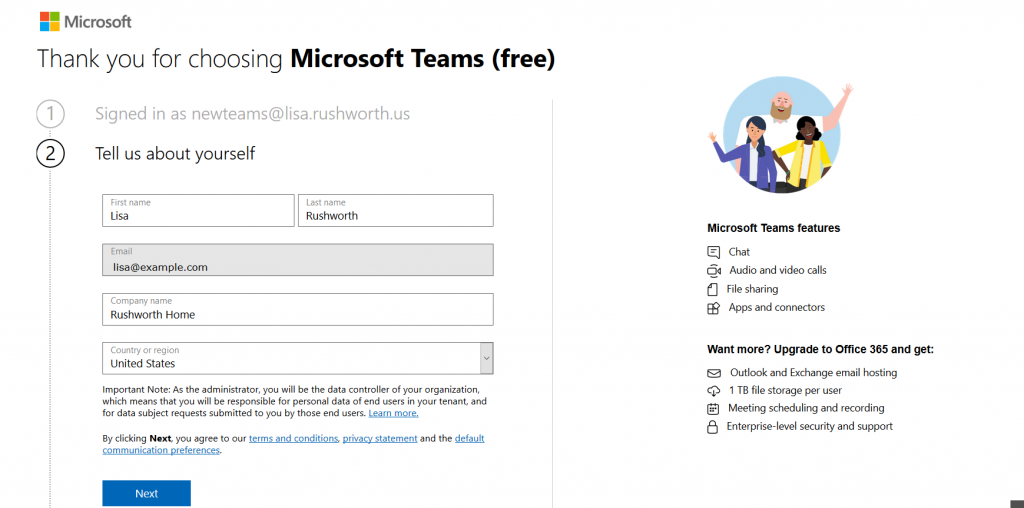
Supply your name, organization name, and country of origin. Read the terms of use and privacy statement. Assuming your use complies with the terms of use and the privacy policy is acceptable, click “Next”

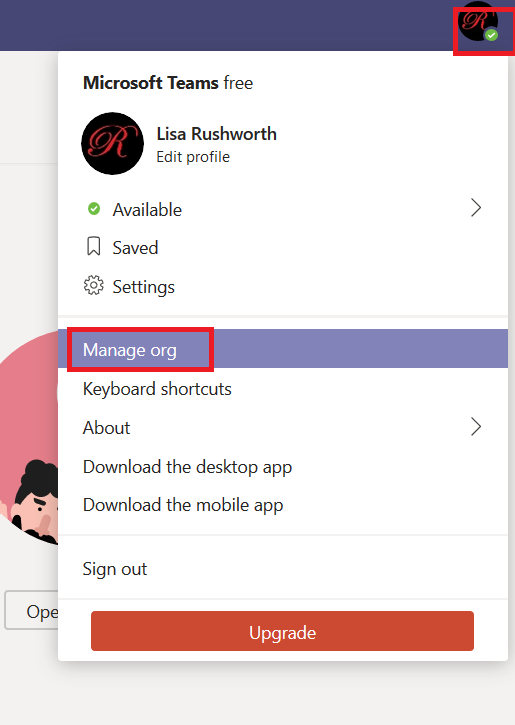
It will take a few minutes for everything to be set up. Once your personal Teams organization is built, you can invite others to join. Click on your avatar in the upper right-hand corner of the screen and select “Manage org”

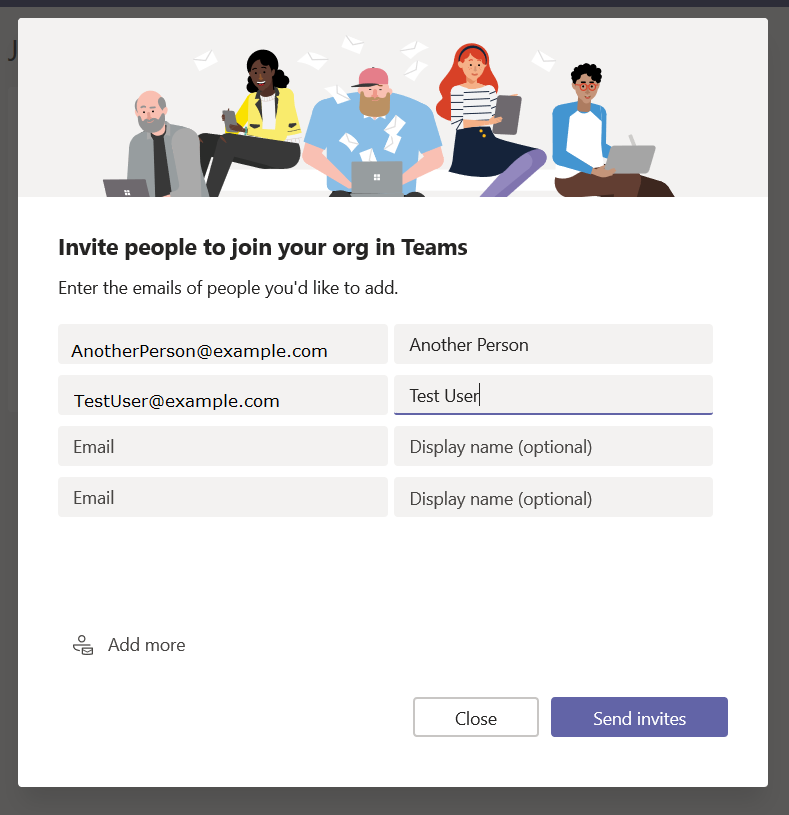
Click “Invite others to your org”

And enter their e-mail addresses

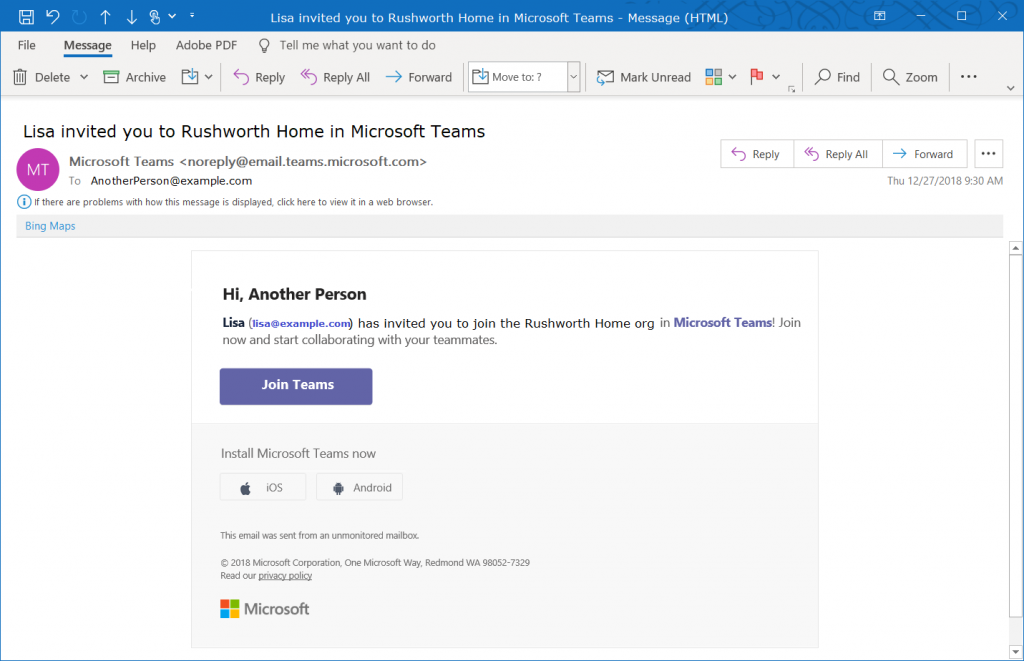
They will get an e-mail message inviting them to join your Teams org.

You’re ready to start using Teams – add tabs to websites your group commonly uses, set up connectors, create new channels, chat, video calls, share files. You can even add new Teams to your organization.

Everyone added to your org is automatically able to access the default Teams space (the one with the name of your org). Teams spaces you create can be private or public, just like at work – but you can also select “Org-wide” which automatically joins any newly-added individuals to the Teams space.

Did you know … you can search chats, files, and people in Microsoft Teams?

One drawback to retaining all of your chat and team discussion content is that there’s a LOT of content … which makes it challenging to find a specific discussion or comment. Luckily, Teams data is easily searched. At the top of your Teams application (or website), there is a long gray bar. Click in it and type a word or phrase to begin searching. Using multiple words will find conversations containing both words, to find a phrase place the phrase “in quotes”. Hit enter.

You’ll see messages that contain the words or phrase – notice this includes both chat messages and channel discussions. Each search result has a reference letting you know where the discussion is located, and you can click on the item to switch to the chat or channel discussion.

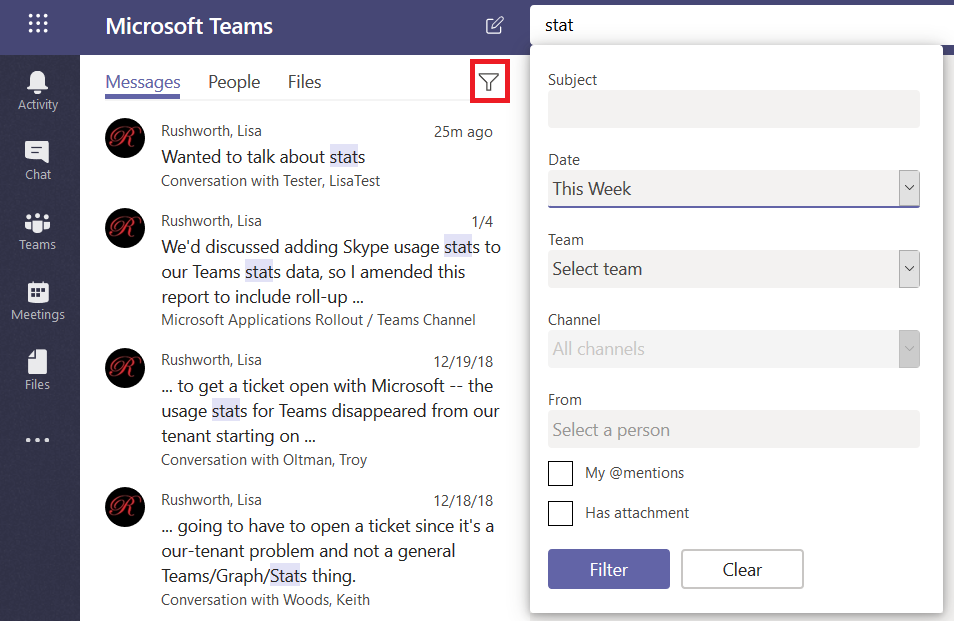
If your search returns too many results, click on the little funnel – you can refine your search results with a filter – a specific individual, a time frame.

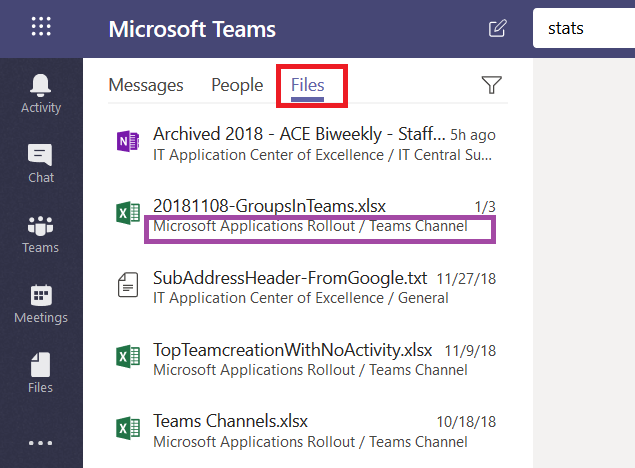
In addition to searching chat messages, you can search files. Just click on “Files” and you’ll see files with names or content that contain your search terms. Again, you can see where the file is located, and you can click on the file to preview the file.

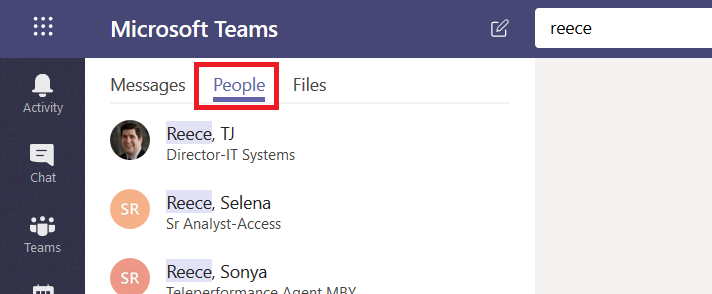
Click on “People” and you’ll find, well, people who work here. This is a name search – you cannot search for “stats” and see people with whom you’ve had discussions about statistics. Search for a last name, a first name, or a name in “last, first” format.

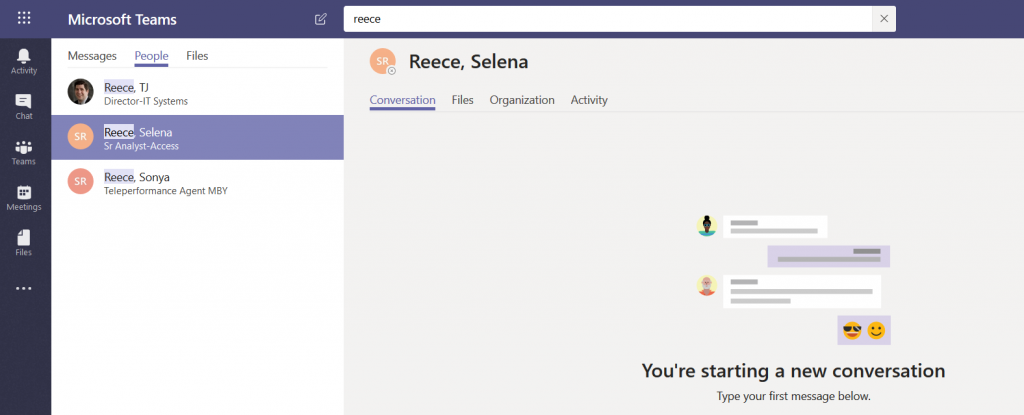
If you click on a person, you’ll see the conversations you have had with them, as well as any shared files, an org chart for their position in the company, and their channel posts for the past two weeks (‘Activity’).

If you haven’t chatted with them before, you can start a new conversation too.