| Application Registration
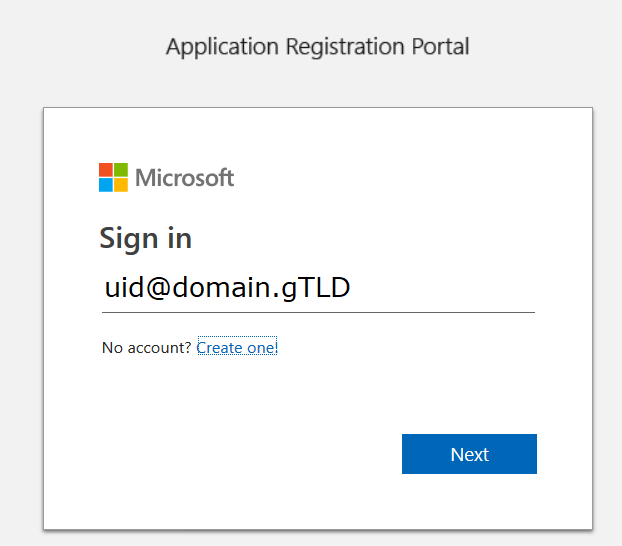
To register your application, go to the Application Registration Portal (https://apps.dev.microsoft.com/). Elect to sign in with your company credentials.
You will be redirected to the company’s authentication page
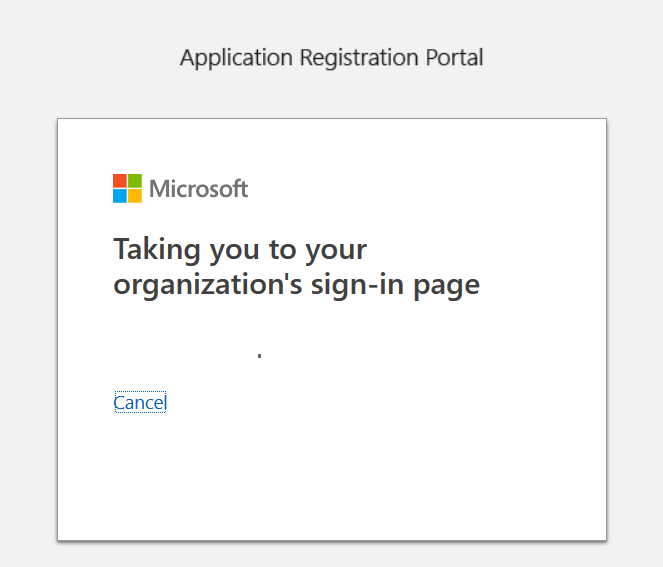
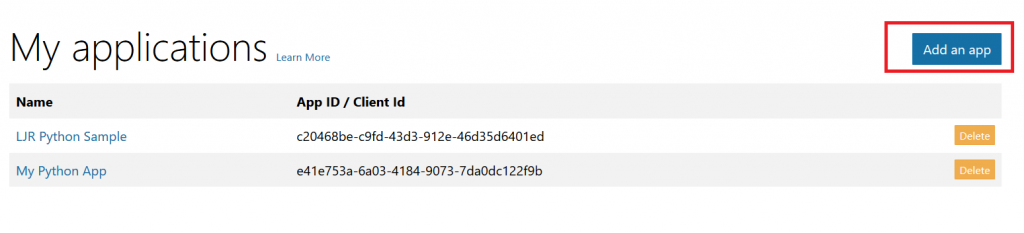
If ADSF finds a valid token for you, you will be directed to the application registration portal. Otherwise you’ll get the same logon page you see for many other MS cloud-hosted apps. Once you have authenticated, click “Add an app” in the upper right-hand corner of the page.
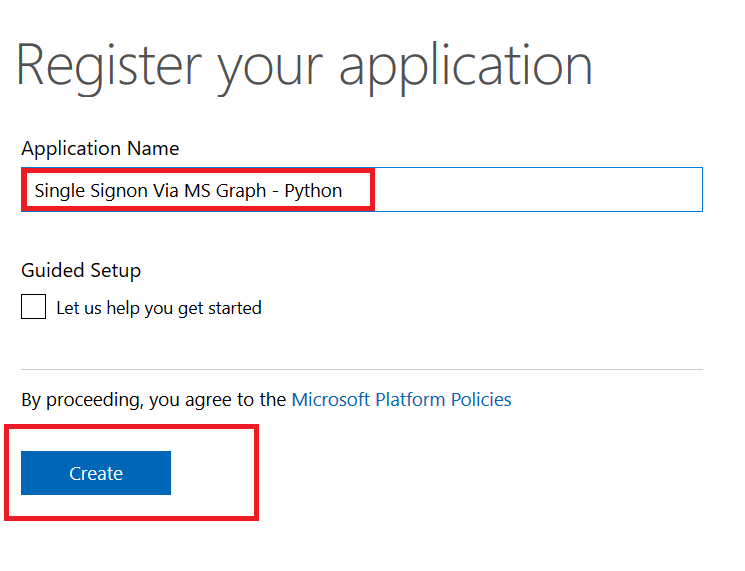
Provide a descriptive name for the application and click “Create”
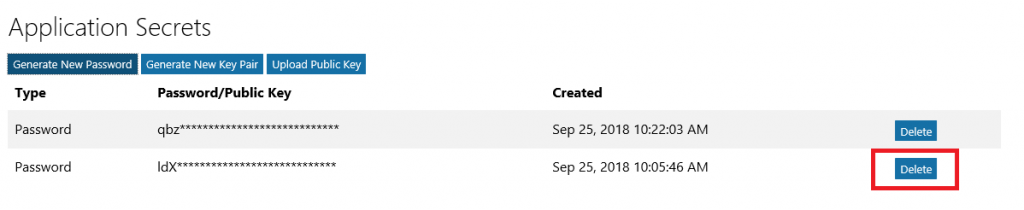
Click “Generate New Password” to generate a new application secret. Copy it into a temporary document. Copy the “Application Id” into the same temporary document.
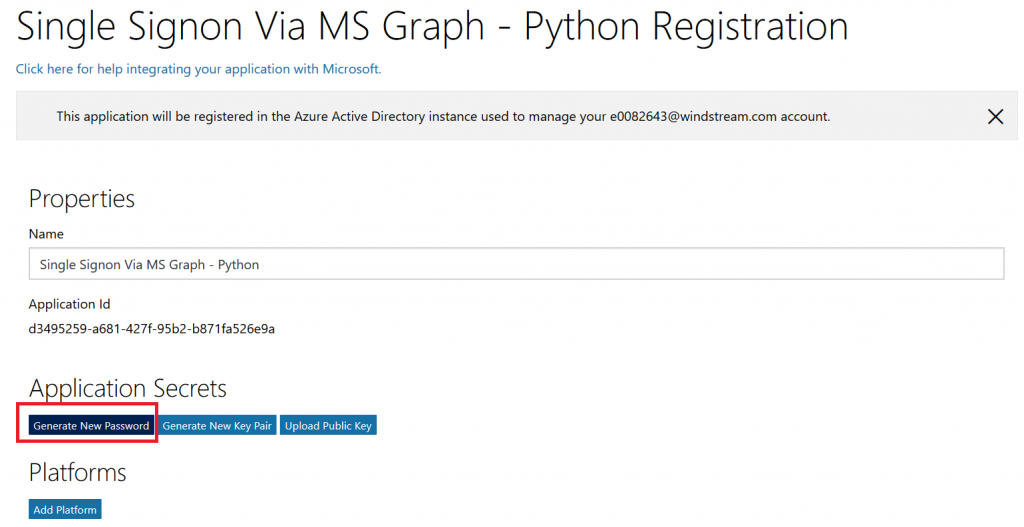
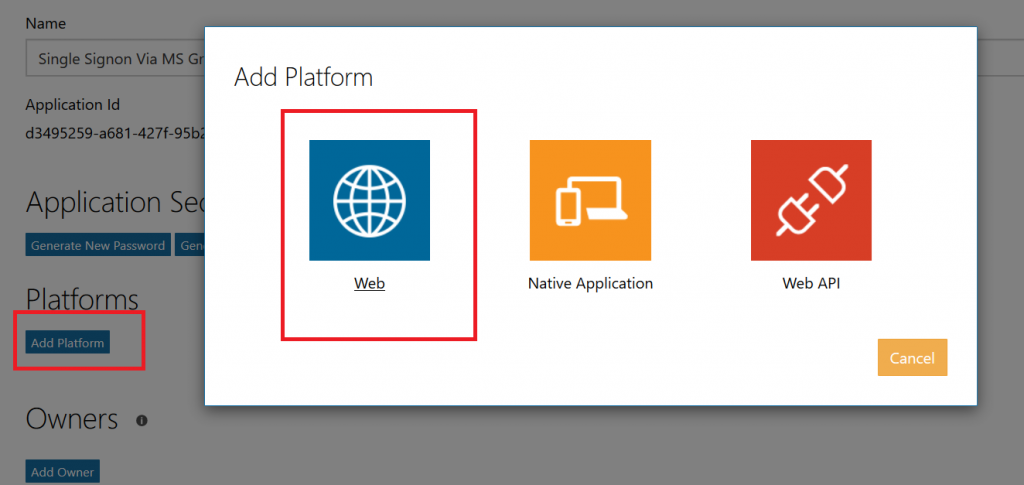
Click “Add Platform” and select “Web”
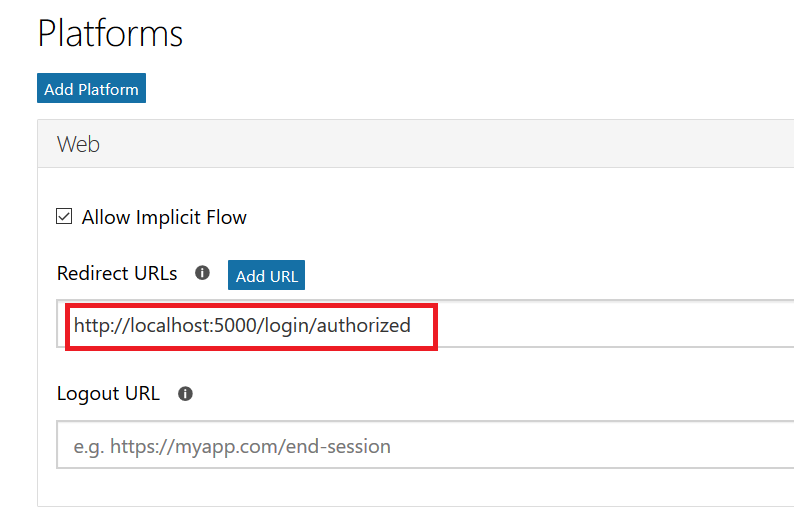
Enter the appropriate redirect/logout URLs (this will be application specific – in the pre-built examples, the post-authentication redirect URL is http://localhost:5000/login/authorized
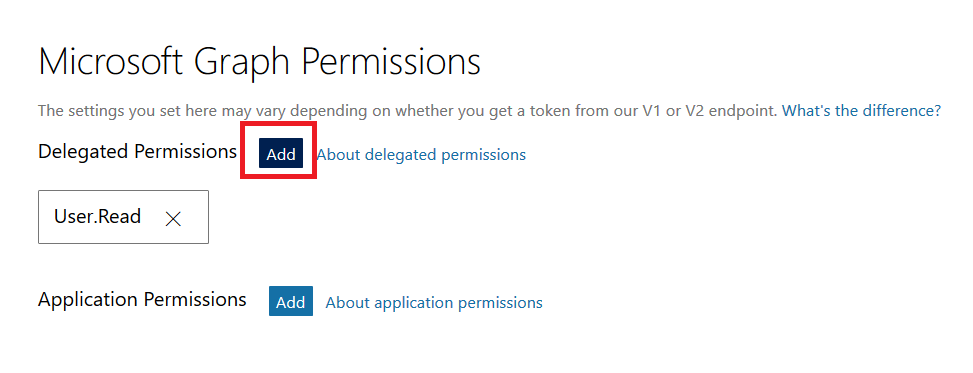
Delegated permissions impersonate the signed in user, application permissions use the application’s credentials to perform actions. I use delegated permissions, although there are use cases where application permissions would be appropriate (batch jobs, for instance).
Add any permissions your app requires – for simple authentication, the default delegated permission “User.Read” is sufficient. If you want to perform additional actions – write files, send mail, etc – then you will need to click “Add” and select the extra permissions.
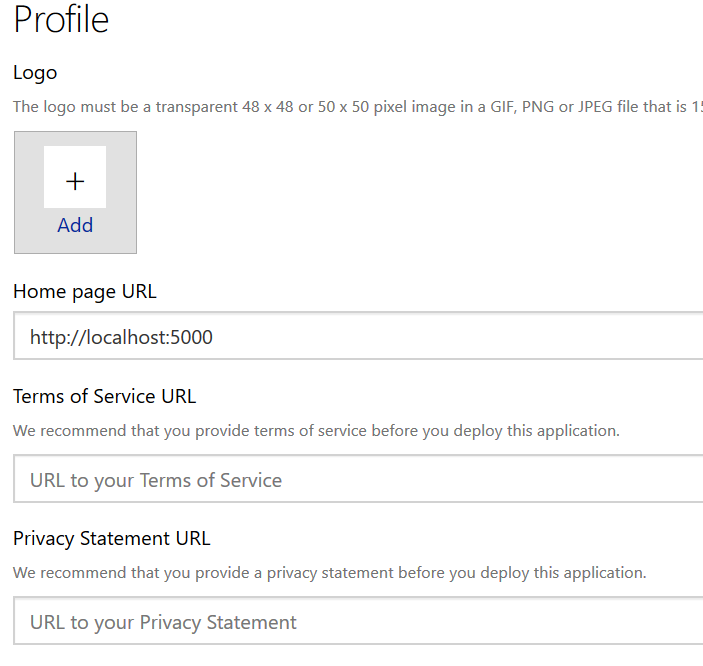
Profile information does not need to be entered, but I have entered the “Home page URL” for all of my applications so I am confident that I know which registered app corresponds with which deployed application (i.e. eighteen months from now, I can still figure out site is using the registered “ADSF Graph Sample” app and don’t accidentally delete it when it is still in use).
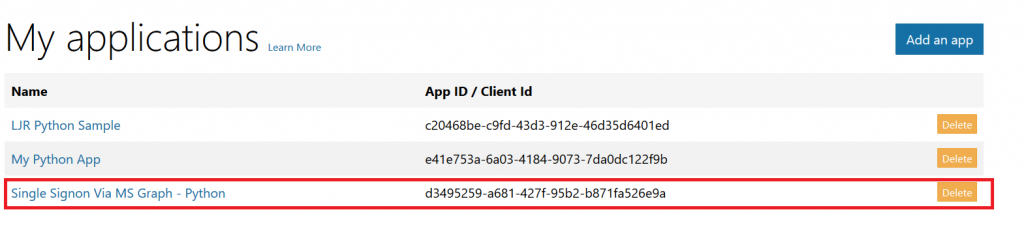
Click Save. You can return to your “My Applications” listing to verify the app was created successfully.
Application Implementation:
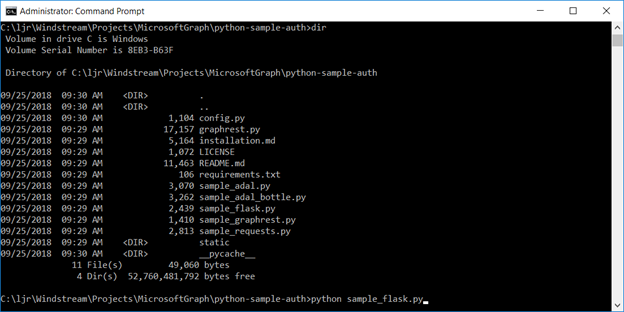
To use an example app from Microsoft’s repository, clone it.
git clone https://github.com/microsoftgraph/python-sample-auth.git
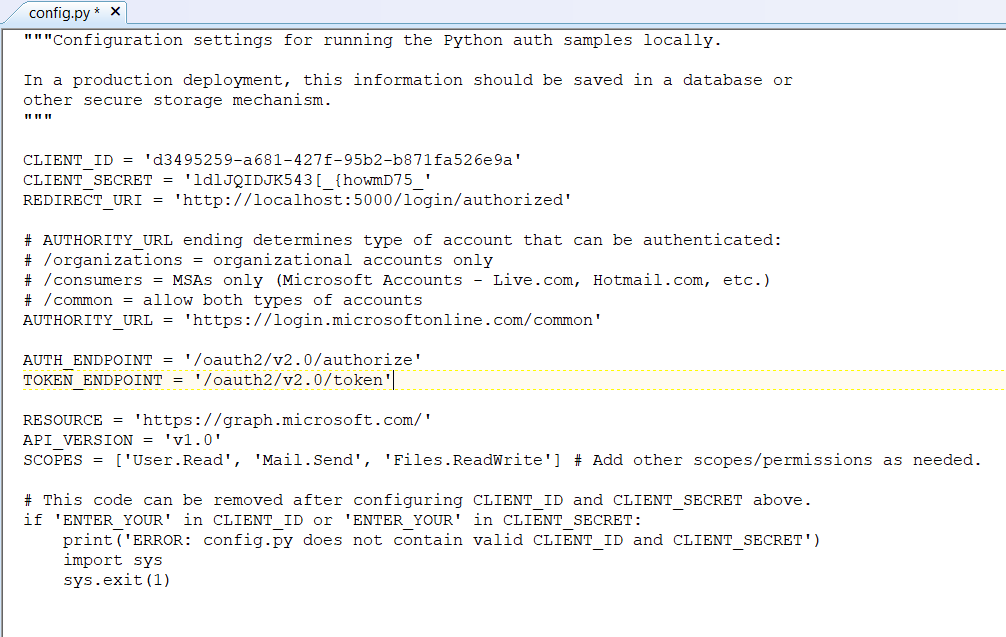
Edit the config.py file and update the “CLIENT_ID” variable with your Application Id and update the “CLIENT_SECRET” variable with your Application Secret password. (As they note, in a production implementation you would hash this out and store it somewhere else, not just drop it in clear text in your code … also if you publish a screen shot of your app ID & secret somewhere, generate a new password or delete the app registration and create a new one. Which is to say, do not retype the info in my example, I’ve already deleted the registration used herein.)
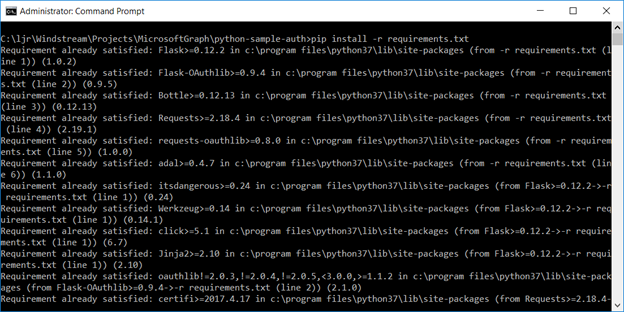
Install the prerequisites using “pip install -r requirements.txt”
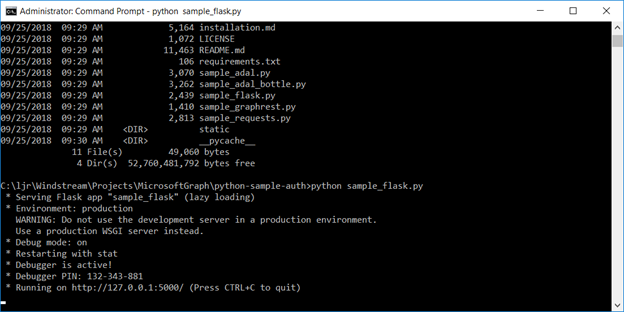
Then run the application – in the authentication example, there are multiple web applications that use different interfaces. I am running “python sample_flask.py”
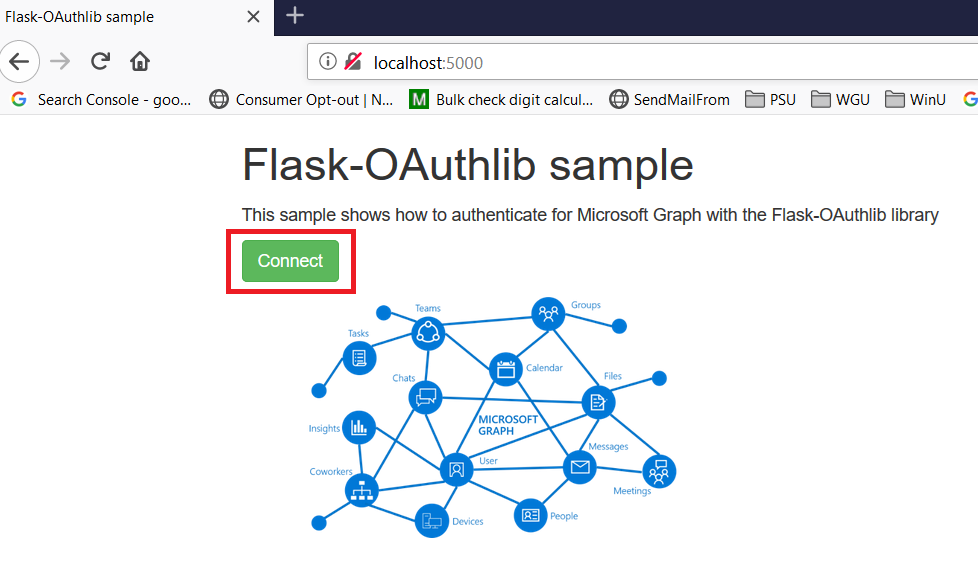
Once it is running, access your site at http://localhost:5000
The initial page will load; click on “Connect”
Enter your company user ID and click “Next”
This will redirect to the company’s sign-on page. For in-domain computers or computers that have already authenticated to ADSF, you won’t have to enter credentials. Otherwise, you’ll be asked to logon (and possibly perform the two-factor authentication verification).
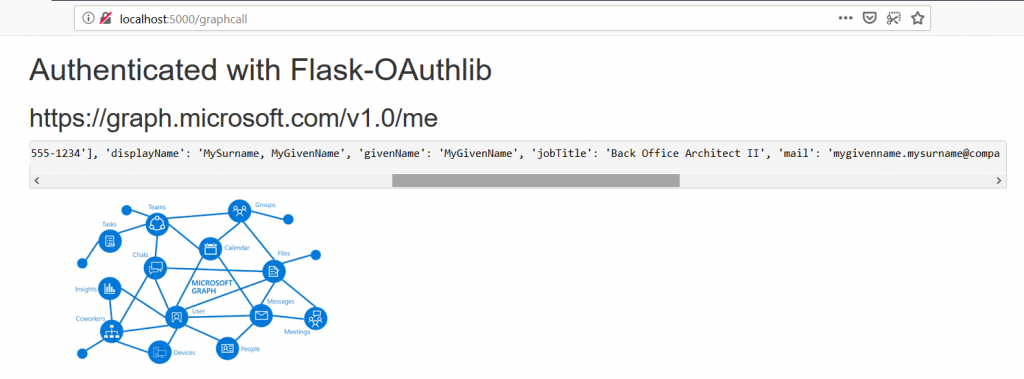
Voila, the user is authenticated and you’ve got access to some basic directory info about the individual.
|

 Re-add the new guest account to whatever they were using & their access will be restored.