A scaled down sandbox can be used to gain experience with the applications and techniques used to deploy containerized applications and microservices. This sandbox will be built on a Windows 10 laptop, but the same components can be run on Linux variants.
Prerequisites:
Verify Virtualization is enabled:
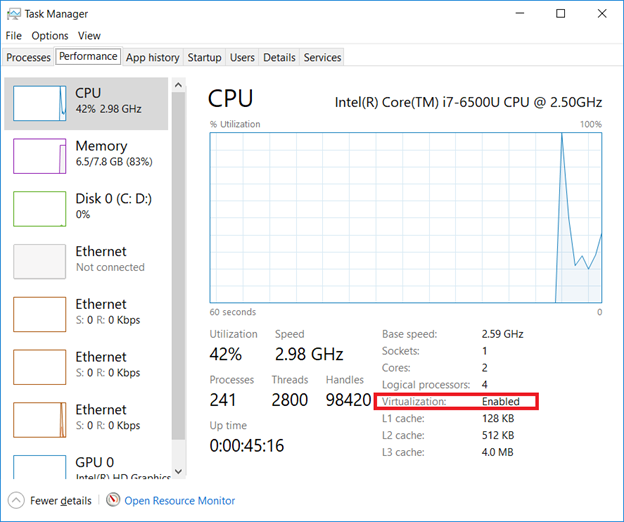
Open Task Manager (taskman.exe) and ensure the virtualization extensions have been enabled.
If virtualization is disabled, boot into the system config (start menu => settings => update & security => recovery, click “Restart now” under “Advanced startup”)
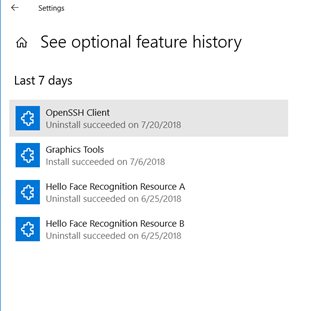
Uninstall the Windows OpenSSH client
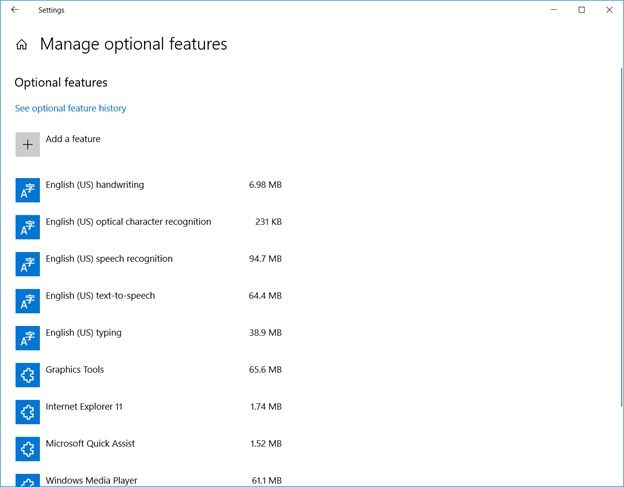
Click ‘Start’ and type “Manage optional features” – within the installed feature list, find “OpenSSH Client”. If present, remove it.
Enable Hyper-V
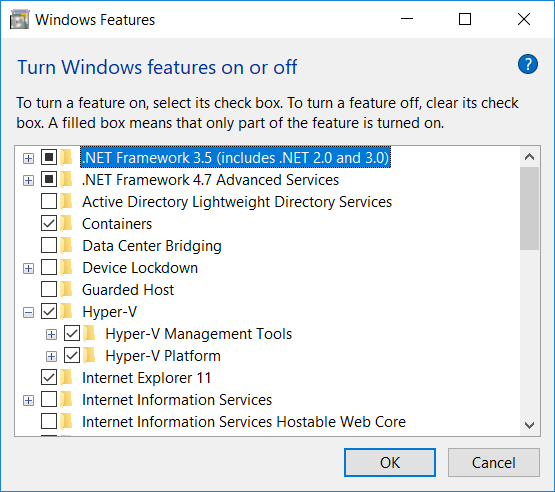
Enable the Hyper-V Windows feature (Control Panel => Programs => Programs and Features, “Turn Windows features on or off” and check both Hyper-V components).
Add Virtual Switch To Hyper-V
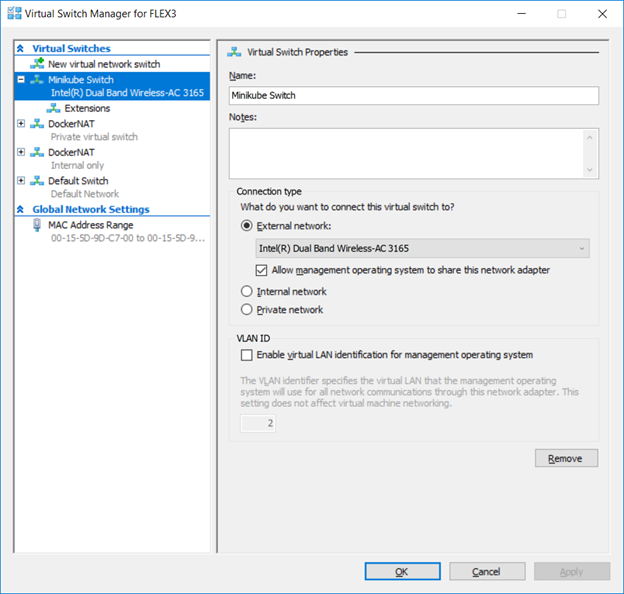
In the Hyper-V Manager, open the “Virtual Switch Manager”. Create a new External virtual switch. Record the name used for your new virtual switch.
Install Minikube
View https://storage.googleapis.com/kubernetes-release/release/stable.txt and record the version number. The current stable release version is v1.11.1
Modify the URL http://storage.googleapis.com/kubernetes-release/release/v#.##.#/bin/windows/amd64/kubectl.exe to use the current stable release version. Current URL is http://storage.googleapis.com/kubernetes-release/release/v1.11.1/bin/windows/amd64/kubectl.exe
Create a folder %ProgramFiles%\Minikube and add this folder to your PATH variable.
Download kubectl.exe from the current release URL to %ProgramFiles%\Minikube
Download the current Minikube release from https://github.com/kubernetes/minikube/releases (scroll down to the “Distribution” section, locate the Windows/amd64 link, and save that binary as %ProgramFiles%\Minikube\minikube.exe). ** v0.28.1 was completely non-functional for me (and errors were related to existing issues on the minikube GitHub site) so I used v0.27.0
Verify both are functional. From a command prompt (run as administrator) or Powershell (again run as administrator), run “kubectl version” and verify the output includes a client version
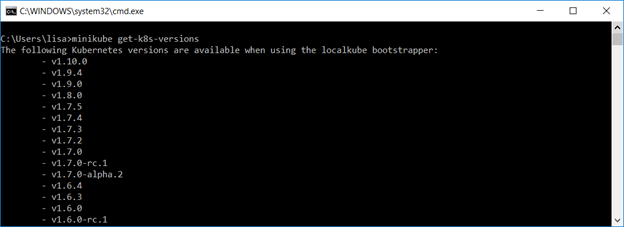
Run “minikube get-k8s-versions” and verify there is output.
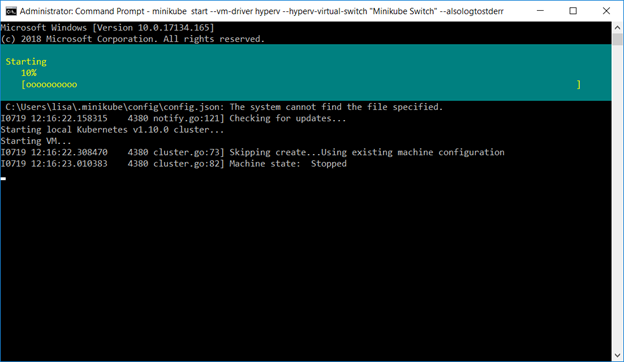
Configure the Minikube VM using the Hyper-V driver and switch you created earlier.
minikube start –vm-driver hyperv –hyperv-virtual-switch “Minikube Switch” –alsologtostderr
Once everything has started, “kubectl version” will report both a client and server version.
You can use “minikube ip” to ascertain the IP address of your cluster
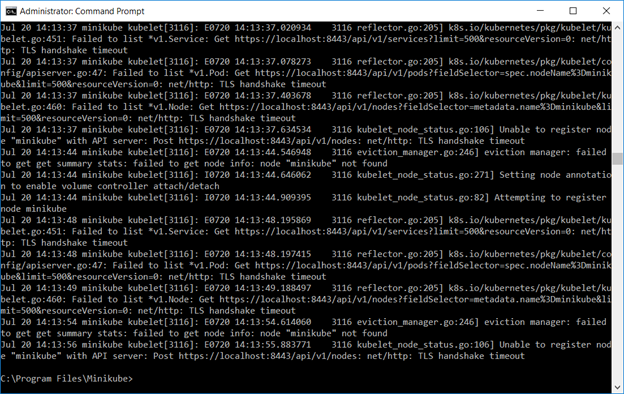
If the cluster services fail to start, there are a few log locations.
Run “minikube logs” to see the log information from the minikube virtual machine
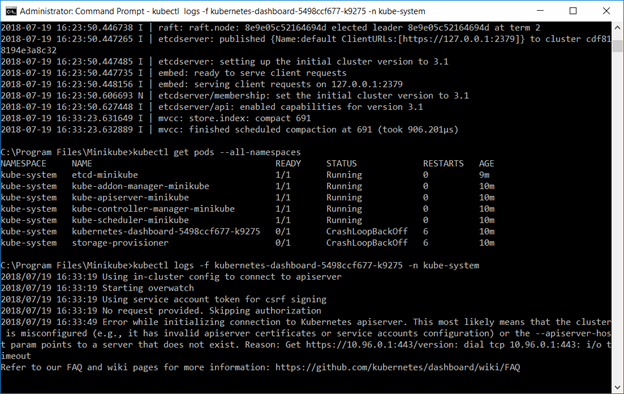
Use “kubectl get pods –all-namespaces” to determine which component(s) fail, then use “kubectl logs -f name -n kube-system” to review logs to determine why the component failed to start.
If you need to connect to the minikube Hyper-V VM, the username is docker and the password is tcuser – you can ssh into the host or connect to the console through the Hyper-V Manager.
Before the management interface comes online, you can use view the status of the containers using the docker command line utilities on the minikube VM.
$ docker ps
CONTAINER ID IMAGE COMMAND CREATED STATUS PORTS NAMES
7d8d66b5e465 af20925d51a3 “kube-apiserver –ad…” About a minute ago Up About a minute k8s_kube-apiserver_kube-apiserver-minikube_kube-system_0f6076ada4273000c4b2f846f250f3f7_3
bb4be8d267cb 52920ad46f5b “etcd –advertise-cl…” 7 minutes ago Up 7 minutes k8s_etcd_etcd-minikube_kube-system_0199781185b49d6ff5624b06273532ab_0
d6be5d6ae360 9c16409588eb “/opt/kube-addons.sh” 7 minutes ago Up 7 minutes k8s_kube-addon-manager_kube-addon-manager-minikube_kube-system_3afaf06535cc3b85be93c31632b765da_1
b5ddf5d1ff11 ad86dbed1555 “kube-controller-man…” 7 minutes ago Up 7 minutes k8s_kube-controller-manager_kube-controller-manager-minikube_kube-system_d9cefa6e3dc9378ad420db8df48a9da5_0
252d382575c7 704ba848e69a “kube-scheduler –ku…” 7 minutes ago Up 7 minutes k8s_kube-scheduler_kube-scheduler-minikube_kube-system_2acb197d598c4730e3f5b159b241a81b_0
421b2e264f9f k8s.gcr.io/pause-amd64:3.1 “/pause” 7 minutes ago Up 7 minutes k8s_POD_kube-scheduler-minikube_kube-system_2acb197d598c4730e3f5b159b241a81b_0
85e0e2d0abab k8s.gcr.io/pause-amd64:3.1 “/pause” 7 minutes ago Up 7 minutes k8s_POD_kube-controller-manager-minikube_kube-system_d9cefa6e3dc9378ad420db8df48a9da5_0
2028c6414573 k8s.gcr.io/pause-amd64:3.1 “/pause” 7 minutes ago Up 7 minutes k8s_POD_kube-apiserver-minikube_kube-system_0f6076ada4273000c4b2f846f250f3f7_0
663b87989216 k8s.gcr.io/pause-amd64:3.1 “/pause” 7 minutes ago Up 7 minutes k8s_POD_etcd-minikube_kube-system_0199781185b49d6ff5624b06273532ab_0
7eae09d0662b k8s.gcr.io/pause-amd64:3.1 “/pause” 7 minutes ago Up 7 minutes k8s_POD_kube-addon-manager-minikube_kube-system_3afaf06535cc3b85be93c31632b765da_1
This allows you to view the specific logs for a container that is failing to launch
$ docker logs 0d21814d8226
Flag –admission-control has been deprecated, Use –enable-admission-plugins or –disable-admission-plugins instead. Will be removed in a future version.
Flag –insecure-port has been deprecated, This flag will be removed in a future version.
I0720 16:37:07.591352 1 server.go:135] Version: v1.10.0
I0720 16:37:07.596494 1 server.go:679] external host was not specified, using 10.5.5.240
I0720 16:37:08.555806 1 feature_gate.go:190] feature gates: map[Initializers:true]
I0720 16:37:08.565008 1 initialization.go:90] enabled Initializers feature as part of admission plugin setup
I0720 16:37:08.690234 1 plugins.go:149] Loaded 10 admission controller(s) successfully in the following order: NamespaceLifecycle,LimitRanger,ServiceAccount,NodeRestriction,DefaultTolerationSeconds,DefaultStorageClass,MutatingAdmissionWebhook,Initializers,ValidatingAdmissionWebhook,ResourceQuota.
I0720 16:37:08.717560 1 master.go:228] Using reconciler: master-count
W0720 16:37:09.383605 1 genericapiserver.go:342] Skipping API batch/v2alpha1 because it has no resources.
W0720 16:37:09.399172 1 genericapiserver.go:342] Skipping API rbac.authorization.k8s.io/v1alpha1 because it has no resources.
W0720 16:37:09.407426 1 genericapiserver.go:342] Skipping API storage.k8s.io/v1alpha1 because it has no resources.
W0720 16:37:09.445491 1 genericapiserver.go:342] Skipping API admissionregistration.k8s.io/v1alpha1 because it has no resources.
[restful] 2018/07/20 16:37:09 log.go:33: [restful/swagger] listing is available at https://10.5.5.240:8443/swaggerapi
[restful] 2018/07/20 16:37:09 log.go:33: [restful/swagger] https://10.5.5.240:8443/swaggerui/ is mapped to folder /swagger-ui/
[restful] 2018/07/20 16:37:52 log.go:33: [restful/swagger] listing is available at https://10.5.5.240:8443/swaggerapi
[restful] 2018/07/20 16:37:52 log.go:33: [restful/swagger] https://10.5.5.240:8443/swaggerui/ is mapped to folder /swagger-ui/
Worst case, we haven’t really done anything yet and you can start over with “minikube delete”, then delete the .minikube directory (likely located in %USERPROFILE%), and start over.
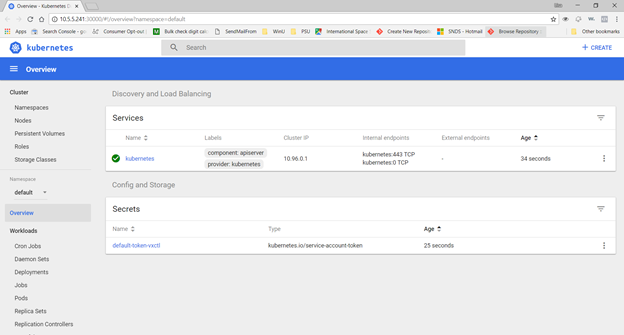
Once you have updated the Hyper-V configuration and started the cluster, you should be able to access the kubernetes dashboard
Actually using it
Now that you have minikube running, you can access the dashboard via a web URL – or just type “minikube dashboard” to have the site launched in your default browser.
Create a deployment – we’ll use the nginx sample image here
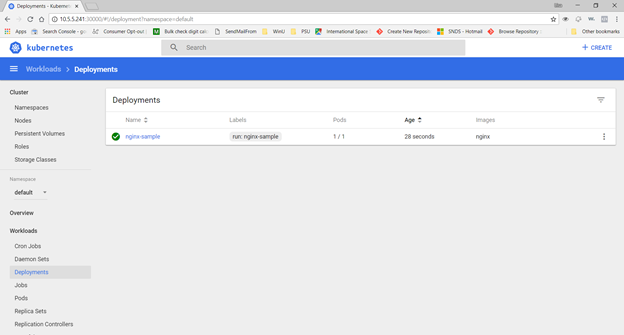
Voila, under Workloads => Deployments, you should see this test deployment (if the Pods column has 0/1, the image has not completely started … wait for it!)
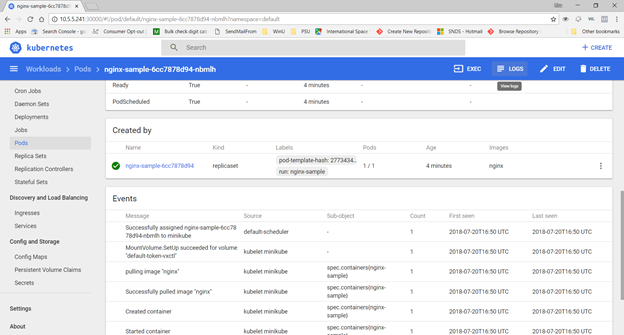
Under Workloads=>Pods, you can select the sample. In the upper right-hand corner, there are buttons to shell into the Pod as well as view logs from the Pod.
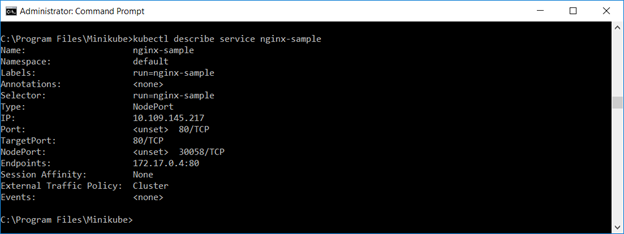
Expose the deployment as a service. You can use the web GUI to verify the service or “kubectl describe service servicename”
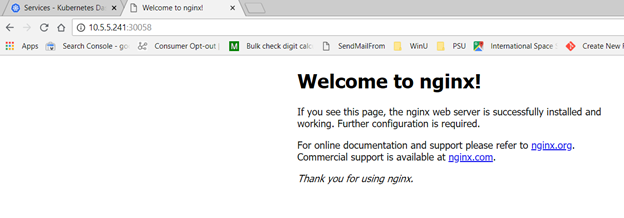
Either method provides the TCP port to access the service. Access the URL in a browser. Voila, a web site:
Viewing the Pod logs should now show the web server access logs.
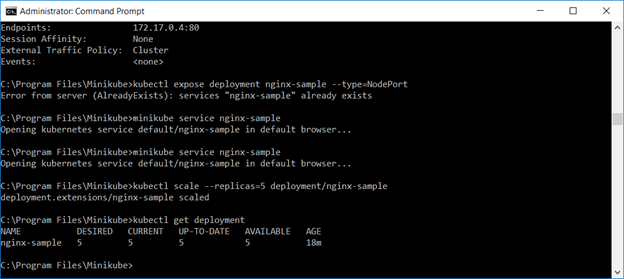
That’s all fine and good, but there are dozens of other ways to bring up a quick web server. Using Docker directly. Magic cloudy hosting services. A server with a web server on it. K8 allows you to quickly scale the deployment – specify the number of replicas you want and you’ve got them:
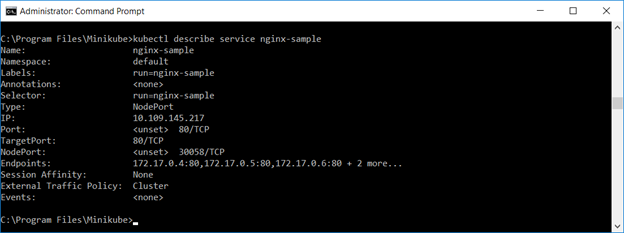
Describing the service, you will see multiple endpoints.
What do I really have?
You’ve got containers – either your own container for your application or some test container. Following these instructions, we’ve got a test container that serves up a simple web page.
You’ve got a Pod – one or more containers are run in a Pod. A pod exists on a single machine, so all containers within a Pod share resources. This is good thing if the containers interact with each other (shared resources speed up this communication), but it’s a bad thing if the containers have no correlation but run high I/O functions (shared resources create contention for this communication).
You’ve got a deployment – a managed group of Pods. Each application or microservice will have a deployment. The deployment keeps the desired number of instances running – if an instance is not healthy, it is terminated and a new instance spawned. You can resize the deployment on a schedule, or you can use load metrics to manage capacity.
You’ve got services – services map resources running within pods to internal or external access. The service has an IP address and port for client access, and requests are load balanced across healthy, running Pods. In our case, we are using NodePort, and “kubectl describe service ngnix-sample” will provide the port number.
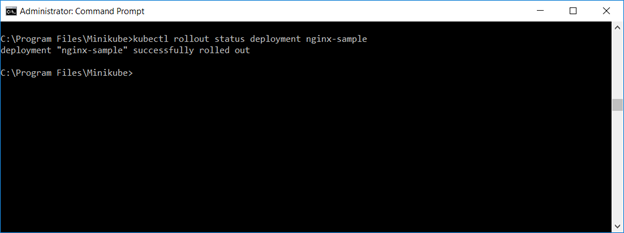
Because client access is performed through the service, you can perform “rolling updates” by setting a new image (and even roll back if the newly deployed image is malfunctioning). To roll a new image into service, use “kubectl set image deployments/ngnix-sample ngnix-sample=something/image:v5”. Using “kubectl get pods”, you can see replicas come online with the new image and ones with the old image terminate. Or, for a quick summary of the rollout status, run “kubectl rollout status deployment nginx-sample”
If the new container fails to load, or if adverse behavior is experienced, you can run “kubectl rollout undo deployment nginx-sample” to revert to the previous working container image.
When you are done with your sandbox, you can stop it using “minikube stop”, and “minikube start” will bring the sandbox back online.
A “real world” deployment would have multiple servers (physical, virtual, or a combination thereof) essentially serving as a resource pool. You wouldn’t manually scale deployments either.
Notice that the dashboard – and all of its administrative functions – are open to the world. A “real world” deployment would either include something like OpenUnison to authenticate through ADFS or some web hook that performs LDAP authentication and provides an access token.
And there’s no reason to use kubectl to manually deploy updates. Commit your changes into the git repository. Jenkins picks up the changes, runs the Maven build and tests, and creates a Docker build. The final step within the Jenkins workflow is to perform the image rollout. This means you can have a new image deployed within minutes (actual time depends on the build/test time) of committing code to a repo.
