I had a maths professor who mused that, back when he was an undergrad, calculators were a newfangled thing that kids only halfway trusted. You’d complete your test; and, time permitting, you would power on that calculator and see if it agreed. Decades later, kids didn’t even do a mental check that the calculator’s results were halfway reasonable. As a technology becomes more familiar, innate trust is built. In the interim … trust but verify. Beyond trust, it’s nice to have a copy of what you’ve submitted when discussing your submissions with someone else. Or, for a periodic survey, to remind you what you said last time. Or because you are particularly proud of a particular turn of phrase and would like to use that one again. For whatever reason you want to create a “receipt” for Forms submissions, you can do it.
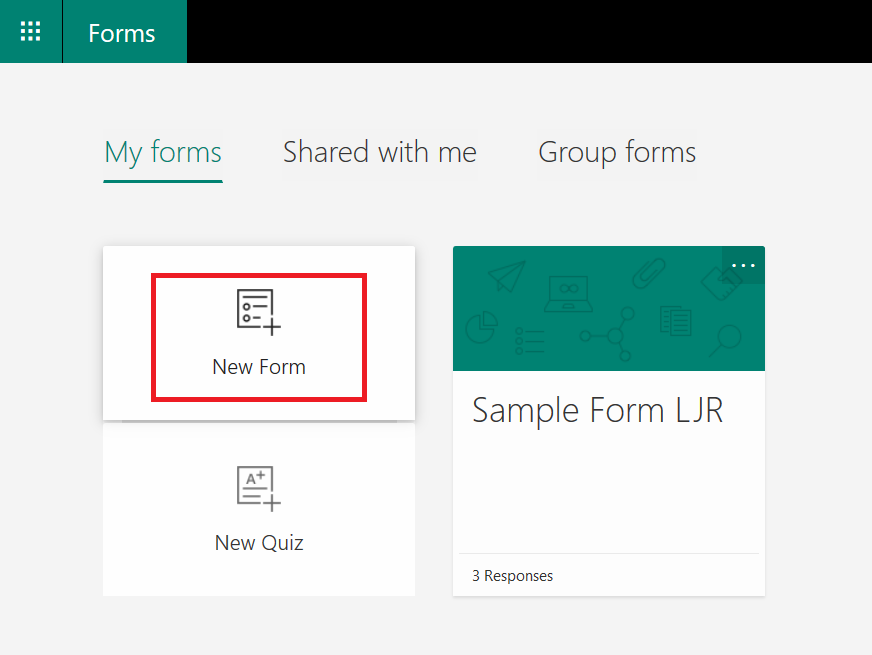
The first thing you need is a Form created under your user ID. Go to https://forms.office.com/ and click “New Form”
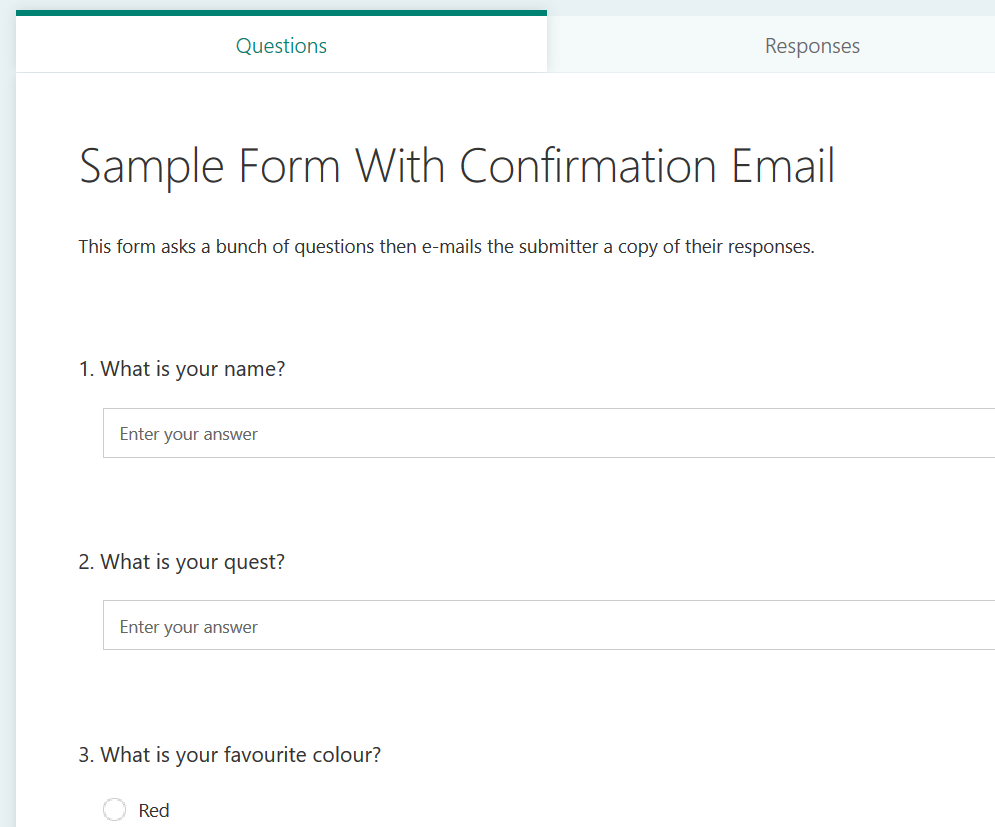
Give your form a name and add some questions
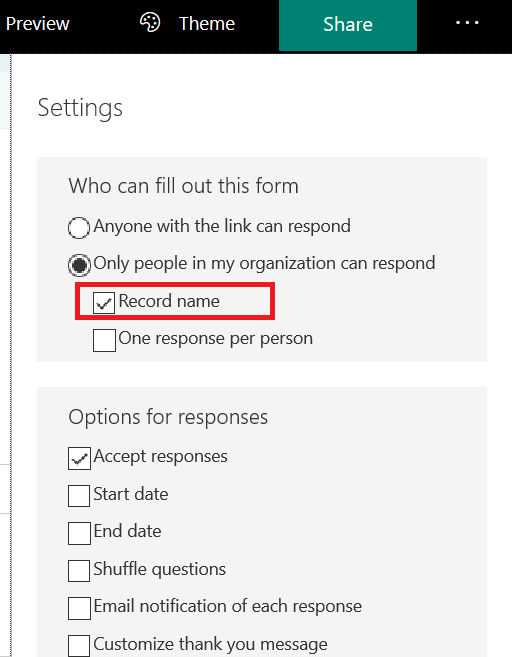
From the hamburger menu in the upper right-hand corner, select “Settings”
Verify that the form is restricted to “people in my organization” and “Record name” is selected.
** If the form needs to be available to individuals outside of the organization, you would need a form field to request their e-mail address … otherwise we don’t know where to send the receipt.
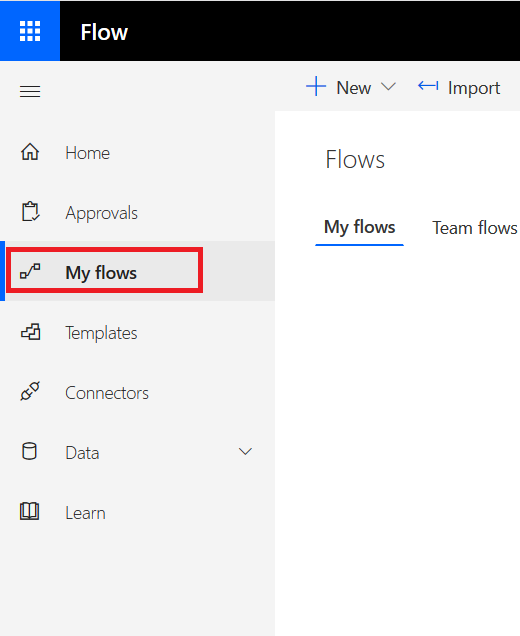
OK, we’ve got a form. Now we need to add a workflow to send the submitter a copy of their responses. Go to https://flow.microsoft.com and select the “My Flows” tile
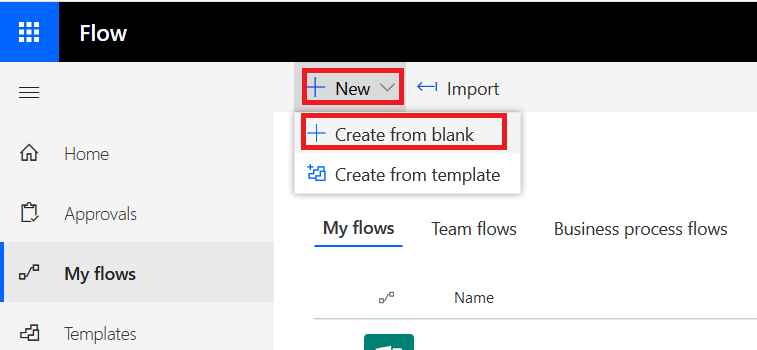
Click on “New” and “Create from blank” to begin creating the workflow.
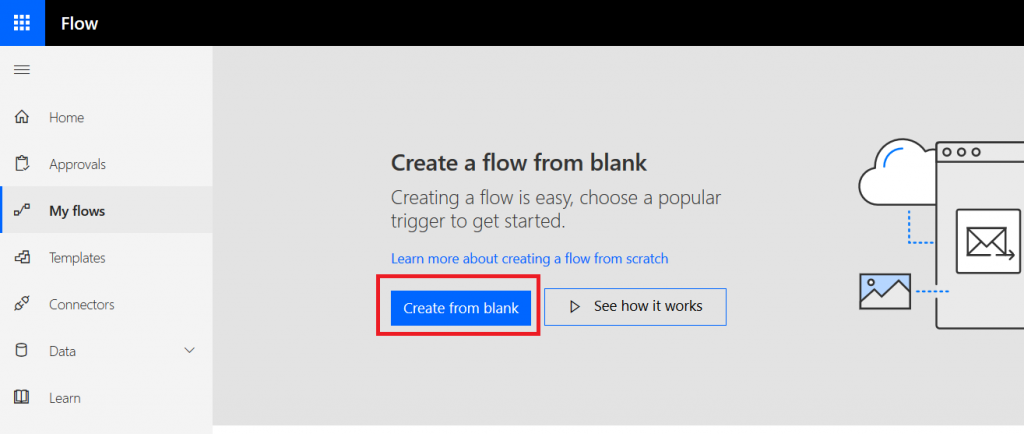
Click “Create from blank” again to confirm you really don’t want one of their templates
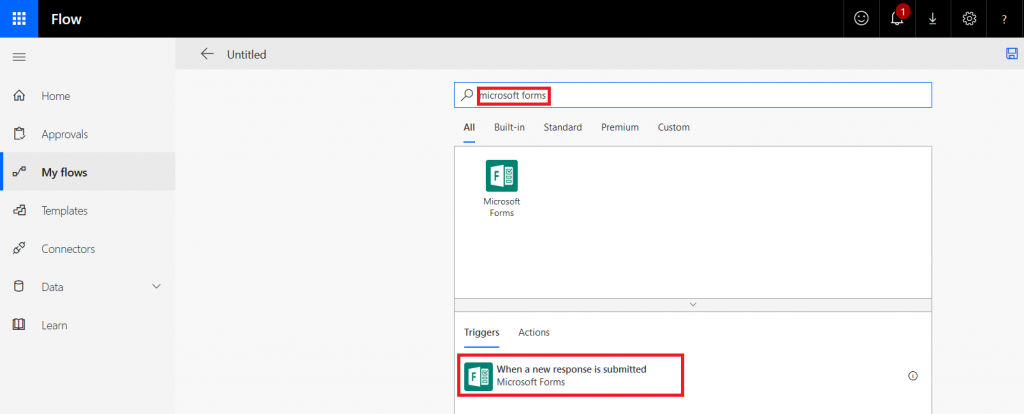
In the search field, type “Microsoft forms” and select the trigger “When a new response is submitted”
Select the form for which you want to generate a receipt – in my case, the form I just created.
Select “New Step”
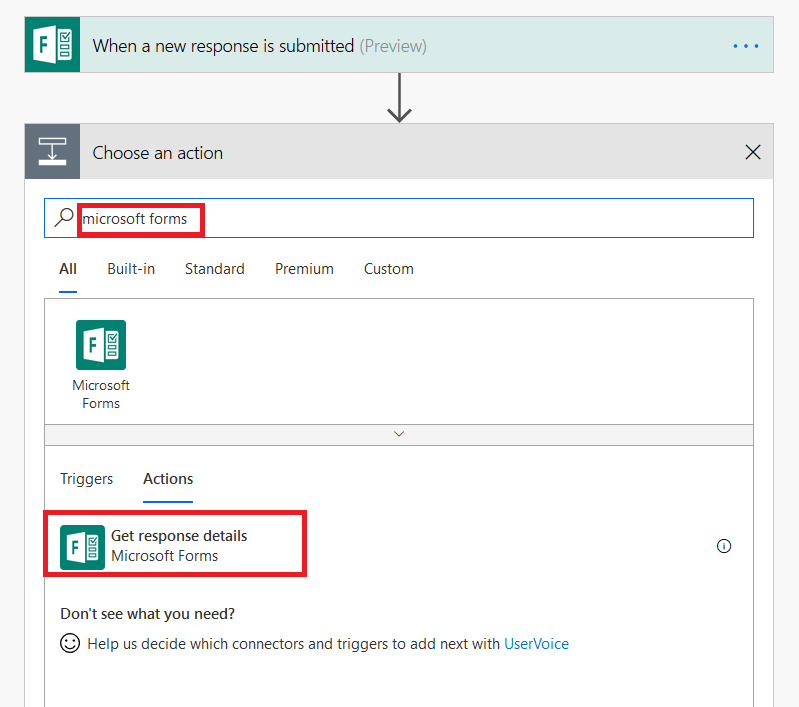
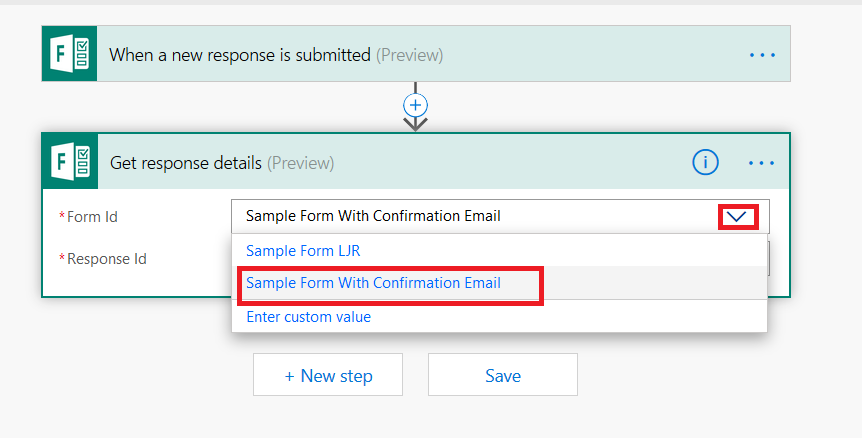
Type “Microsoft forms” in the search dialogue again, and select “Get response details”.
Click the inverted caret for “Form Id” and select your form again.
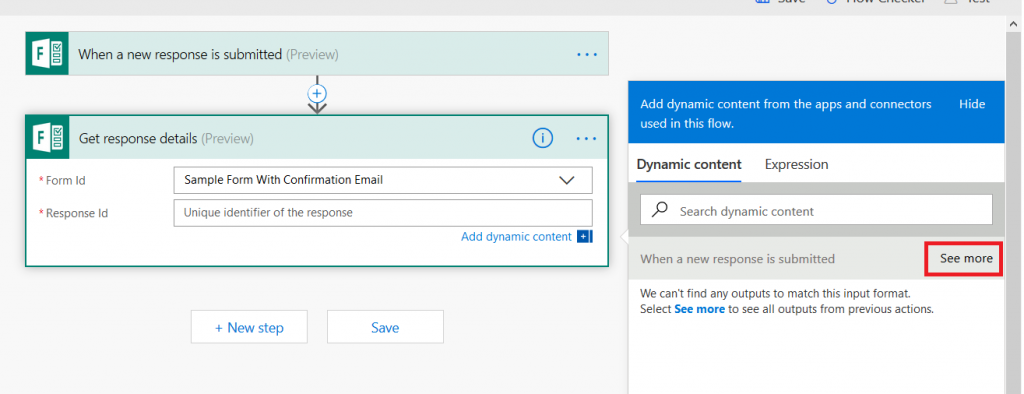
Click in the “Response Id” field – a new pane will appear to the right of your workflow. Click the “See more” button across from “When a new response is submitted”
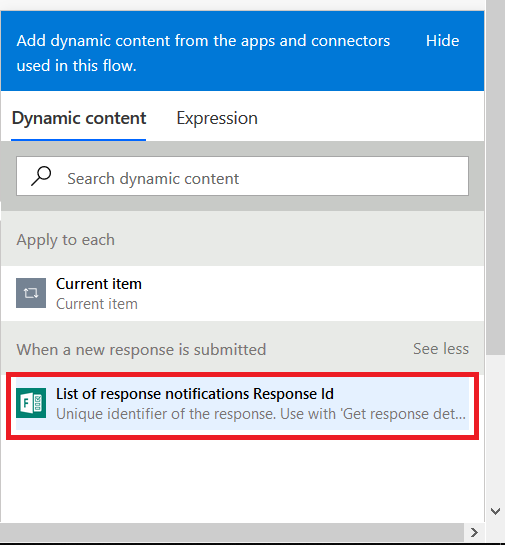
Select “List of response notification Response Id”
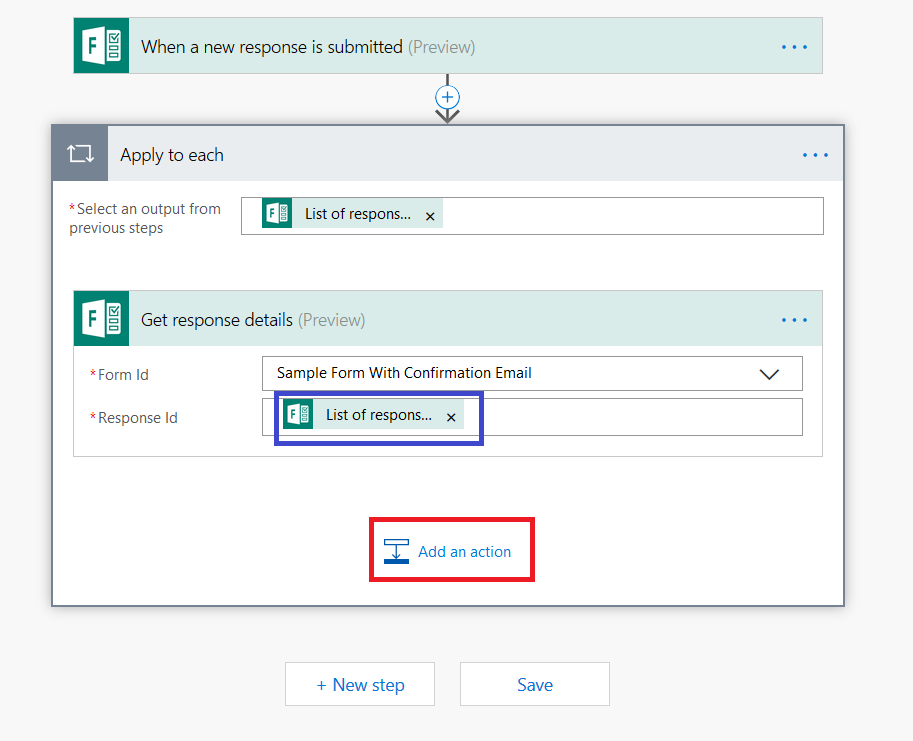
You’ll see the selection populated in the “Response Id” section. Click “Add an action”
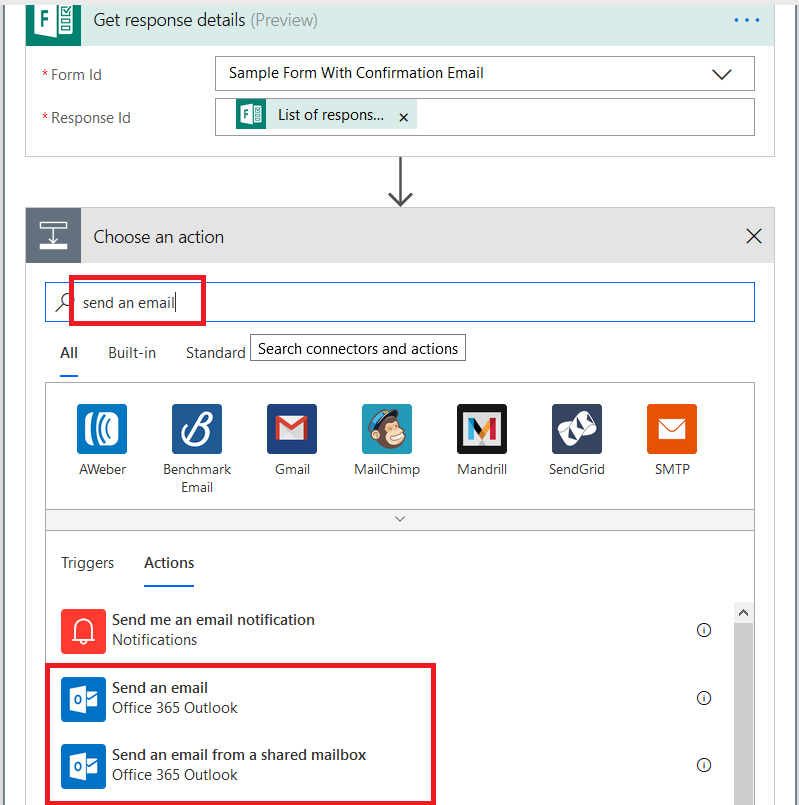
In the search dialog, type “send an email”. To send the receipt from your mailbox, select “Send an email” – to send the receipt from a generic mailbox to which you have send-as access select “Send an email from a shared mailbox”.
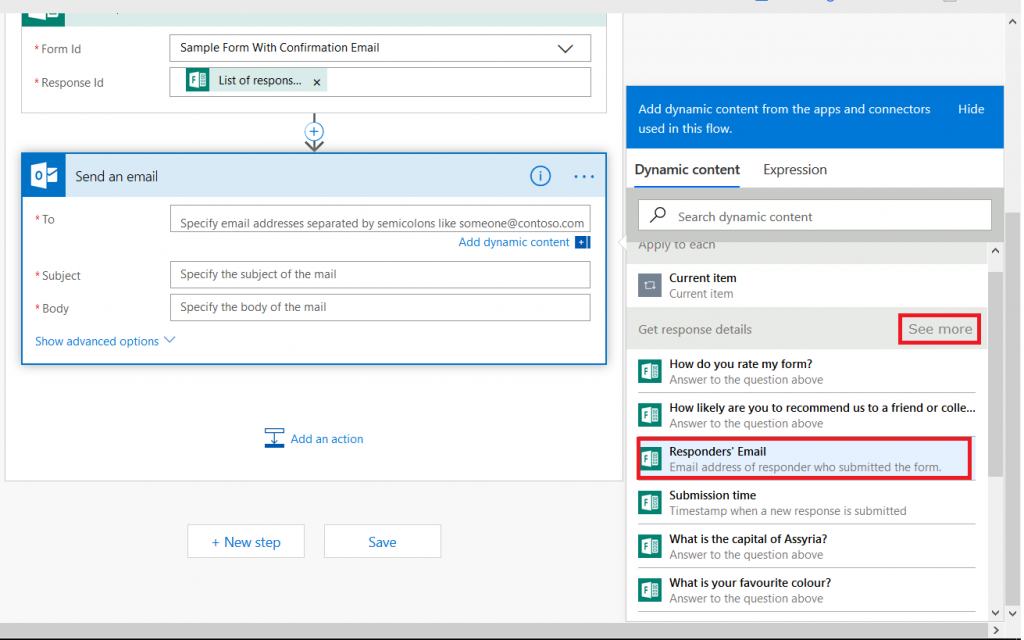
Click in the “To” field – the dynamic content pane will appear on the right again. Click “See more” across from “Get response details”. If this form is locked down to submitters within the organization and the submitter’s name is recorded, you can select “Responders’ email”, otherwise select the form question where you’re quested the submitter’s e-mail address (warning – since there’s nothing verifying the individual actually owns the e-mail address, forms that take freeform e-mail address submissions can be used to “spam” others).
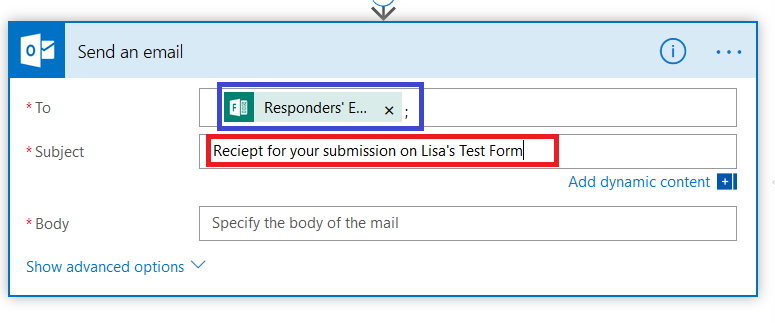
You’ll see “Responders’ E…” populated into the “To” field. Type in a reasonably descriptive subject for your message.
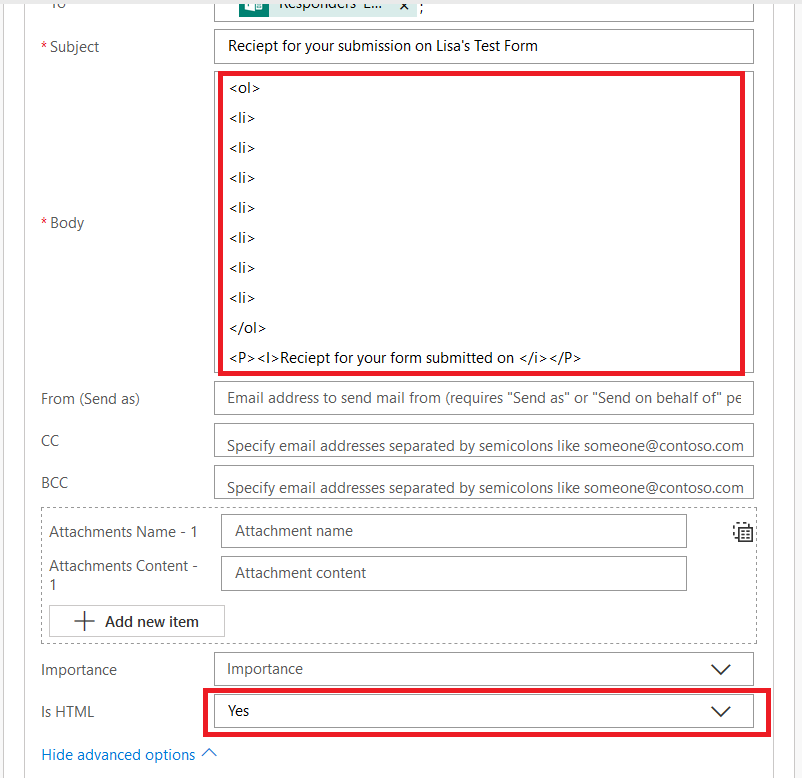
I start by creating my message template – pretty messages will require HTML, so click to “Show advanced options” and set “Is HTML” to yes.
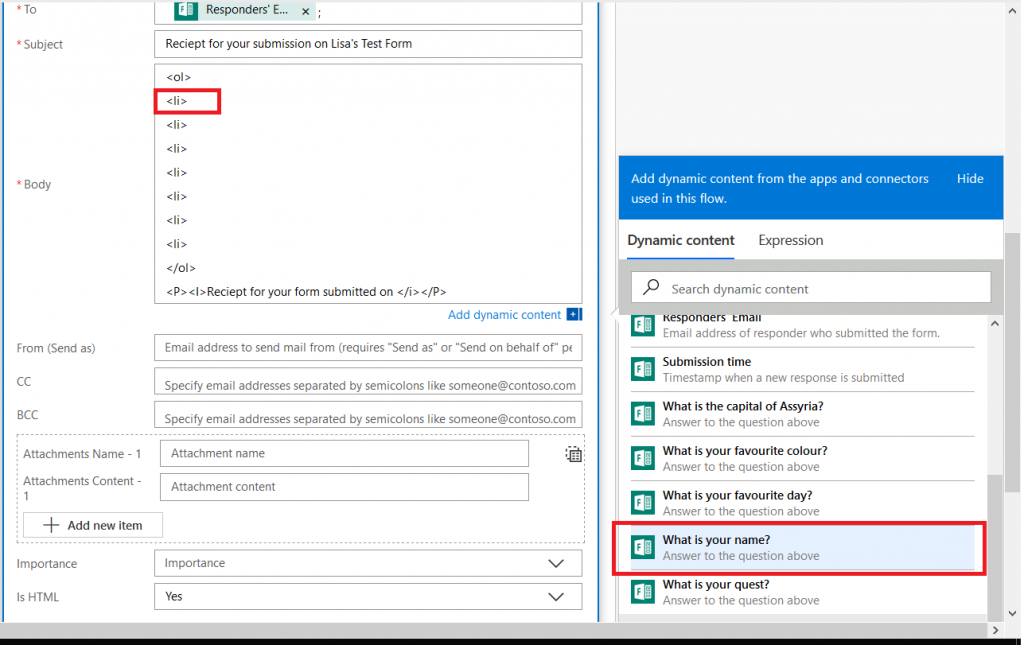
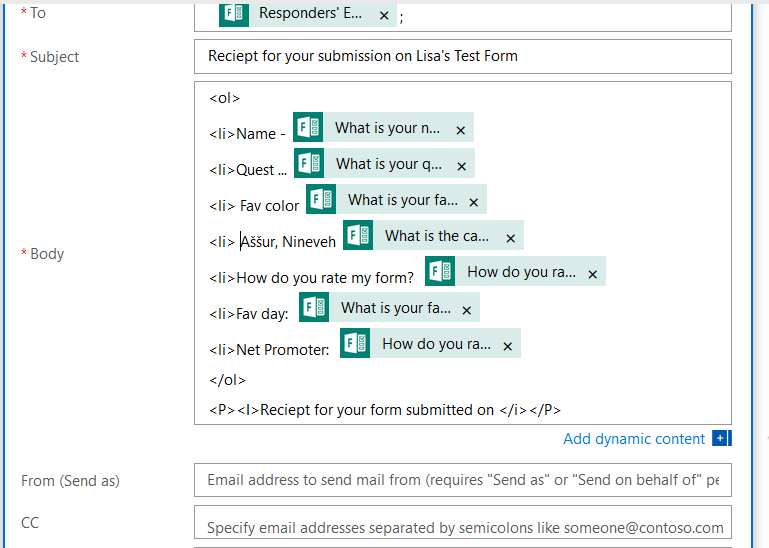
Now’s the part where we include the individual’s response data – click back into the “Body” field and you’ll see the dynamic content pane again. Within the message body, click where you want the response to appear (here, it’s after my first “<LI>” tag. Then select the question whose response you want to insert into that position.
It’s generally helpful to type something before the answer to remind the person what the question was – it’s freeform text, and pretty much anything you can do in HTML is acceptable here.
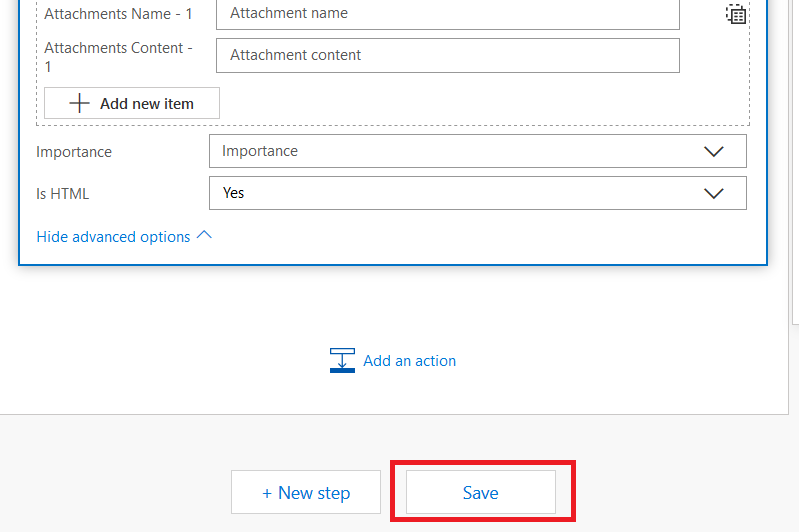
Once you have finished creating your message template, scroll down to the bottom and click “Save”
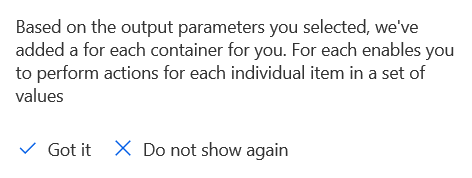
You may get a warning that a “for each” container has been added for you … that’s good, we want to generate a receipt for each submission!
Now that your workflow has been saved, click “Test”
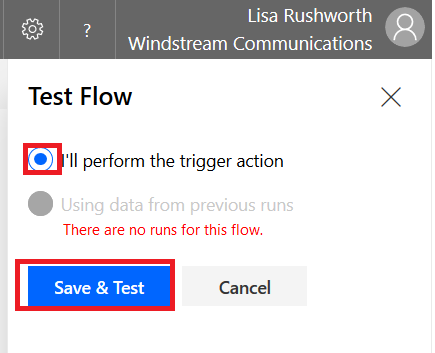
Select “I’ll perform the trigger action” and then click “Save & Test”
Return to your form and click “Preview”. Complete your form and click submit.
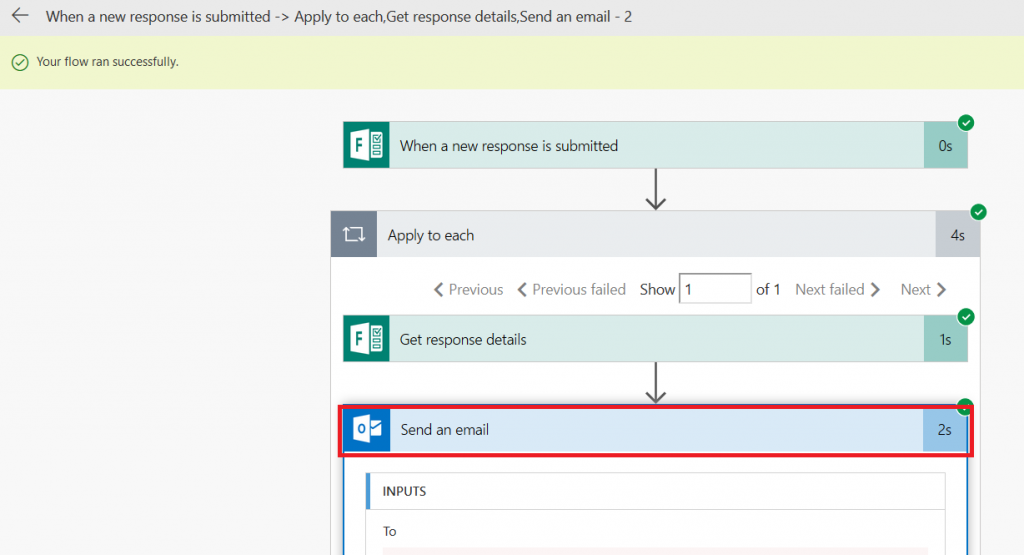
Return to Flow. If you are quick enough, you’ll see a message that your flow is running. Wait. Eventually you’ll see the results. You can click on the “Send an email” section to see detailed results.
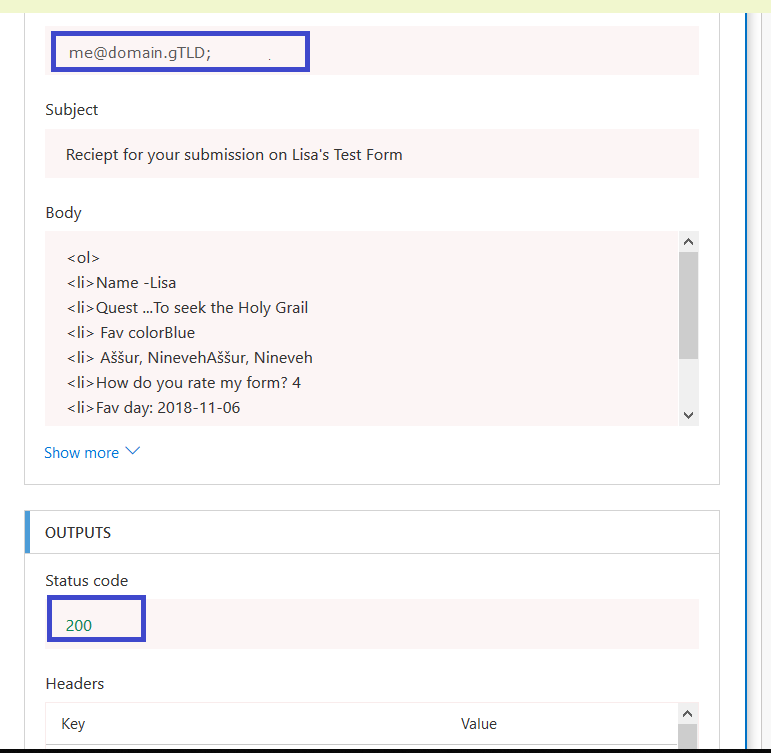
Including the e-mail address to which the receipt was sent and the status code (200 is good).
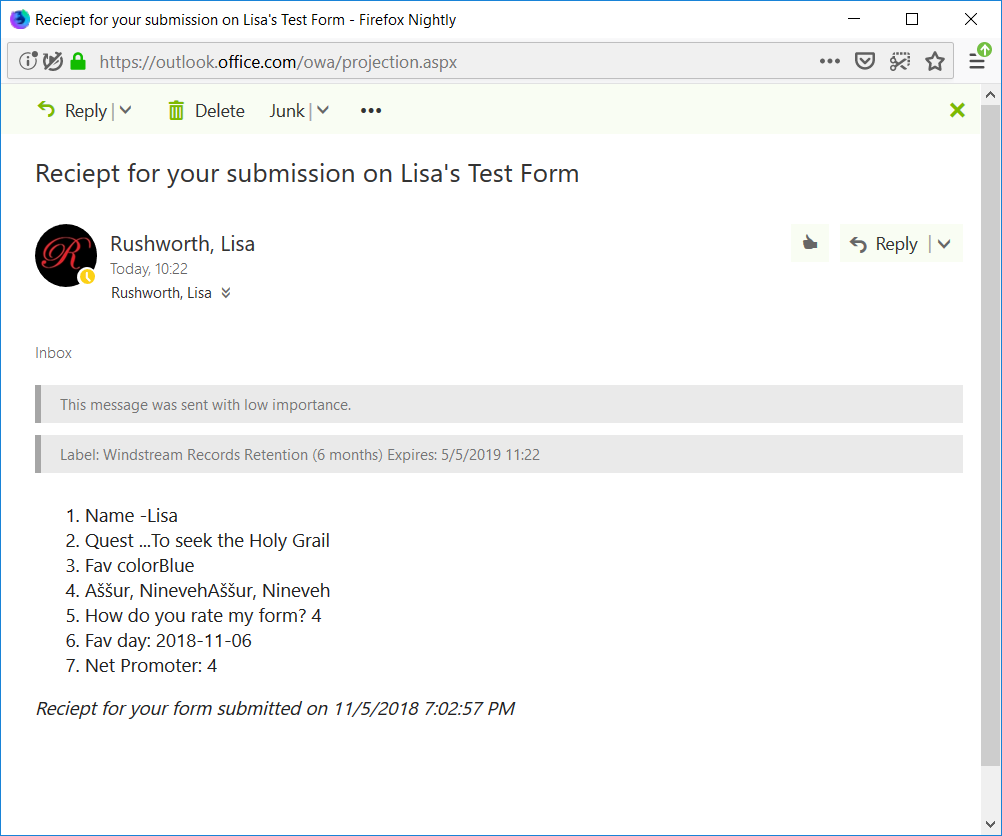
Check your mailbox too – you should have a message:
